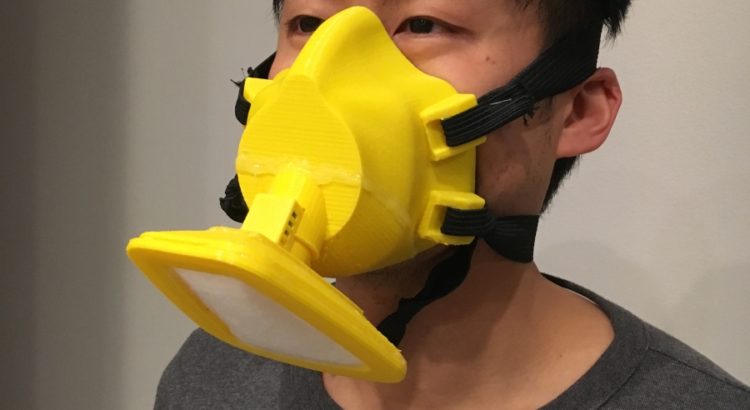
TL;DR: I made a working respirator using a small stockpile of N95 replacement filters I have… However, since a local hospital has the appropriate adapters and real respirators, for the greater good, it makes the most sense for me to simply donate my materials.
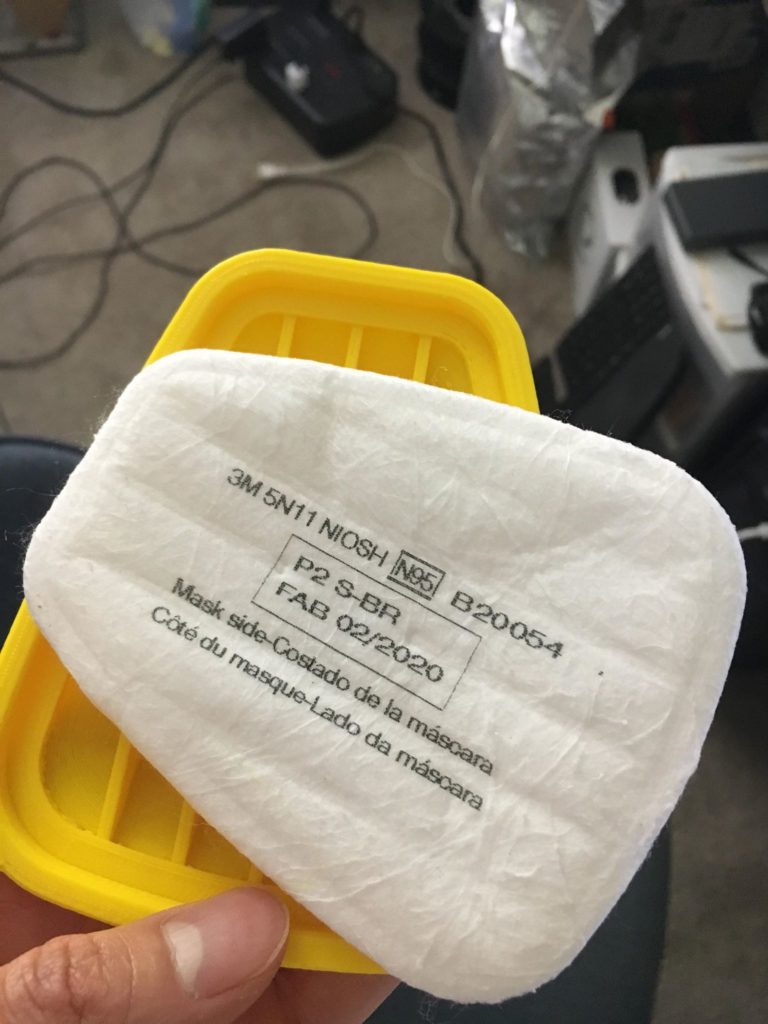
Two weeks ago, I completed the design of, and successfully tested a prototype N95 respirator. Before everything was sold out, I managed to buy a small stockpile of about forty 3M 5N11 particulate filters, typically used for industrial purposes. Unfortunately, I didn’t find any of the requisite adapters nor compatible respirators.
Luckily, what I did find was this great project called S.A.F.E (self-assembly filtration unit for emergencies) from the Medical University of South Carolina (MUSC) (https://web.musc.edu/innovation/covid-19-innovation/safe-cartridge-system-and-masks) to use as a starting point for my own design. In the original design, MUSC recommends using part of a furnace HEPA filter as the filtering material inserted in a replaceable cartridge system. What I believe was the true key to their design, however, is the inclusion of a simple one-way valve. The valve makes it easier to breathe out, prevents excessive CO2 buildup, and extends the life of the filter, but it does not prevent the user from spreading COVID-19 if they are already infected.
To speed up the printing process (and thereby the prototyping and fit-checking stages), I broke the system into three main components:
- The mask – this remained untouched from the original
- The tube – This component was originally built into the cartridge, and attaches the filter to the mask. The tube also houses the one-way valve, which I thought was a particularly high-risk feature, so I wanted to be able to test it separately.
- The cartridge – I needed to replace the HEPA filter design to fit 5N11 replacements.
Since the mask needed no modifications and changes to the tube were minor, I was free to focus my energy on creating a cartridge to fit filter replacement pads. To be honest, even this was a fairly straightforward design job… I took a few measurements of my filter and made a simple enclosure, making sure that the tube would fit into the back. One neat trick I employed to check my fit before printing was that I took a photo of my pad and imported it into my design software to ensure all my geometry looked correct.
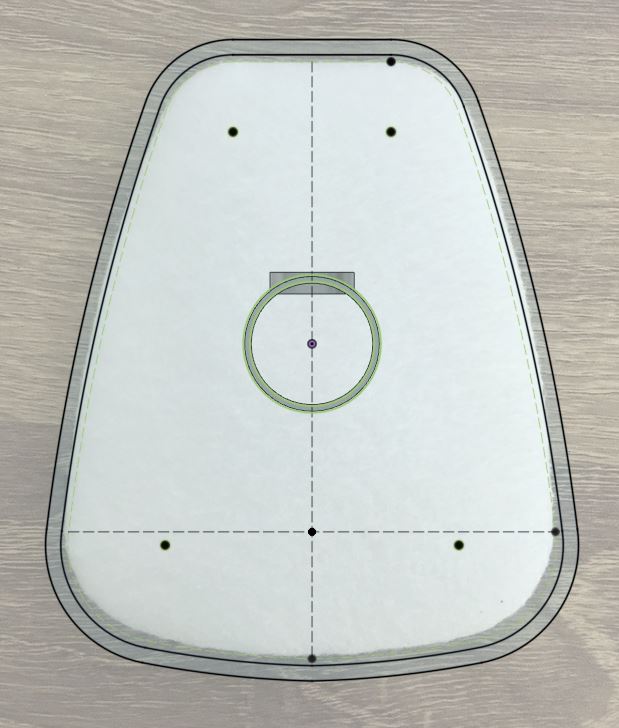
While I originally intended the design to be a snap fit to make it easier to swap out the 5N11, I decided that simply sealing everything in place with hot glue, and turning the cartridge into a single-use item would be safer. It is simply much harder to guarantee a seal if end users are the ones making changes.
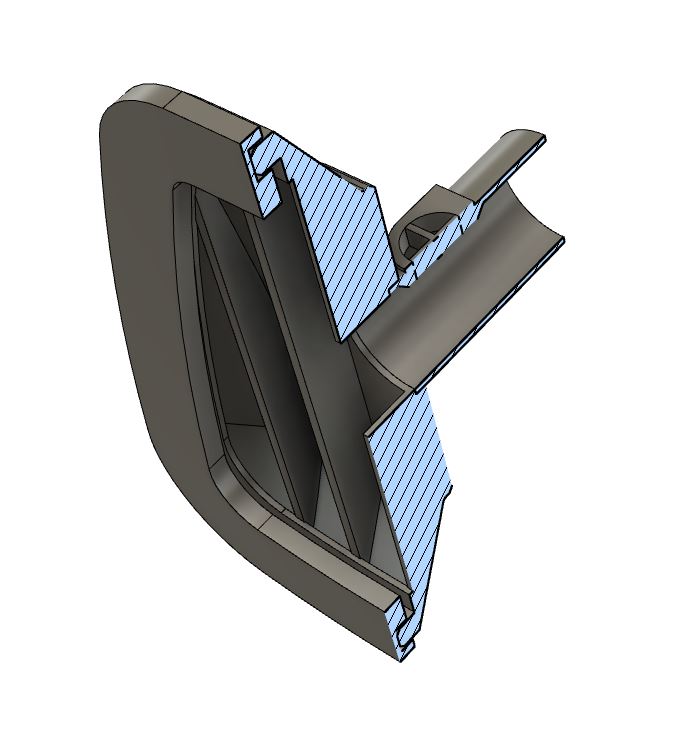
The tube only took about half an hour to print, so I made that first to test the valve. The S.A.F.E. design called for the use of heavier rubber for the flap, but the only material I had available were thin inspection gloves. Luckily, the design was robust as-is! However, since my membrane material was much thinner and tended to curl, I paid extra special attention to ensure the curl direction defaulted to the closed position. Next, I made the filter cartridge. Since I had checked all my dimensions electronically before, the parts fit together perfectly on my first try—yay! I hot glued a filter in place to make sure the only path for air was through the filter pad itself.
Since the mask took hours to print, I made it overnight. Unfortunately, sometime in the middle of the night, my nozzle clogged a bit and/or my extruder skipped a few steps. This resulted in some underextruded and weak layers, which caused the mask to break as I removed it from the print bed and cleaned up support materials. However, since the breaks were clean, I was able to fix the mask in a quick and dirty way by simply smothering the interface with hot glue. I then attached some rubber material used for sealing windows to the inside of the mask to ensure I could get a tight airtight seal on my face.
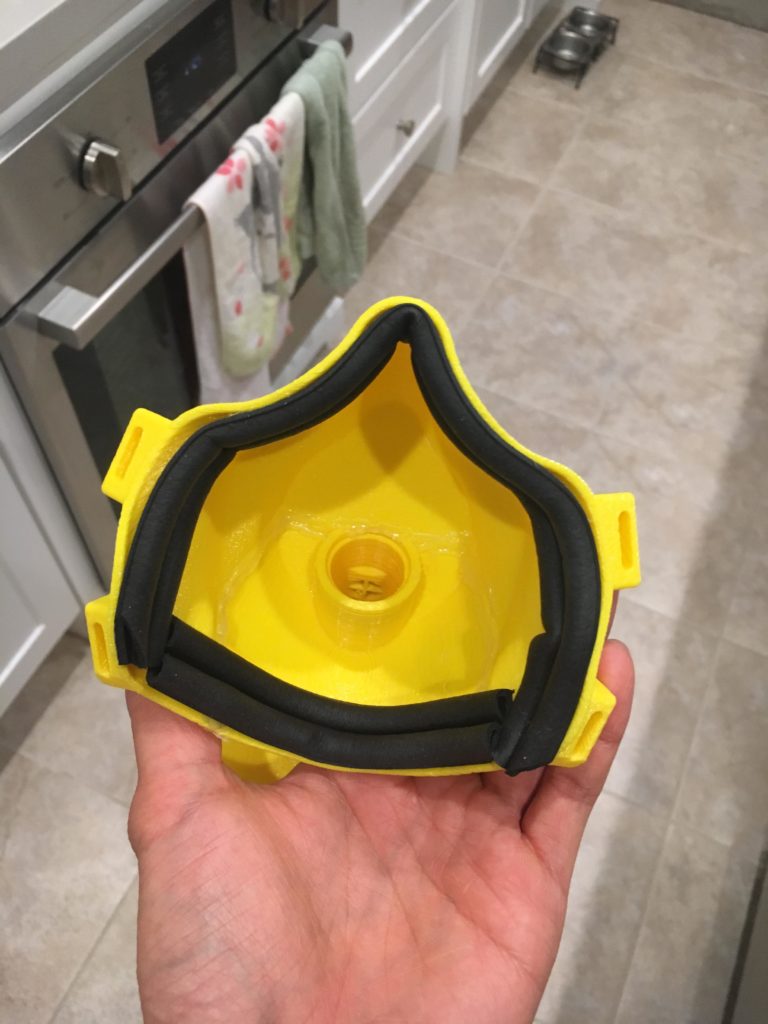
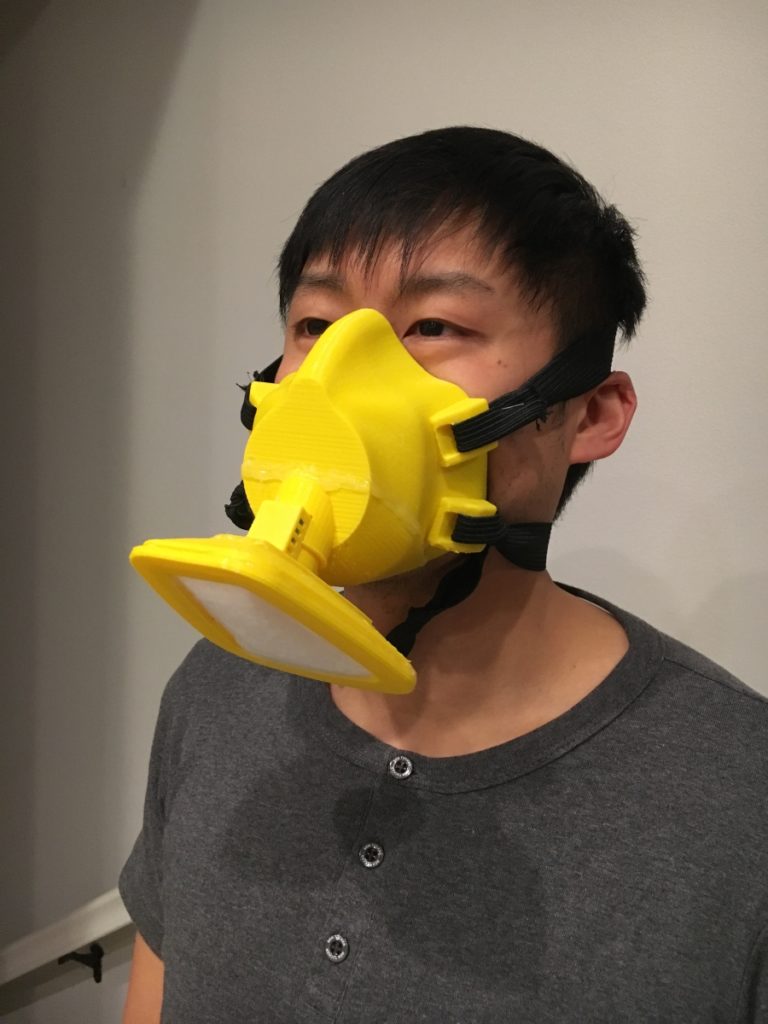
Assembling the mask was simply a matter of attaching the cartridge with tube into the corresponding hole in the mask. I put the mask on and breathed in and out to ensure the valve operated as intended. Then, I did a vacuum test—I covered the filter with a sheet of plastic, and breathed in extra hard… and… success! I was able to hold the plastic up, demonstrating no leaks in my mask!
Despite some initial success, I quickly realized there were some potential issues with my mask design. First, the positioning of the filter is non-ideal for healthcare workers. Although the filter is out of the way for the doctor, it is facing a potentially exposed area where it is super easy for a patient’s cough to cover the filter itself. Second, my design lacks any sort of exterior grating to protect the filter. Regardless, I saw the two units I did make as a huge success.
As an engineer, I really love designing and making stuff. However, in this situation, I realized that if any hospitals actually had the real adapters and respirators to pair with my 5N11 filters, then the filters would be better utilized as donated goods. I contacted a few hospitals in my area, and UCI said they could accept them.
Despite giving away my filter materials, not all is lost for me in terms of making pseudo n95 masks! The NIH actually approved of this design for clinical use: https://3dprint.nih.gov/discover/3dpx-013429 and both Keck (USC) and Cedars Sinai accept this alternative N95-esque design: https://blog.crashspace.org/covid/
As an aside, now that I have two printers running, my output has tripled (my 2nd printer has a bigger build area than my first), and with bigger nozzles coming in, I expect my output to increase again to *FOUR* times what I started with.
Hope everybody stays safe and healthy out there!
