Designing The Wedding – Part 7

It’s better late than never–at least that’s what I tell myself. At this point, I’m glad I finally found time (and we don’t even have kids) to sit down to knock out the very last part of this longer-than-expected series: the centerpieces! Designing, and making the centerpieces was probably my single favorite portion of planning the wedding. 

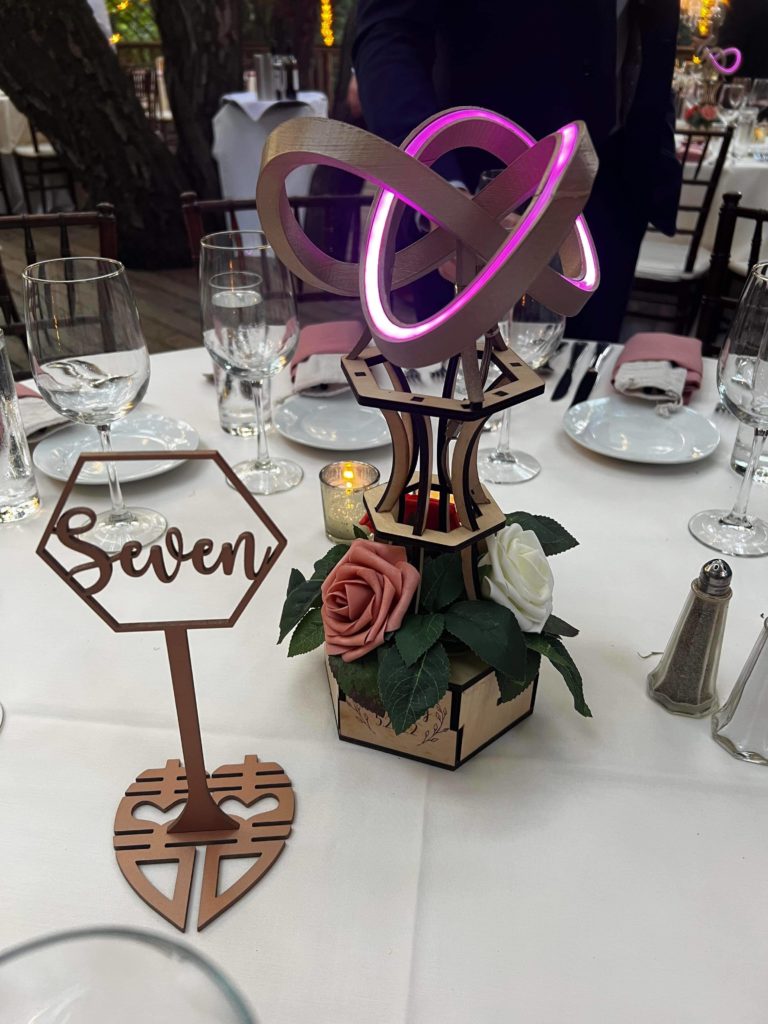
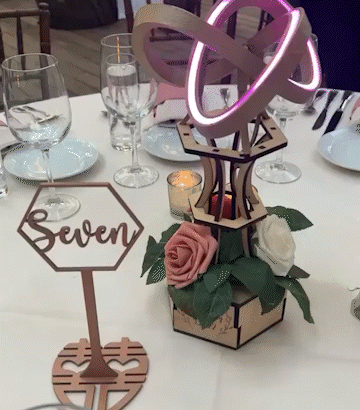
I knew I wanted to make the centerpieces at my wedding even before I knew who I wanted to marry. I didn’t know what form the centerpiece would ultimately take at the outset since I planned on merging both Tiff’s and my tastes. I’m extremely proud of the product we (this was a team effort) ended up with. For those who haven’t seen yet, this is what they looked like: 

Being an engineer, I began the process with a set of product requirements:

  • Symbolic: The centerpiece had to represent Tiffany and I as a couple. 
  • Aesthetic: It had to look good and match the overall theme of our wedding
  • Whimsical / Interactive: I wanted the centerpiece to be somewhat unique and fun. 
  • Manufacturable: About 10 needed to be made 
  • Easy assembly: Obvious for somebody who had never seen it before, with limited instructions
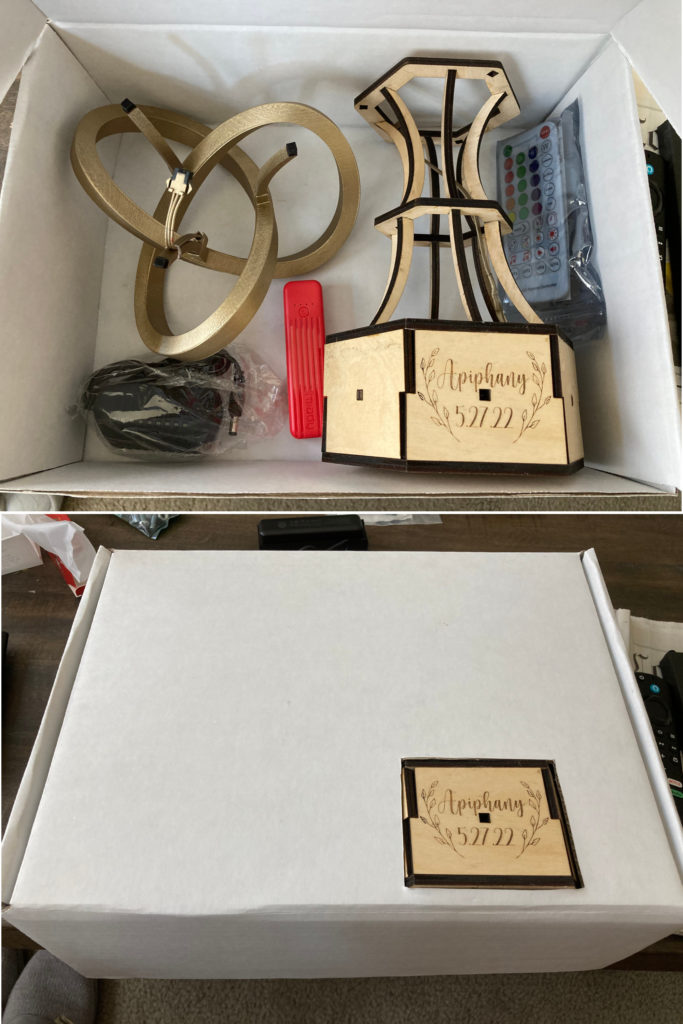
  • Packaging: Simple disassembly and airplane-proof for guests to take home

With the requirements in mind, I began an iterative process of creating components, testing them, and refining them. 

The first component I created was the top lighted portion. The shape is called a trefoil knot and it has a few interesting (for nerds at least) properties which double as symbolic attributes. First, like a ring, it’s made of a single unbroken strand (like marriage). From various angles, it looks almost like a three dimensional infinity sign (representing an everlasting love). The trefoil knot is also nontrivial in the mathematical sense in that it cannot be untied without cutting (insert your own apt marriage analogy here). Another property which made it highly adaptable for lighting in this project is the fact that even though it appears as if the faces twist around, they actually keep the same orientation with respect to each of the other faces (I don’t know enough math terms to describe this properly). In practical terms, it means I could insert a single strip of LED rope and have all the lighting be visible without cutting it into separate sections. 

Didn’t expect to see parametric equations and trig functions? You were wrong 😉

The physical model for the knot was created by extruding a U channel along a curve defined with a set of parametric equations (shout out to IMSA math teachers! I knew this stuff would be useful). I tweaked the parameters for the shape to fit my print bed, fit exactly 1 meter of lighted rope, and have “lobes” that look good.

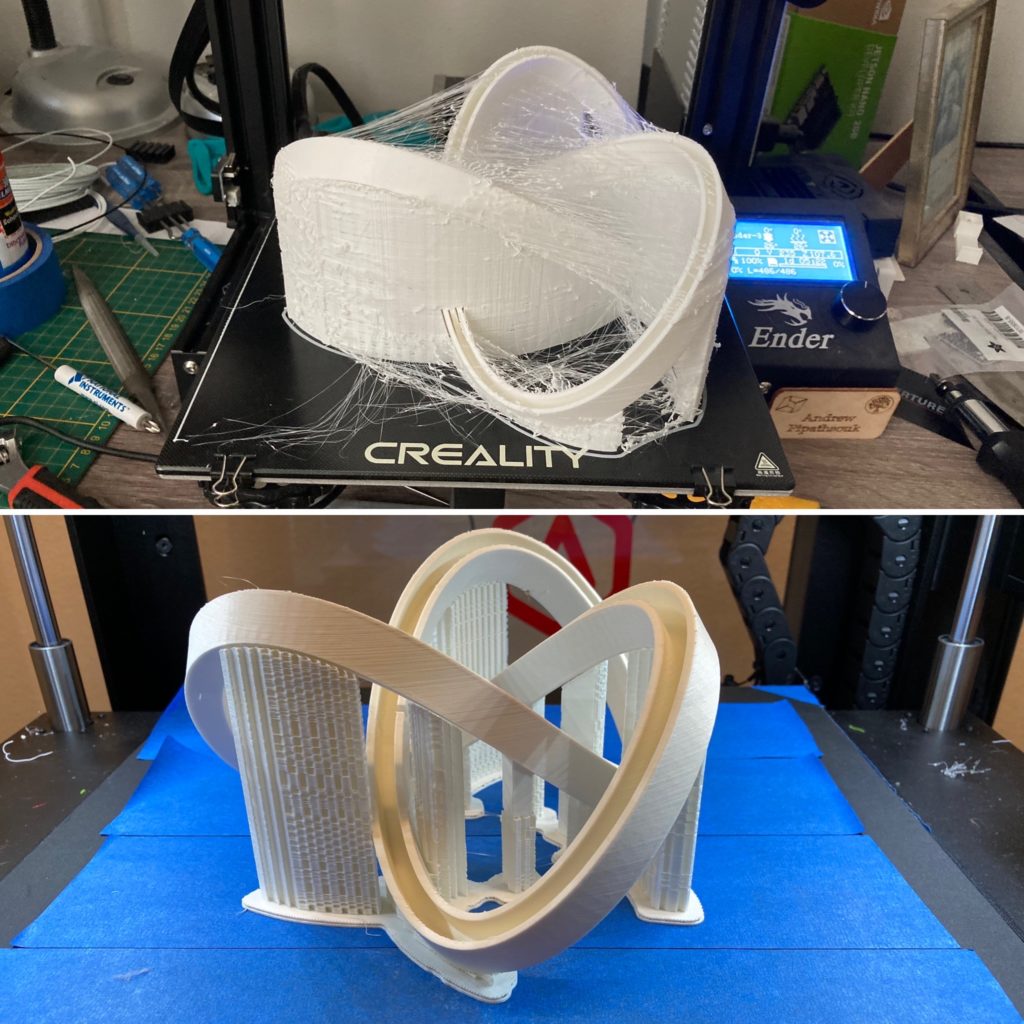
The first prototype print… was a PITA to clean up and prepare, but it did its job

As you can see, my first print (top) had severe stringing and had a lot of overkill in terms of support material which made it a bit of a nightmare to finish. Luckily, I’ve got a bit of experience in optimizing print settings which helped in the production process down the line ;). 

My first prototype trefoil knot used some WS2812 LED strips left over from projects I completed years ago. While it worked as a proof of concept, I didn’t like that discrete LEDs were clearly visible. 

Searching for a replacement, I found a newer LED strip product with super high density (96 LEDs per meter). Additionally, I started the project out by planning to control the LEDs by rolling my own arduino code and creating some basic power management circuitry as I had done in the past, but I was amazed to find integrated controllers (SP511E) which did everything I wanted to and more for cheaper than I could buy individual components (thank you AliExpress!). This awesome little controller has two different power inputs for either battery or wall wart, has an IR sensor for a remote control, has a ton of pre-programmed light patterns, AND has a sound reactive function! Above is a prototype video showing all of this in action. 

The centerpiece design I went with in an alternate universe

I toyed around with the idea of having a vase with flowers inside the trefoil knot for a little bit, but ultimately we decided that the lighting would look better raised. We also searched for and tried multiple color options on both black and white plastic before deciding on gold paint on white. 
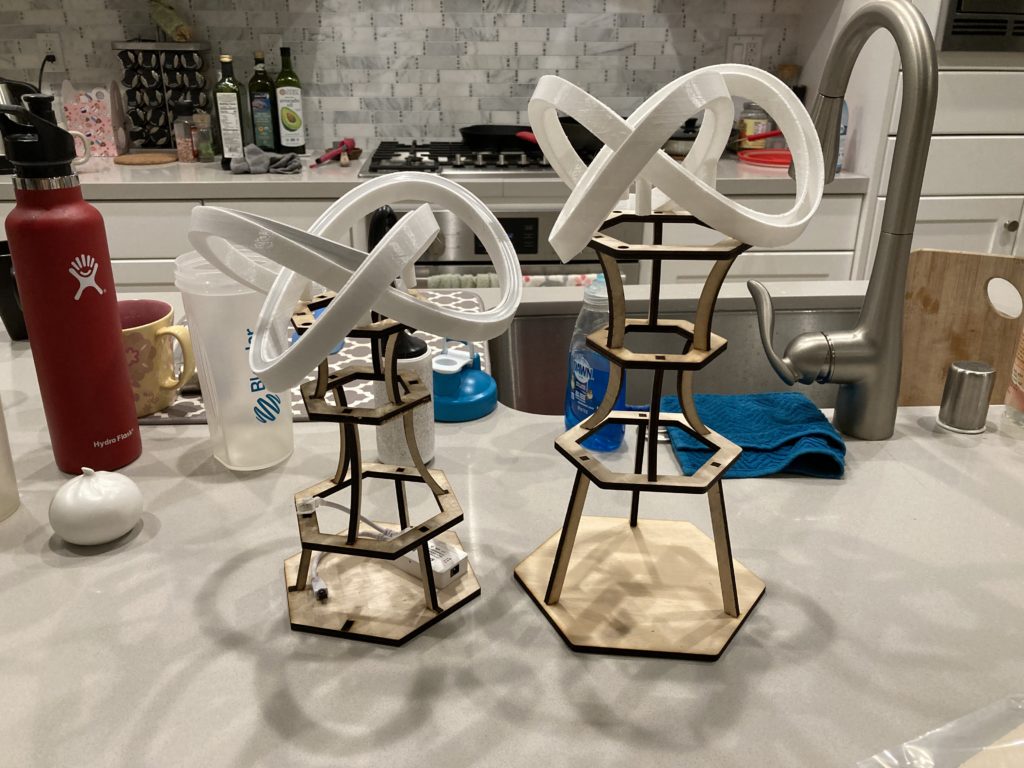
A couple of many design iterations for the centerpiece base

I went through multiple design iterations for the base as well. I optimized the overall height, the number of and shape of the “layers”. Additionally, I had to ensure all the control components could be hidden from view to add to the “magic” factor. 

After finalizing the design and building the functional prototype seen above, we got to work in the production phase…
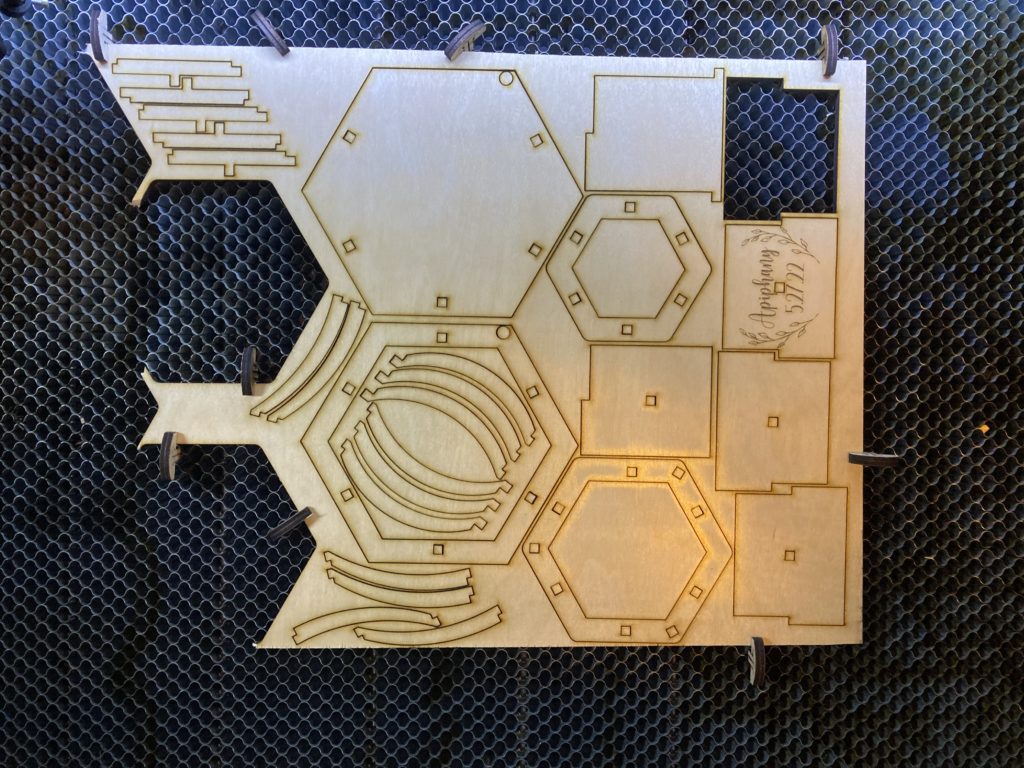
Not only did I need to print about a dozen trefoil knots (each print took ~18 hours), I needed to cut the same number of bases while minimizing plywood waste material. 

This took over our living space for quite a while… Not shown in any of these photos are the hours that Tiffany spent sanding to finish the tops before spray painting, the time I spent trimming and soldering the LED ropes, and the preparation of the floral elements.  

Arguably the most important element of the design is how easy it was to assemble and disassemble… it doesn’t matter how good it looks if nobody else can put it together and take it apart again. I knew I would not have time on the date of the wedding itself to do either, so I put a lot of work up front to make everything as intuitive as possible including: optimizing cable routing, creating sub-assemblies, and writing work instructions. 

Thanks so much for sticking with me for this series for almost a year now. It’s been a ton of fun for me, and I hope it’s been at least somewhat interesting for you :). I want to take this opportunity to once again thank my wife, family, friends, and vendors who all made our wedding special and unforgettable!!

For you readers that have made it this far… Here’s a little thank you video I put together that shows the centerpieces in action at our wedding! 
Designing The Wedding – Part 5

Thanks for sticking with me despite the delayed postings… it’s only been about 4 months since our wedding 😅. This quick post covers a hodgepodge of projects–the personalized elements in our gifts to our wedding party, and the tip jar for our bartenders.

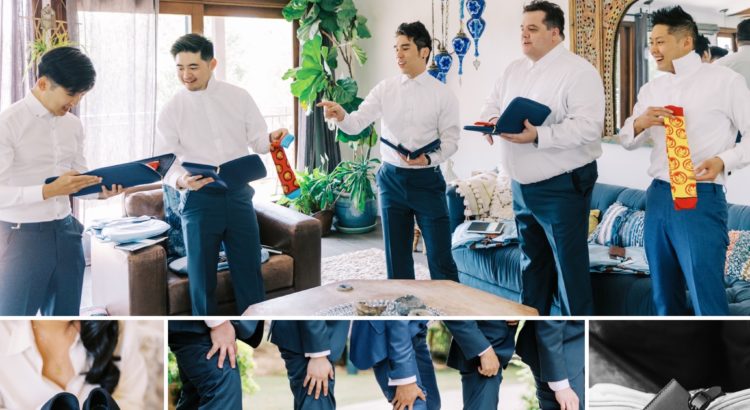
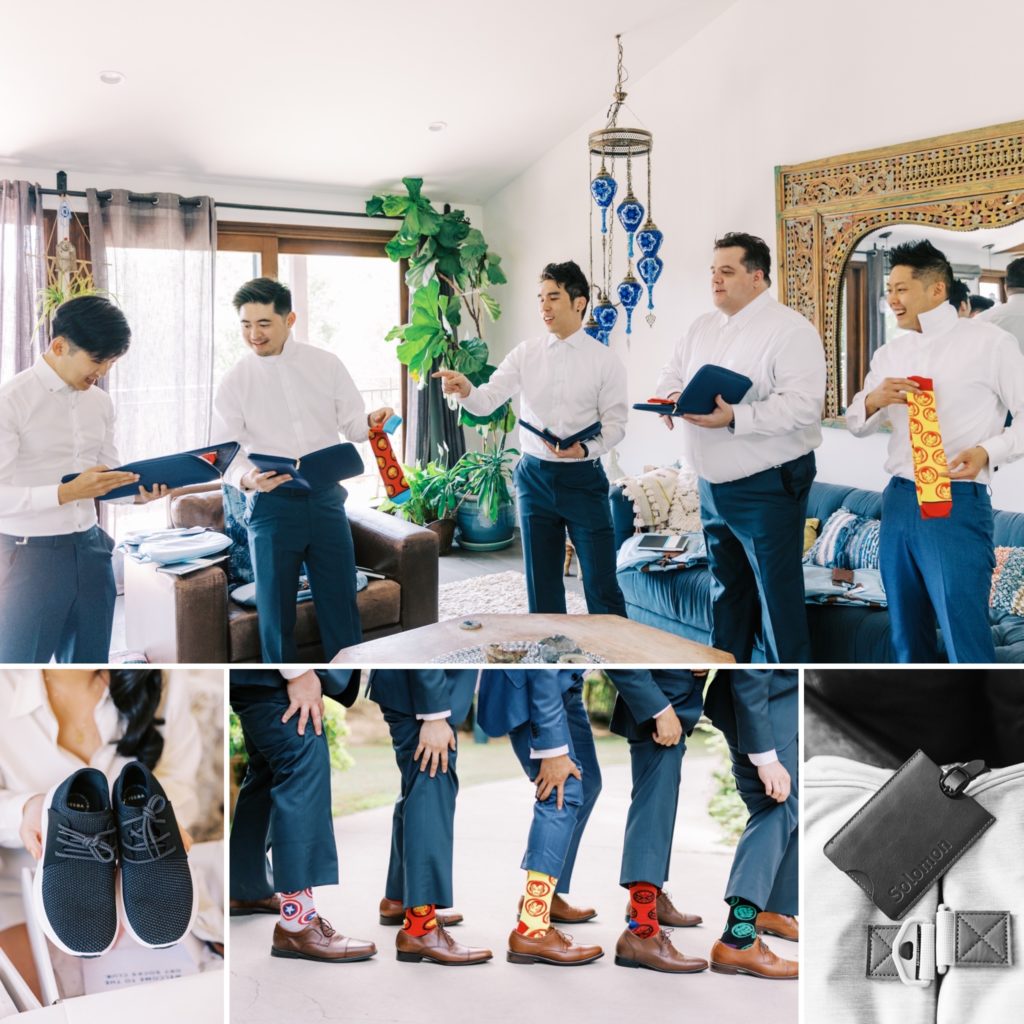
Our wedding party was fairly small–just 4 members on each side–so Tiff and I wanted to give functional and meaningful tokens of our appreciation. For my groomsmen, I gifted duffel bags, personalized luggage tags, personalized Moleskine notebooks, travel tie cases, ties, pocket squares, tie bars, and themed socks :D. For her bridesmaids, Tiffany gifted waterproof shoes, necklaces, robes, and the same personalized luggage tags I made for my groomsmen.

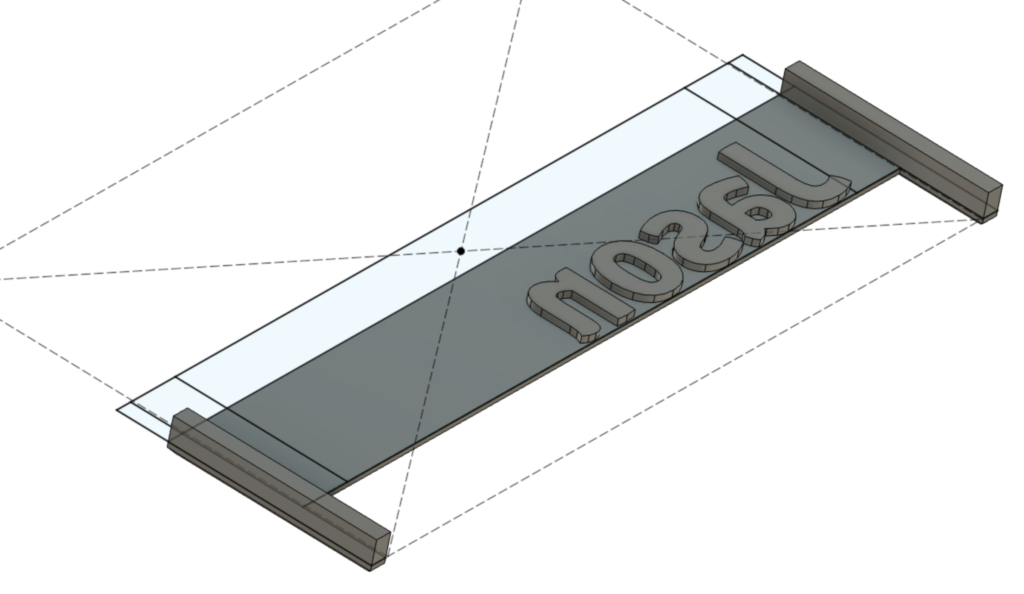
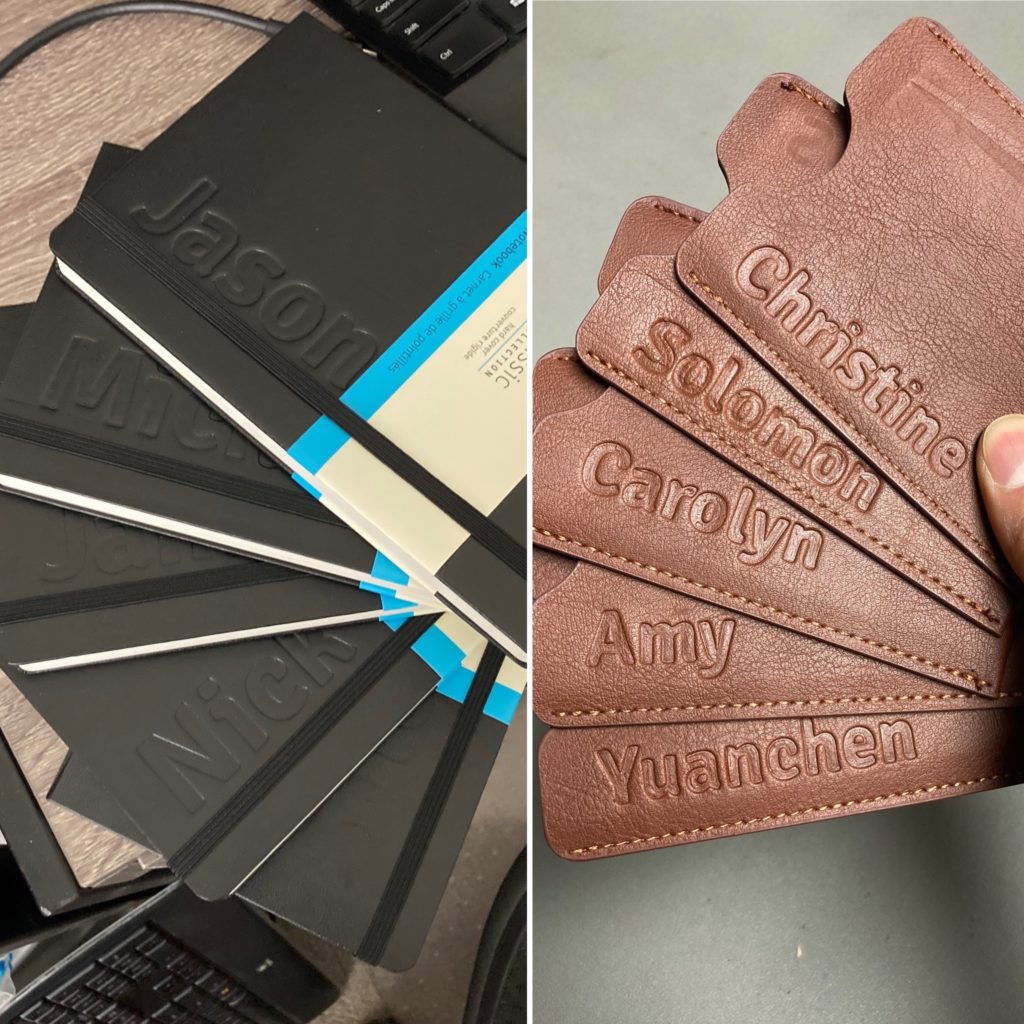
The same process was used to personalize both the luggage tags and moleskine notebooks. First, I designed debossing tools with inverted text and wings to help with alignment:

This press tool was designed to uniformly align the names for each item. Unfortunately, Fusion 360 isn’t the greatest when it comes to creating different configurations, but I made it work by creating feature groups which I manually suppressed and unsuppressed to generate different versions.

It took a bit of experimentation for me to refine the process, but was extremely straightforward to do once I had all the tools set up:

  1. For strength, print the debossing tool with a higher than normal number of walls (5) and infill (50%). Normally, there are diminishing returns on adding more infill, but in this case it was warranted.  
  2. Wet the surface to be imprinted
  3. Add a very stiff backing plate beneath the area to be debossed
  4. Sandwich the component between more flat plates to help spread the clamping force evenly
  5. Clamp down HARD, for at least 15 minutes. Using hard mounted vises makes the work easier.

As one might expect, it was more difficult to emboss larger objects with longer names, since a greater amount of overall force is needed to apply the same amount of pressure (force per given area). 

Having the proper tooling – scrap metal plates and vises made the personalization job much easier than it would have been otherwise…

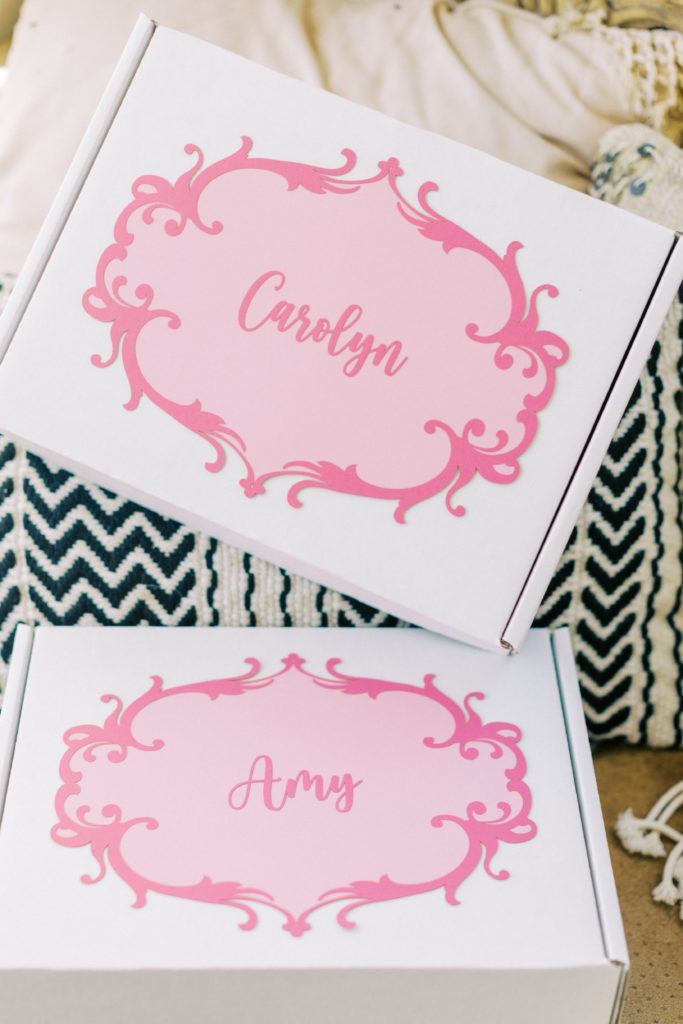
To create the nametags for the bridesmaids’ gift boxes, I used the laser cutter my groomsmen gifted me. I used inkscape to generate vector files to create a background piece, a border to fit on top, and names. Aside from dialing in the diode laser intensity settings for clean cuts in each color, the most difficult part of the project was actually applying the adhesive spray without making a mess.

We used an adhesive spray to attach the dark pink border and names onto the lighter pink background.

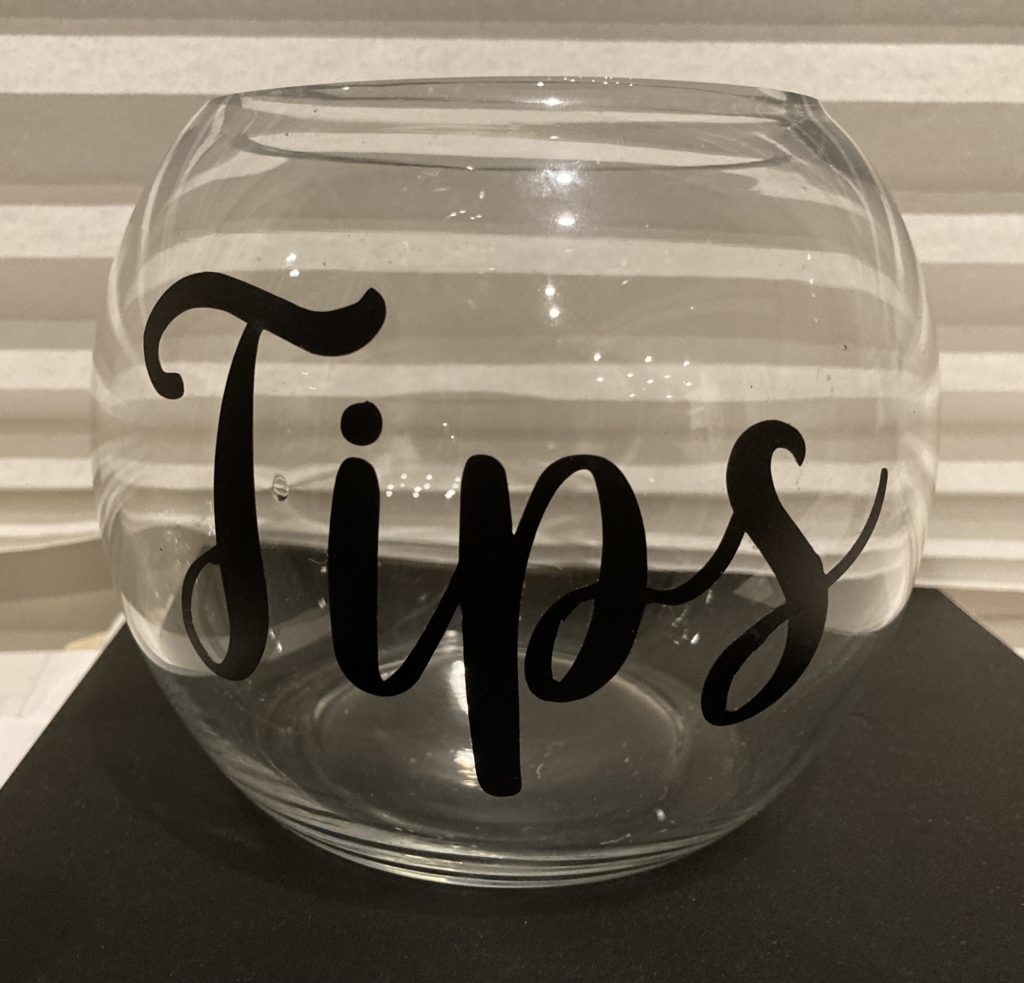
Of all the projects, the tip jar was probably the most straight forward. We found a round glass vase we liked. Then, I used a vinyl cutter to cut the word “Tips” out of a sticker material and used transfer tape to place the stickers on the vase. That’s all it was!

Once again, thanks for sticking with me–I should be able to wrap things up within two more posts, hopefully before Thanksgiving rolls around!

Wedding Season

TL;DR: September 2021 was the craziest month I’ve ever had in terms of being involved with weddings… I had the honor of being in the wedding party for all 3 I was able to attend, and was able to make gifts for all three as well.

Without a doubt, 2021 and 2022 will go down as the crazy-busiest two-year timeframe for weddings in my life. If you haven’t heard, of it yet, a little thing called COVID19 came along and delayed most weddings from 2020 into 2021 and it seems like all the couples who didn’t drive each other insane during quarantine decided to get hitched.

September 2021 was undoubtedly my single busiest month ever—I had the honor of being in the bridal party for all three I was able to attend. I love weddings, they’re all always so much fun! For each of these three, I am proud to have crafted something special for each couple.

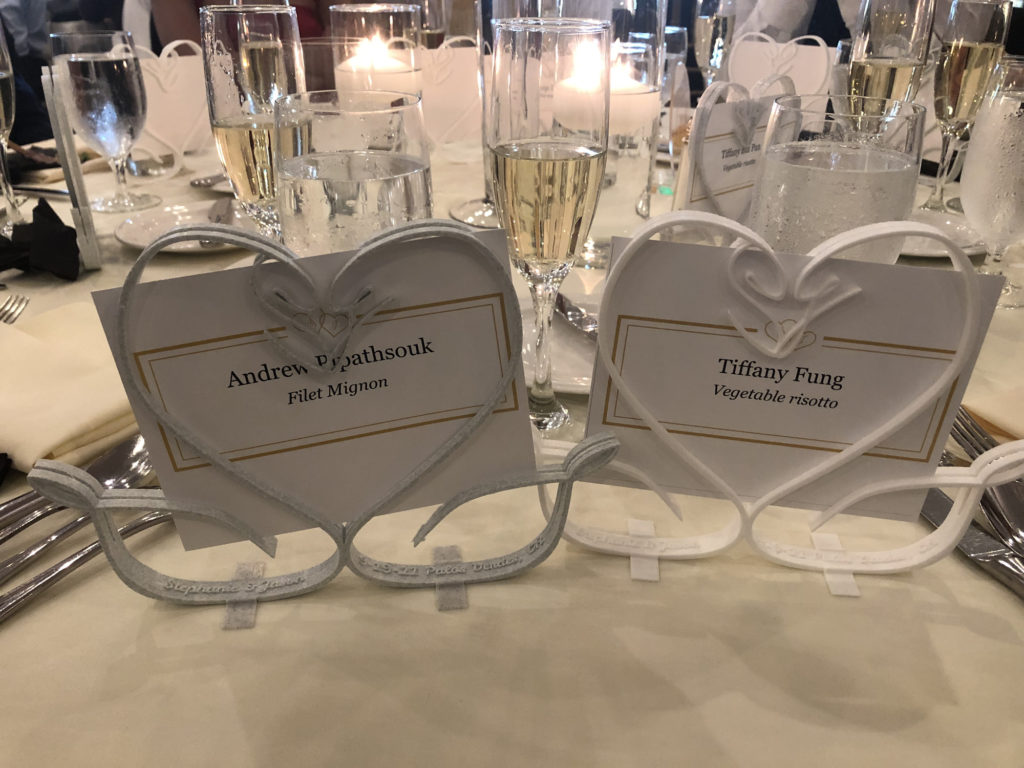
Early this year, my friend Jason commissioned me to design the party favors for his wedding. After going back and forth with a few Jason and his now wife Stephanie with a few design iterations, I completed the following final design–a sculpture of two swans with their initials (S & J) as the heads, which also doubled as a document holder able to display papers of arbitrary size.

These swans came in two colors and doubled as a namecard/document holder and as a practical favor guests could take home and reuse

I was very happy with how all of the favors turned out after several weeks of nonstop printing and finishing the parts by hand.

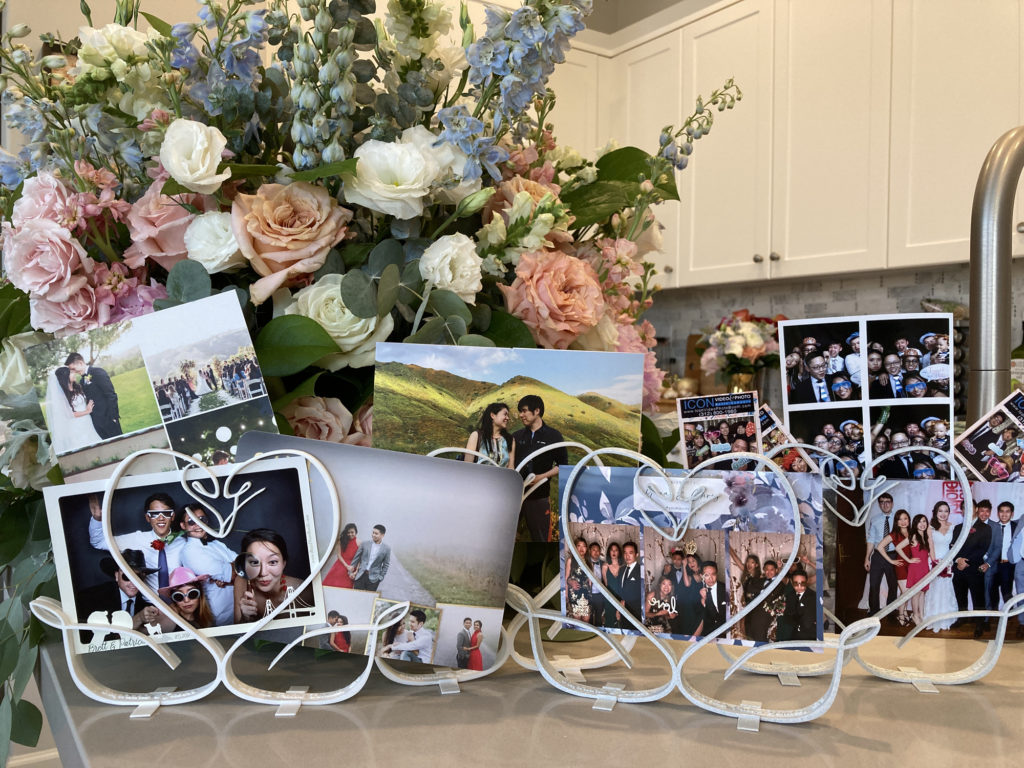
These swans can hold documents, photos, etc. of arbitrary size!

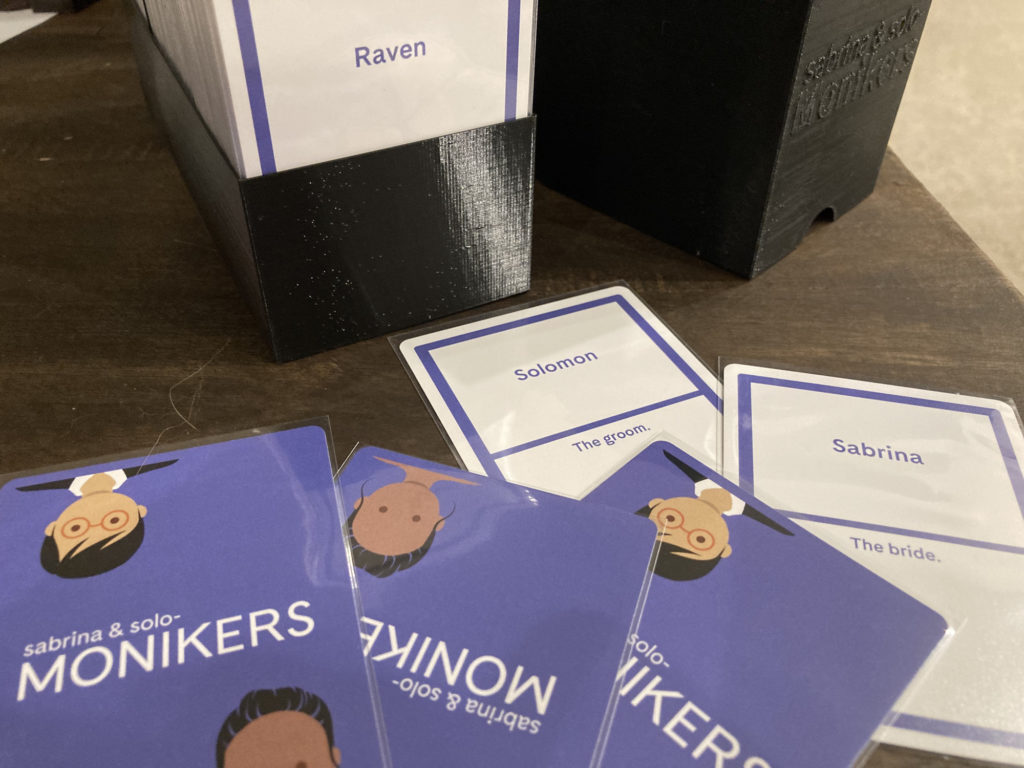
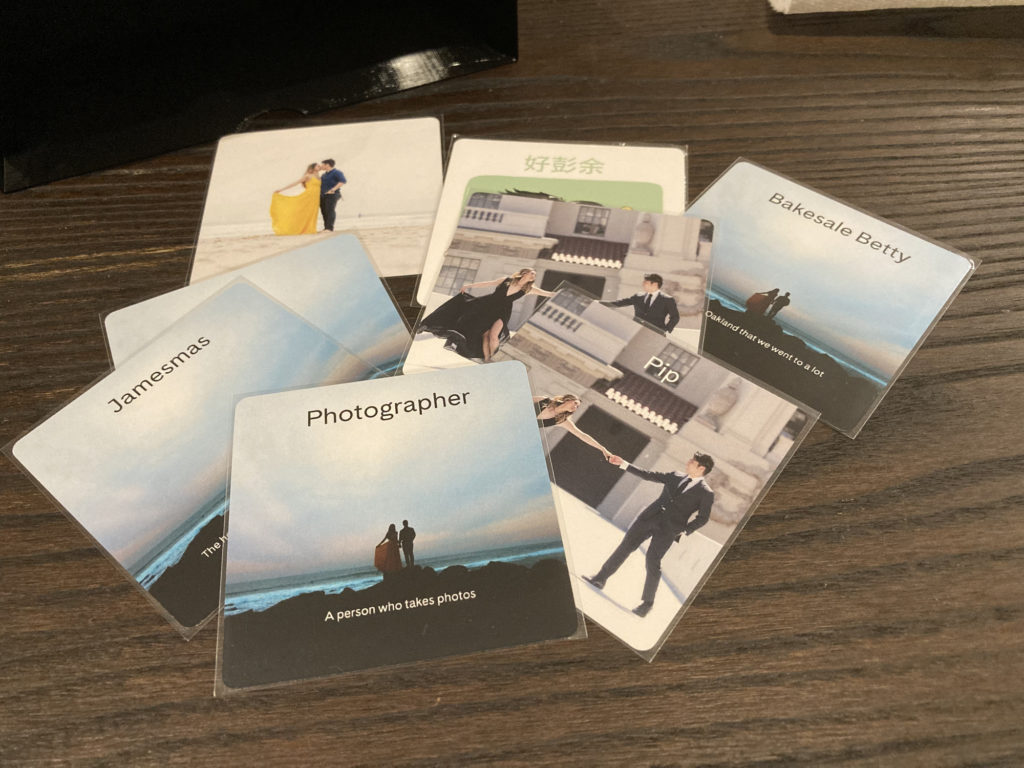
For the other two weddings (Jimmy & Cat; Solomon & Sabrina), I created very similar gifts—custom cards filled with words and phrases meaningful to the couples usable for a variety of games (monikers, charades, codenames, Pictionary, etc.)

In both cases, I am fortunate to have known nearly all members of both sides of the bridal party. I was able to I reach out and had everybody fill in a spreadsheet with words and definitions. Next, I gathered artwork to use for the front and back of each card–for the game Sabrina and SoloMonikers, I reached out to Sabrina’s brilliant designer sister who was able to whip up custom artwork.

Sabrina & SoloMonikers!

For Hao Peng Yu, I reached out to a caricature artist James and Cat previously commissioned for their Save the Dates and took some photos from their engagement shoots.

For Hao Peng Yu, I used engagement shoot photos for the front of the cards

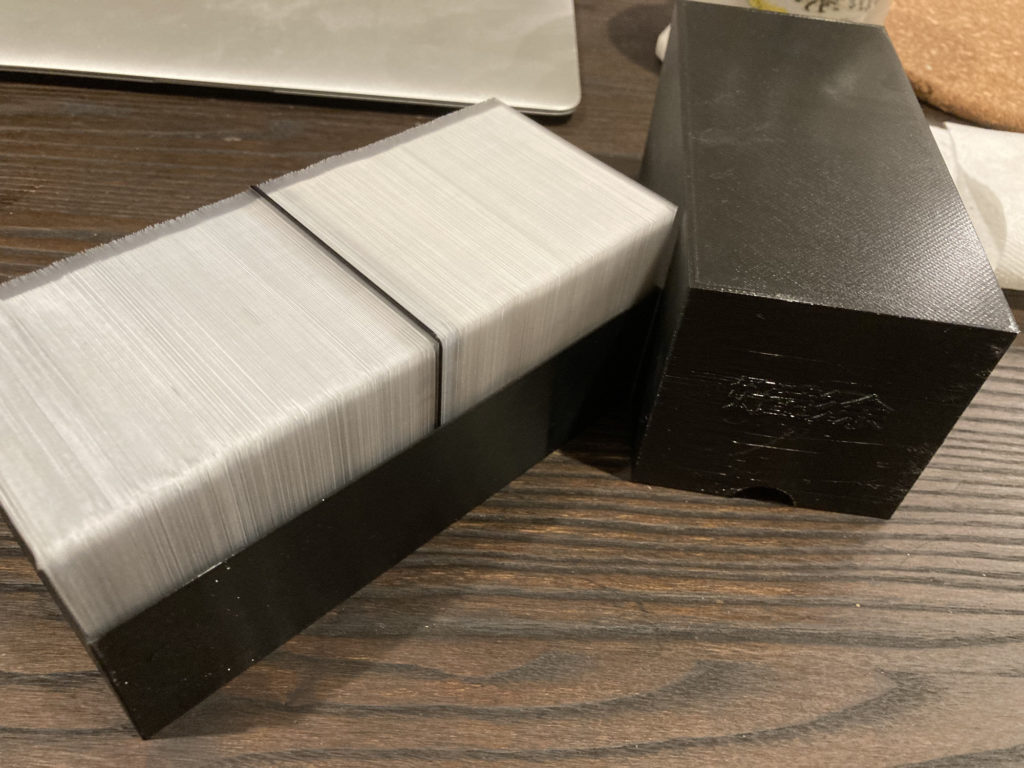
I generated unique cards by populating the art files with words and definitions from the bridal party spreadsheets in GIMP via python script. Then I uploaded all the files to a fantastic card printer based in Hong Kong (makeplayingcards.com) who printed both ~500 card decks and had them at my door within 2 weeks! After the decks arrived, I sleeved all the cards and printed custom boxes to hold everything.

The box was custom sized to fit all the cards and a divider was included to help keep things a bit organized

I am very proud of how both decks of cards came out, and am grateful for all the help I had from all members of all four wedding parties. Things were too hectic at both weddings for us to play with the cards–a bit unfortunate, but EXTREMELY understandable. It’s just an excuse for us to all get together again in the near future though ;).

Looking back at this crazy September, I am delighted to have played a part in making the day special for each of these happy couples! The entire month felt like it was gone in the blink of an eye, yet I know we made enough memories to last a lifetime. Despite the exhaustion and a sense of relief of being “off the clock”, I wouldn’t have traded last month for anything.