TL;DR: Tiff and I took advantage of a few lazy quarantine weekends to plan and create a few custom pieces of wall décor.
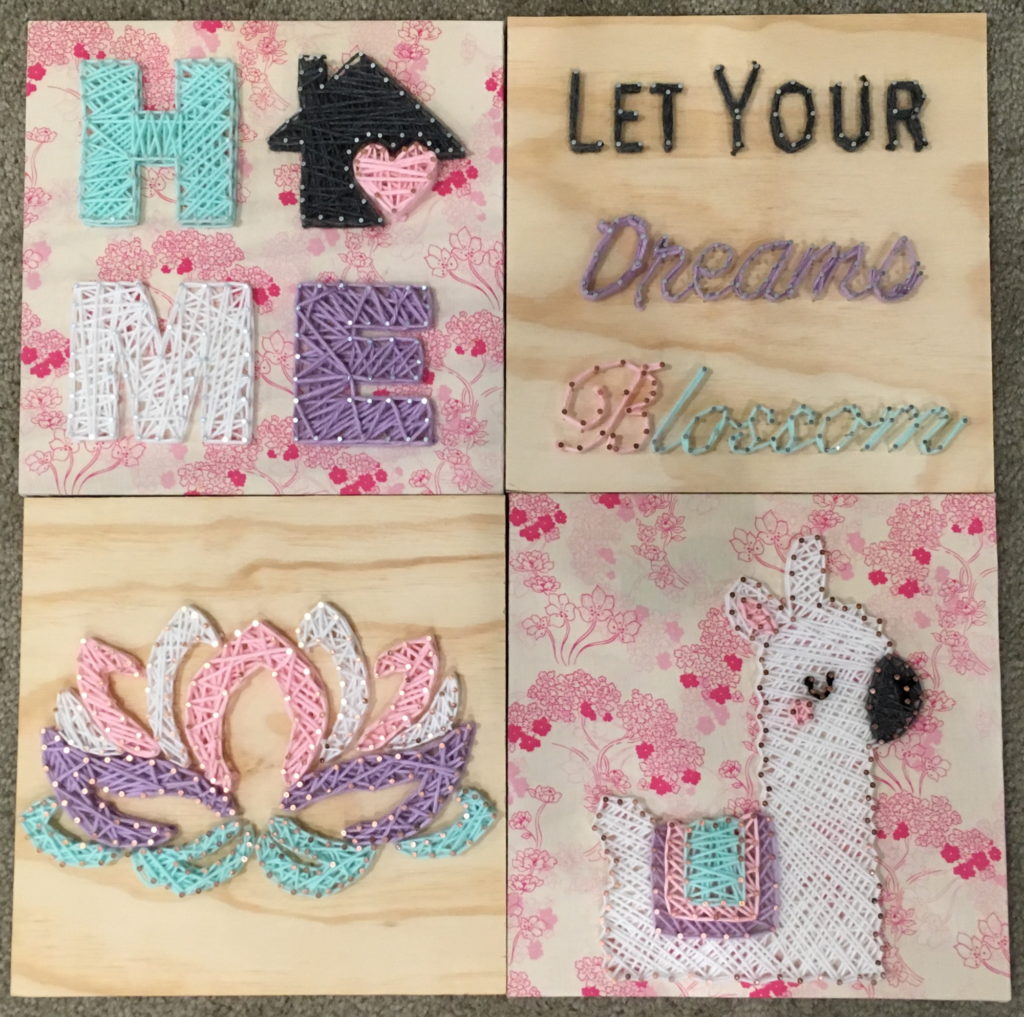
A few weeks ago, I posted photos previewing string art Tiff and I started working on. We planned a series of four. While she focused on making the most adorable one, three fell to me. For the background of pieces, we upcycled an old dress otherwise destined for Goodwill. This was my first string art project in about 7 years and actually found the act of stringing quite meditative and refreshing.
A series of four string artworks we completed during the Great Coronatine of 2020
As a bonus art project, we also created a shattered mirror piece. I purchased “sliceable” adhesive-backed plastic mirrors for a different project but first wanted to experiment with how easily cut the parts were. I doodled a geometric hummingbird design while Tiff picked colors for and assembled the background from cardstock we had laying around. Cutting the mirror was harder than I expected, but got much better by the end.
I originally intended to add a simplified geometric rose to match the rest of the aesthetic, but it was difficult for my friends to figure out what it was. We went with a bundle of curvy cherry blossoms instead, and I think I dig the contrast in shape and colors.
Upper Right: Finished work; Everything else: various stages of planning/making
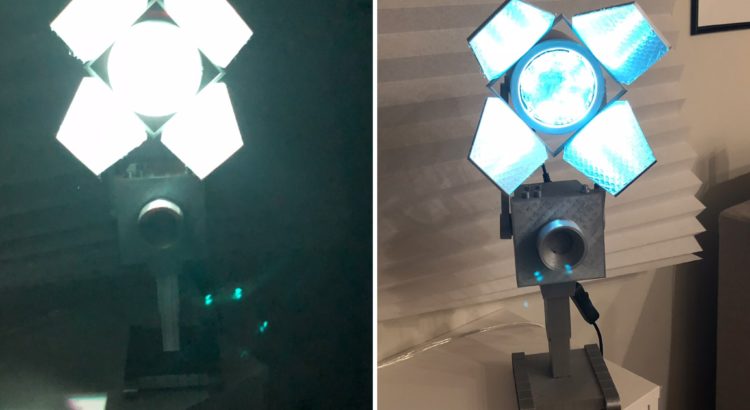
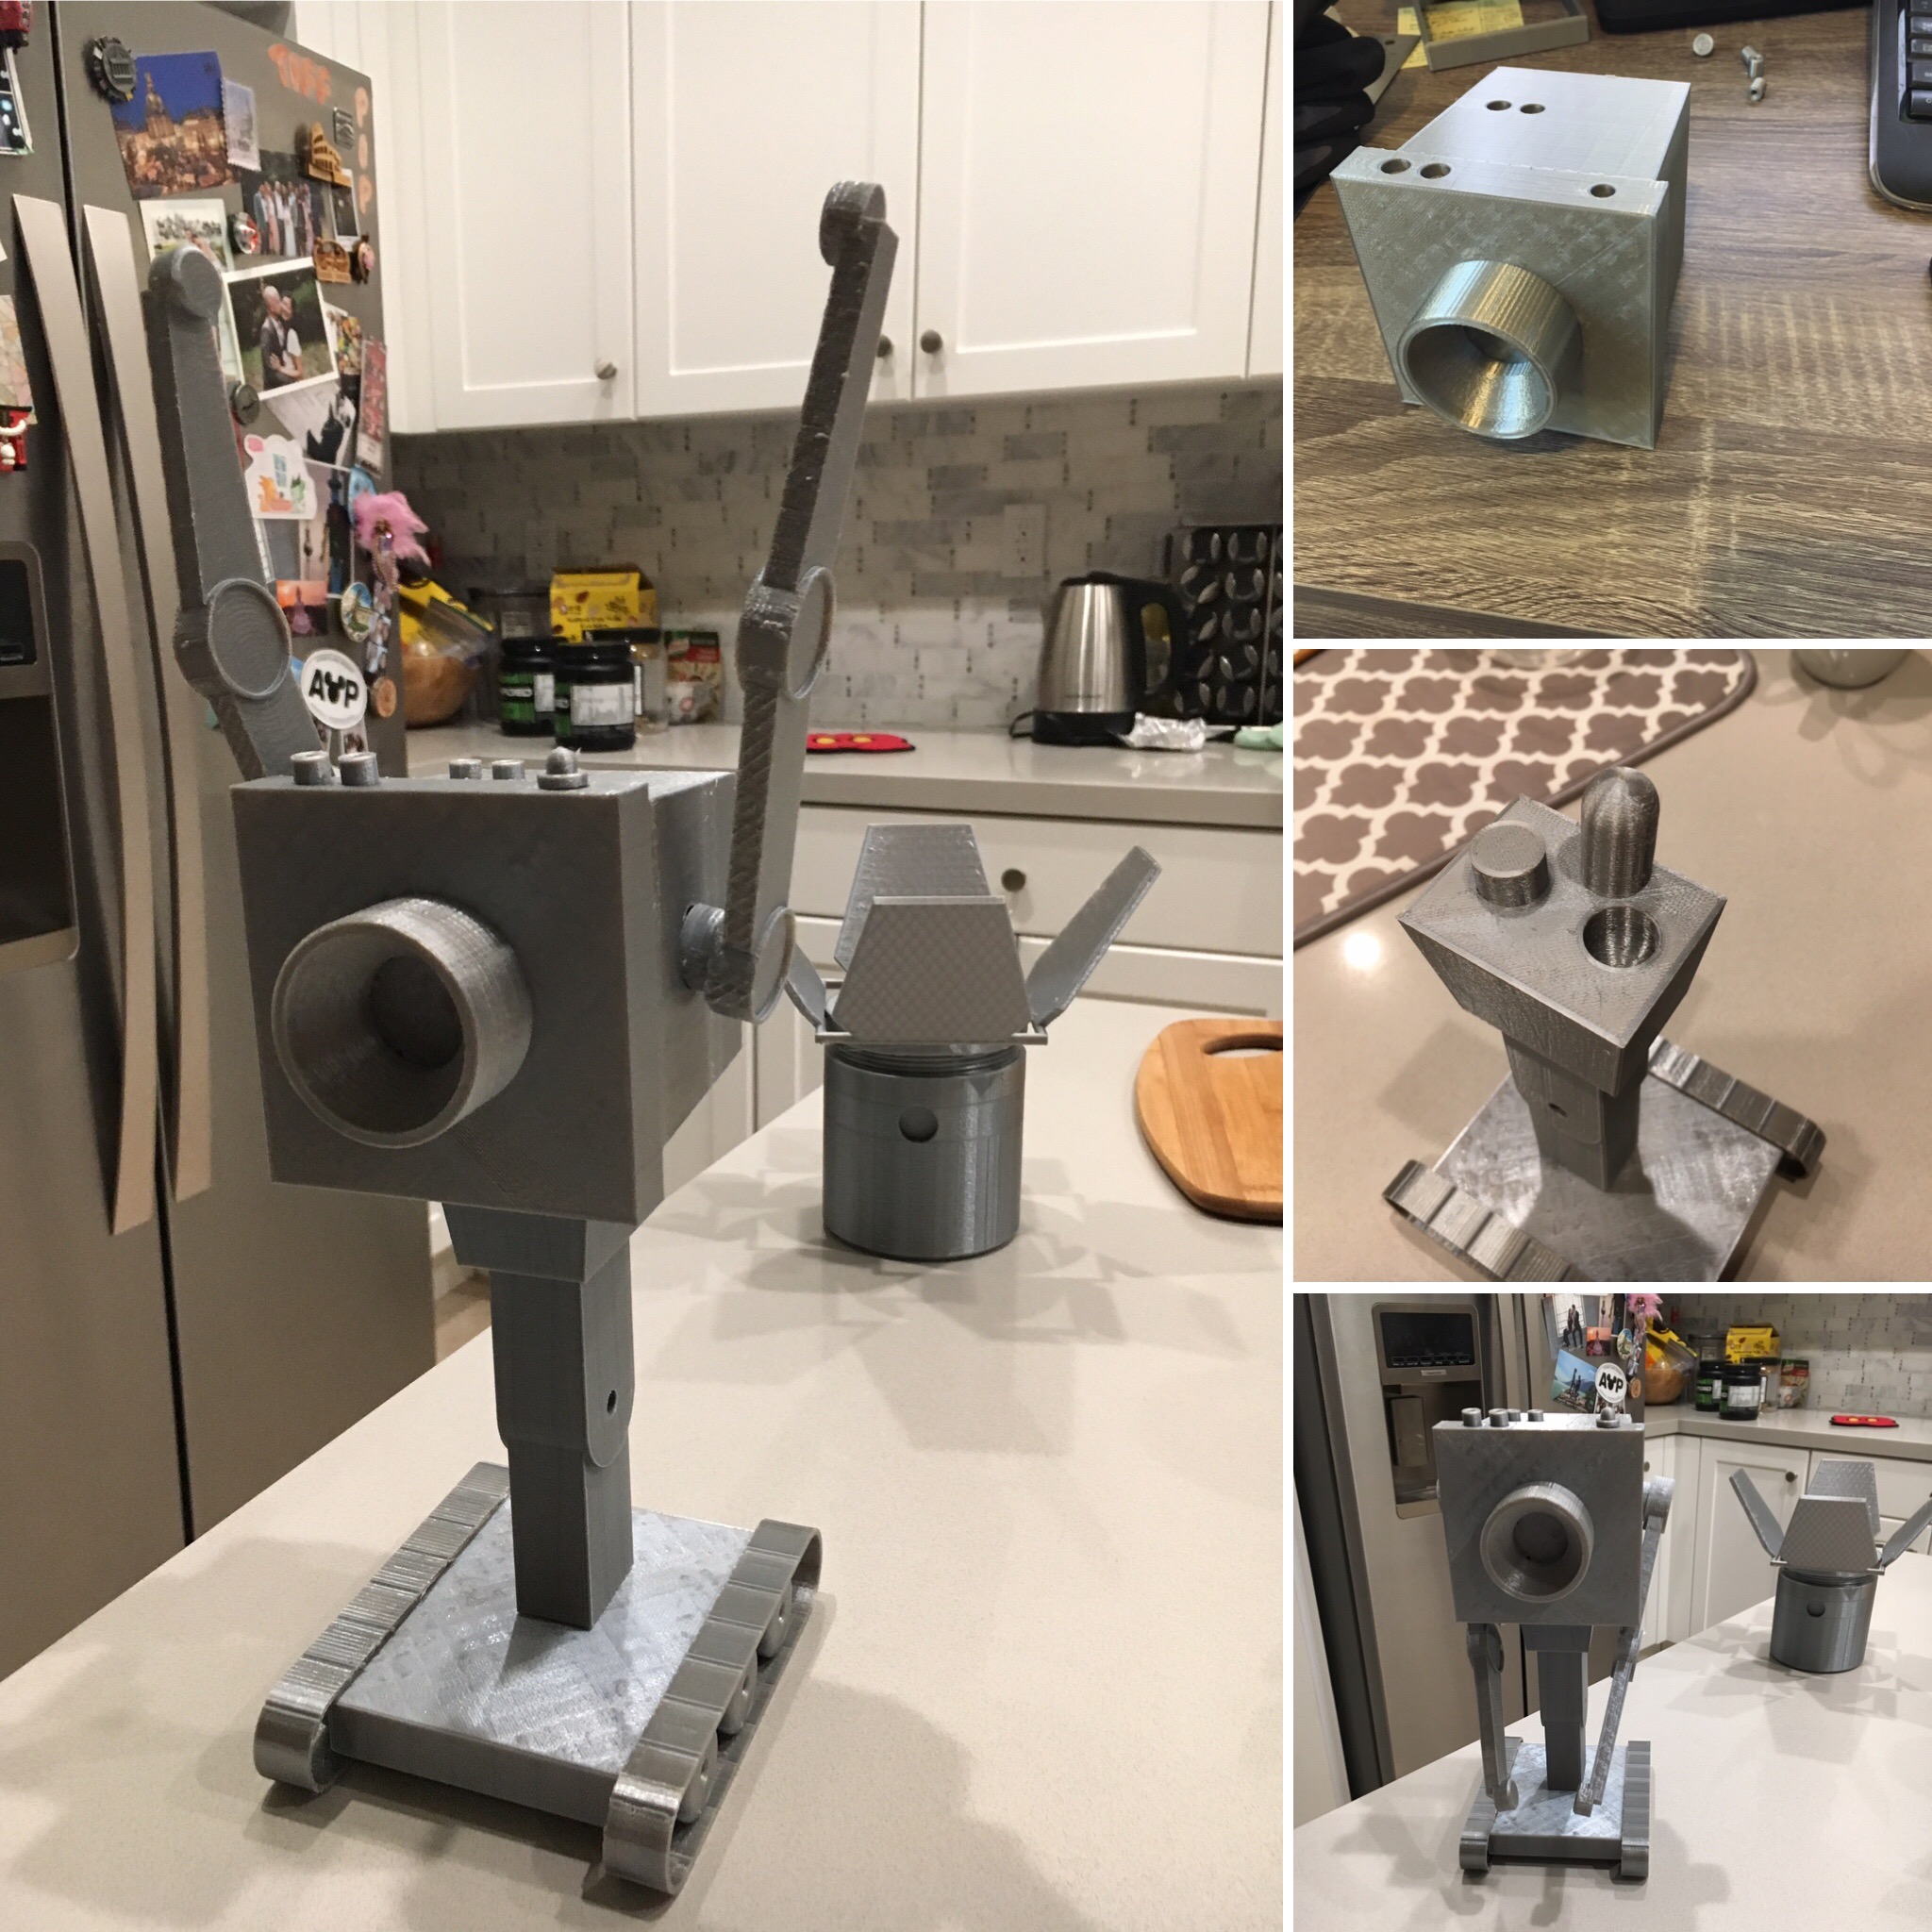
TL;DR: I made a robot whose only purpose is to hold up a spotlight… At
least it’s a step up from passing butter :D. I am extremely pleased with how
this guy turned out. The light is adjustable both in leaf rotation and tilt
angle.
A few weeks ago, I desperately wanted a lamp for my nightstand to keep me
from needing to stumble around in the dark trying to find the bed while
avoiding squishing the dog after turning off the lights at night. Thus, I
decided to do the most practical thing, and began designing my own.
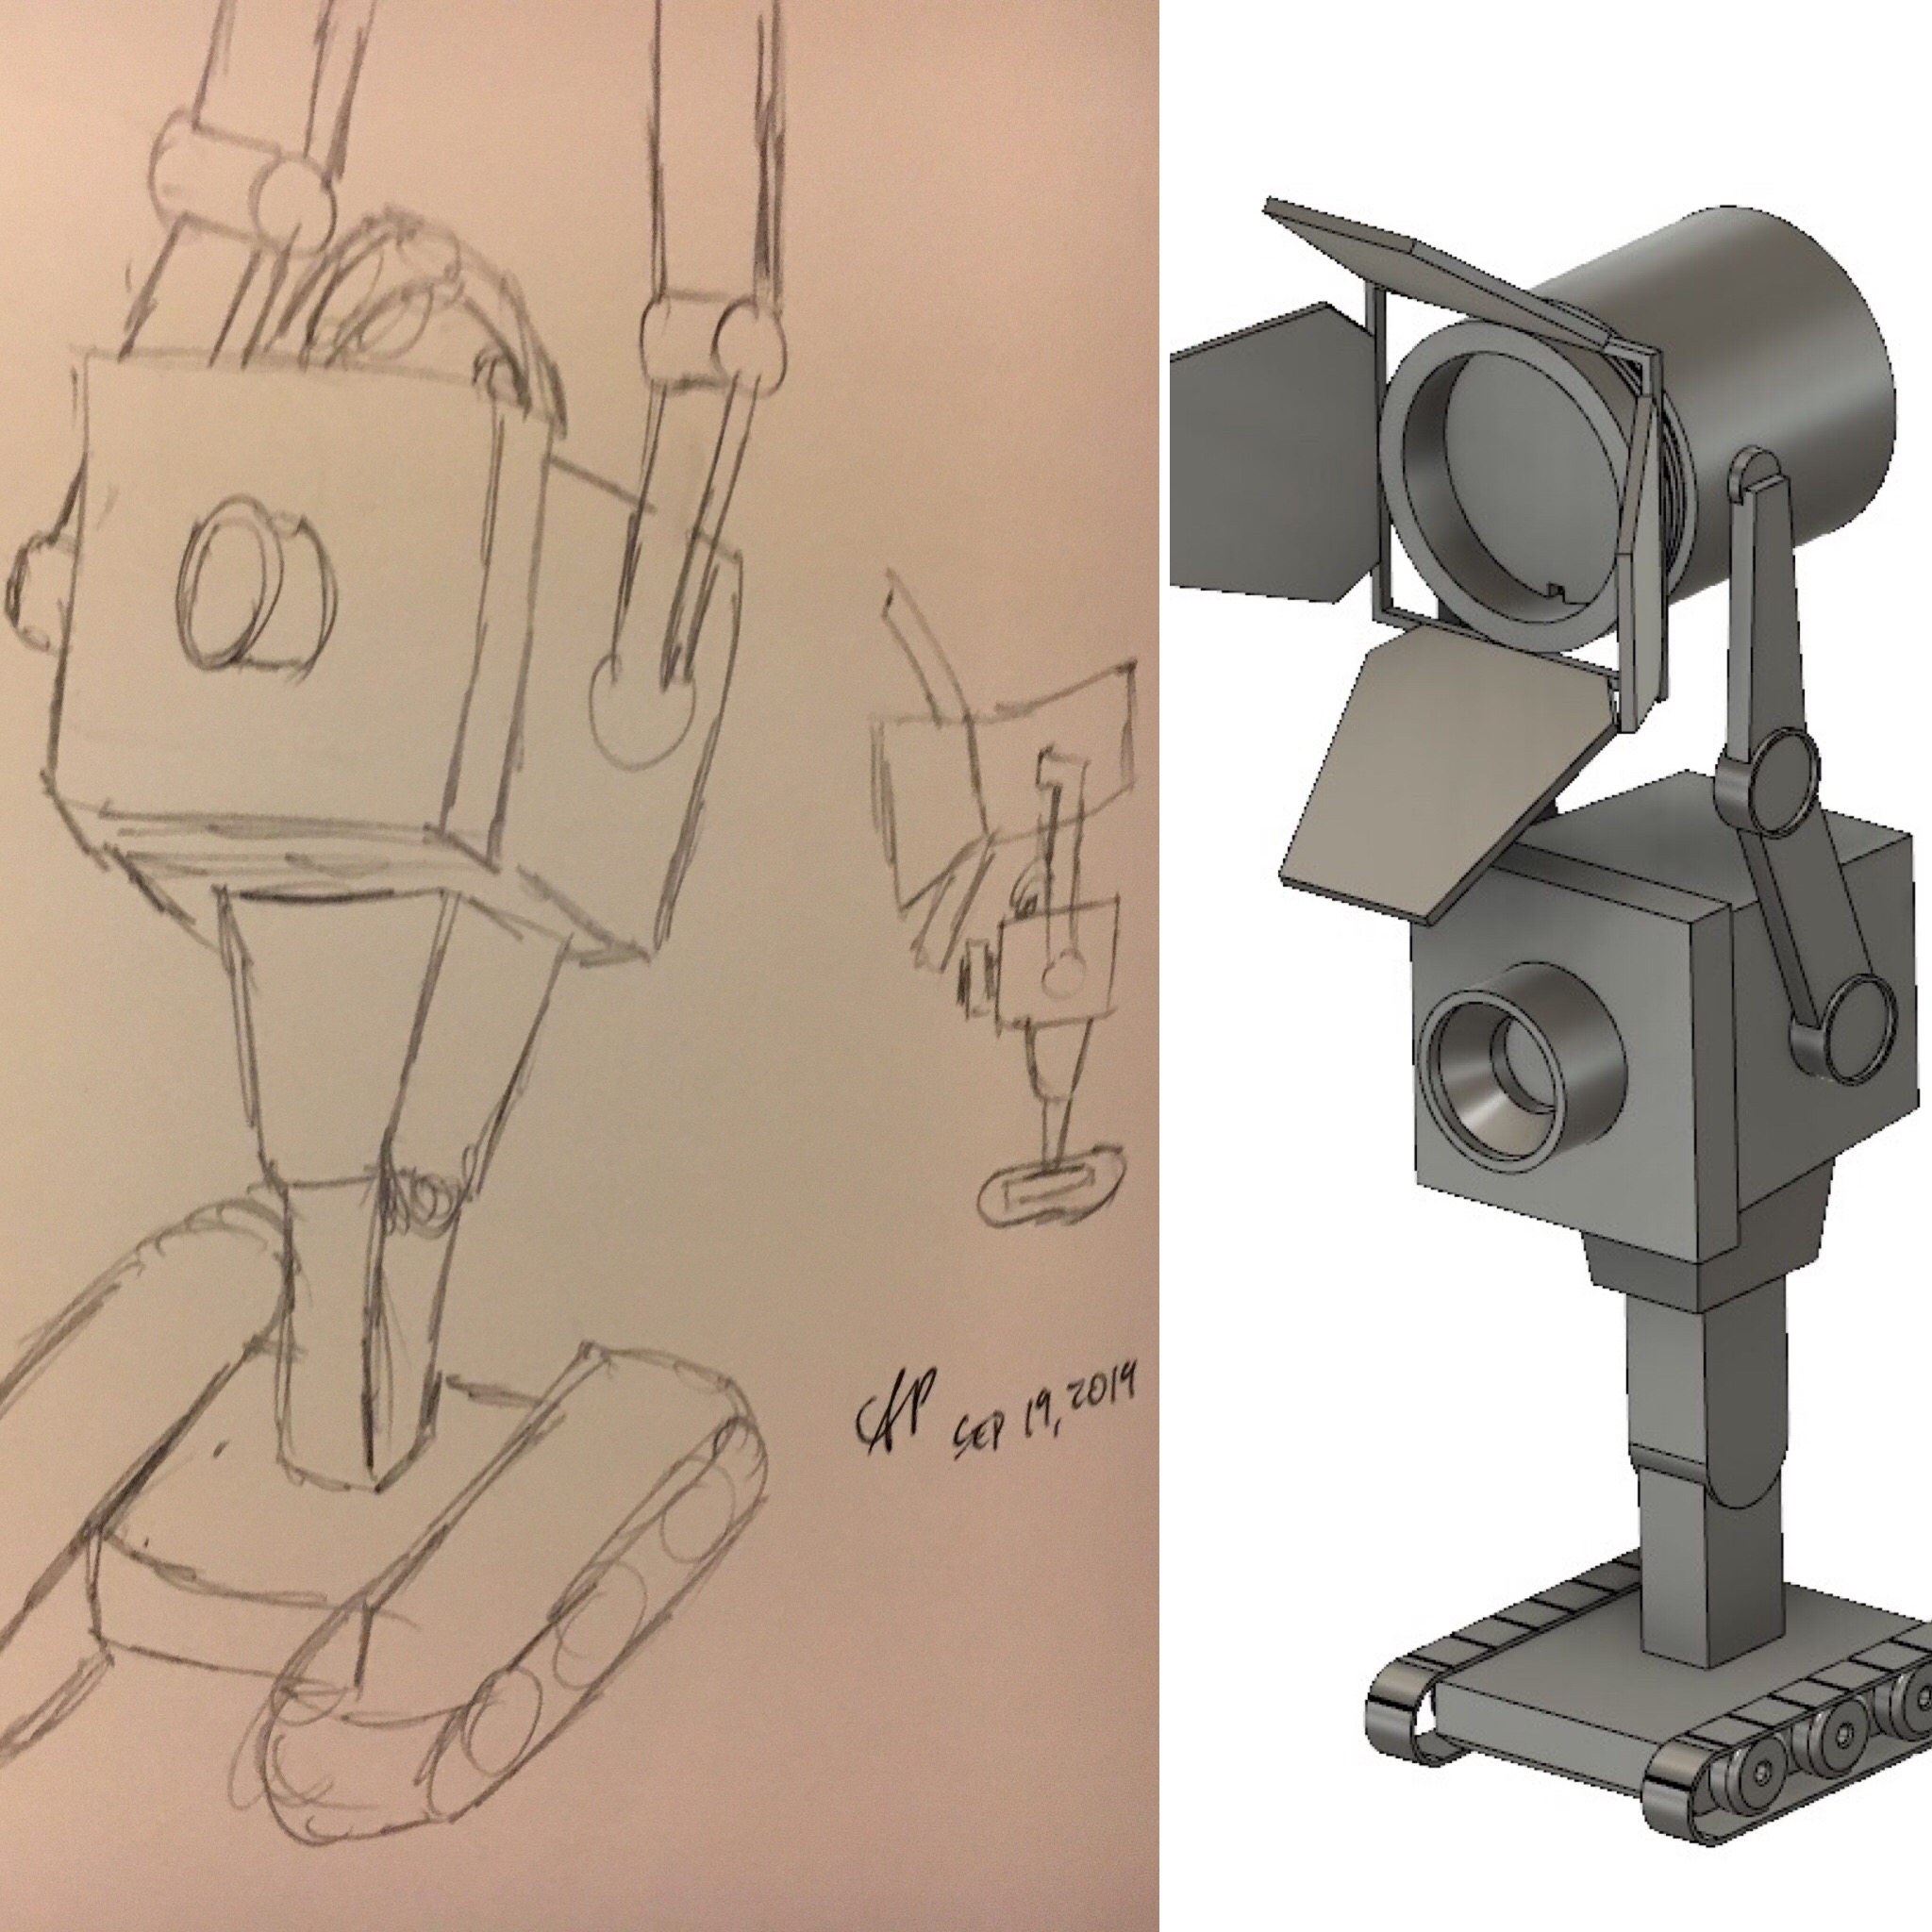
I began my design around the idea of creating something in a modular manner.
I knew I wanted to have some sort of character holding up the light source, but
was unsure about the specifics of what was going to be feasible, and what would
be accepted by my landlord to have around the house. I landed on the idea of
building around a spotlight—I like the simple shape and general aesthetics and
the character-neutral nature.
Over the next few weekends, I kicked around a few ideas and asked some
friends for inspiration when I had my eureka moment—THE BUTTER BOT FROM RICK
AND MORTY IS PERFECT FOR THIS!!! I am a huge fan of the show, wanted to use up
my silk silver plastic filament, and thought I could give this little guy a
better purpose than just passing butter. Really, it was a win/win/win scenario.
I don’t have any photos detailing the electronics, but I’ve got a simple ATmega32U4-based
Arduino board with a micro-USB interface. I found this awesome inline DC jack
power switch and paired it with an even cooler DC jack to micro-USB cable to
provide power and add the ability to turn the light on/off.
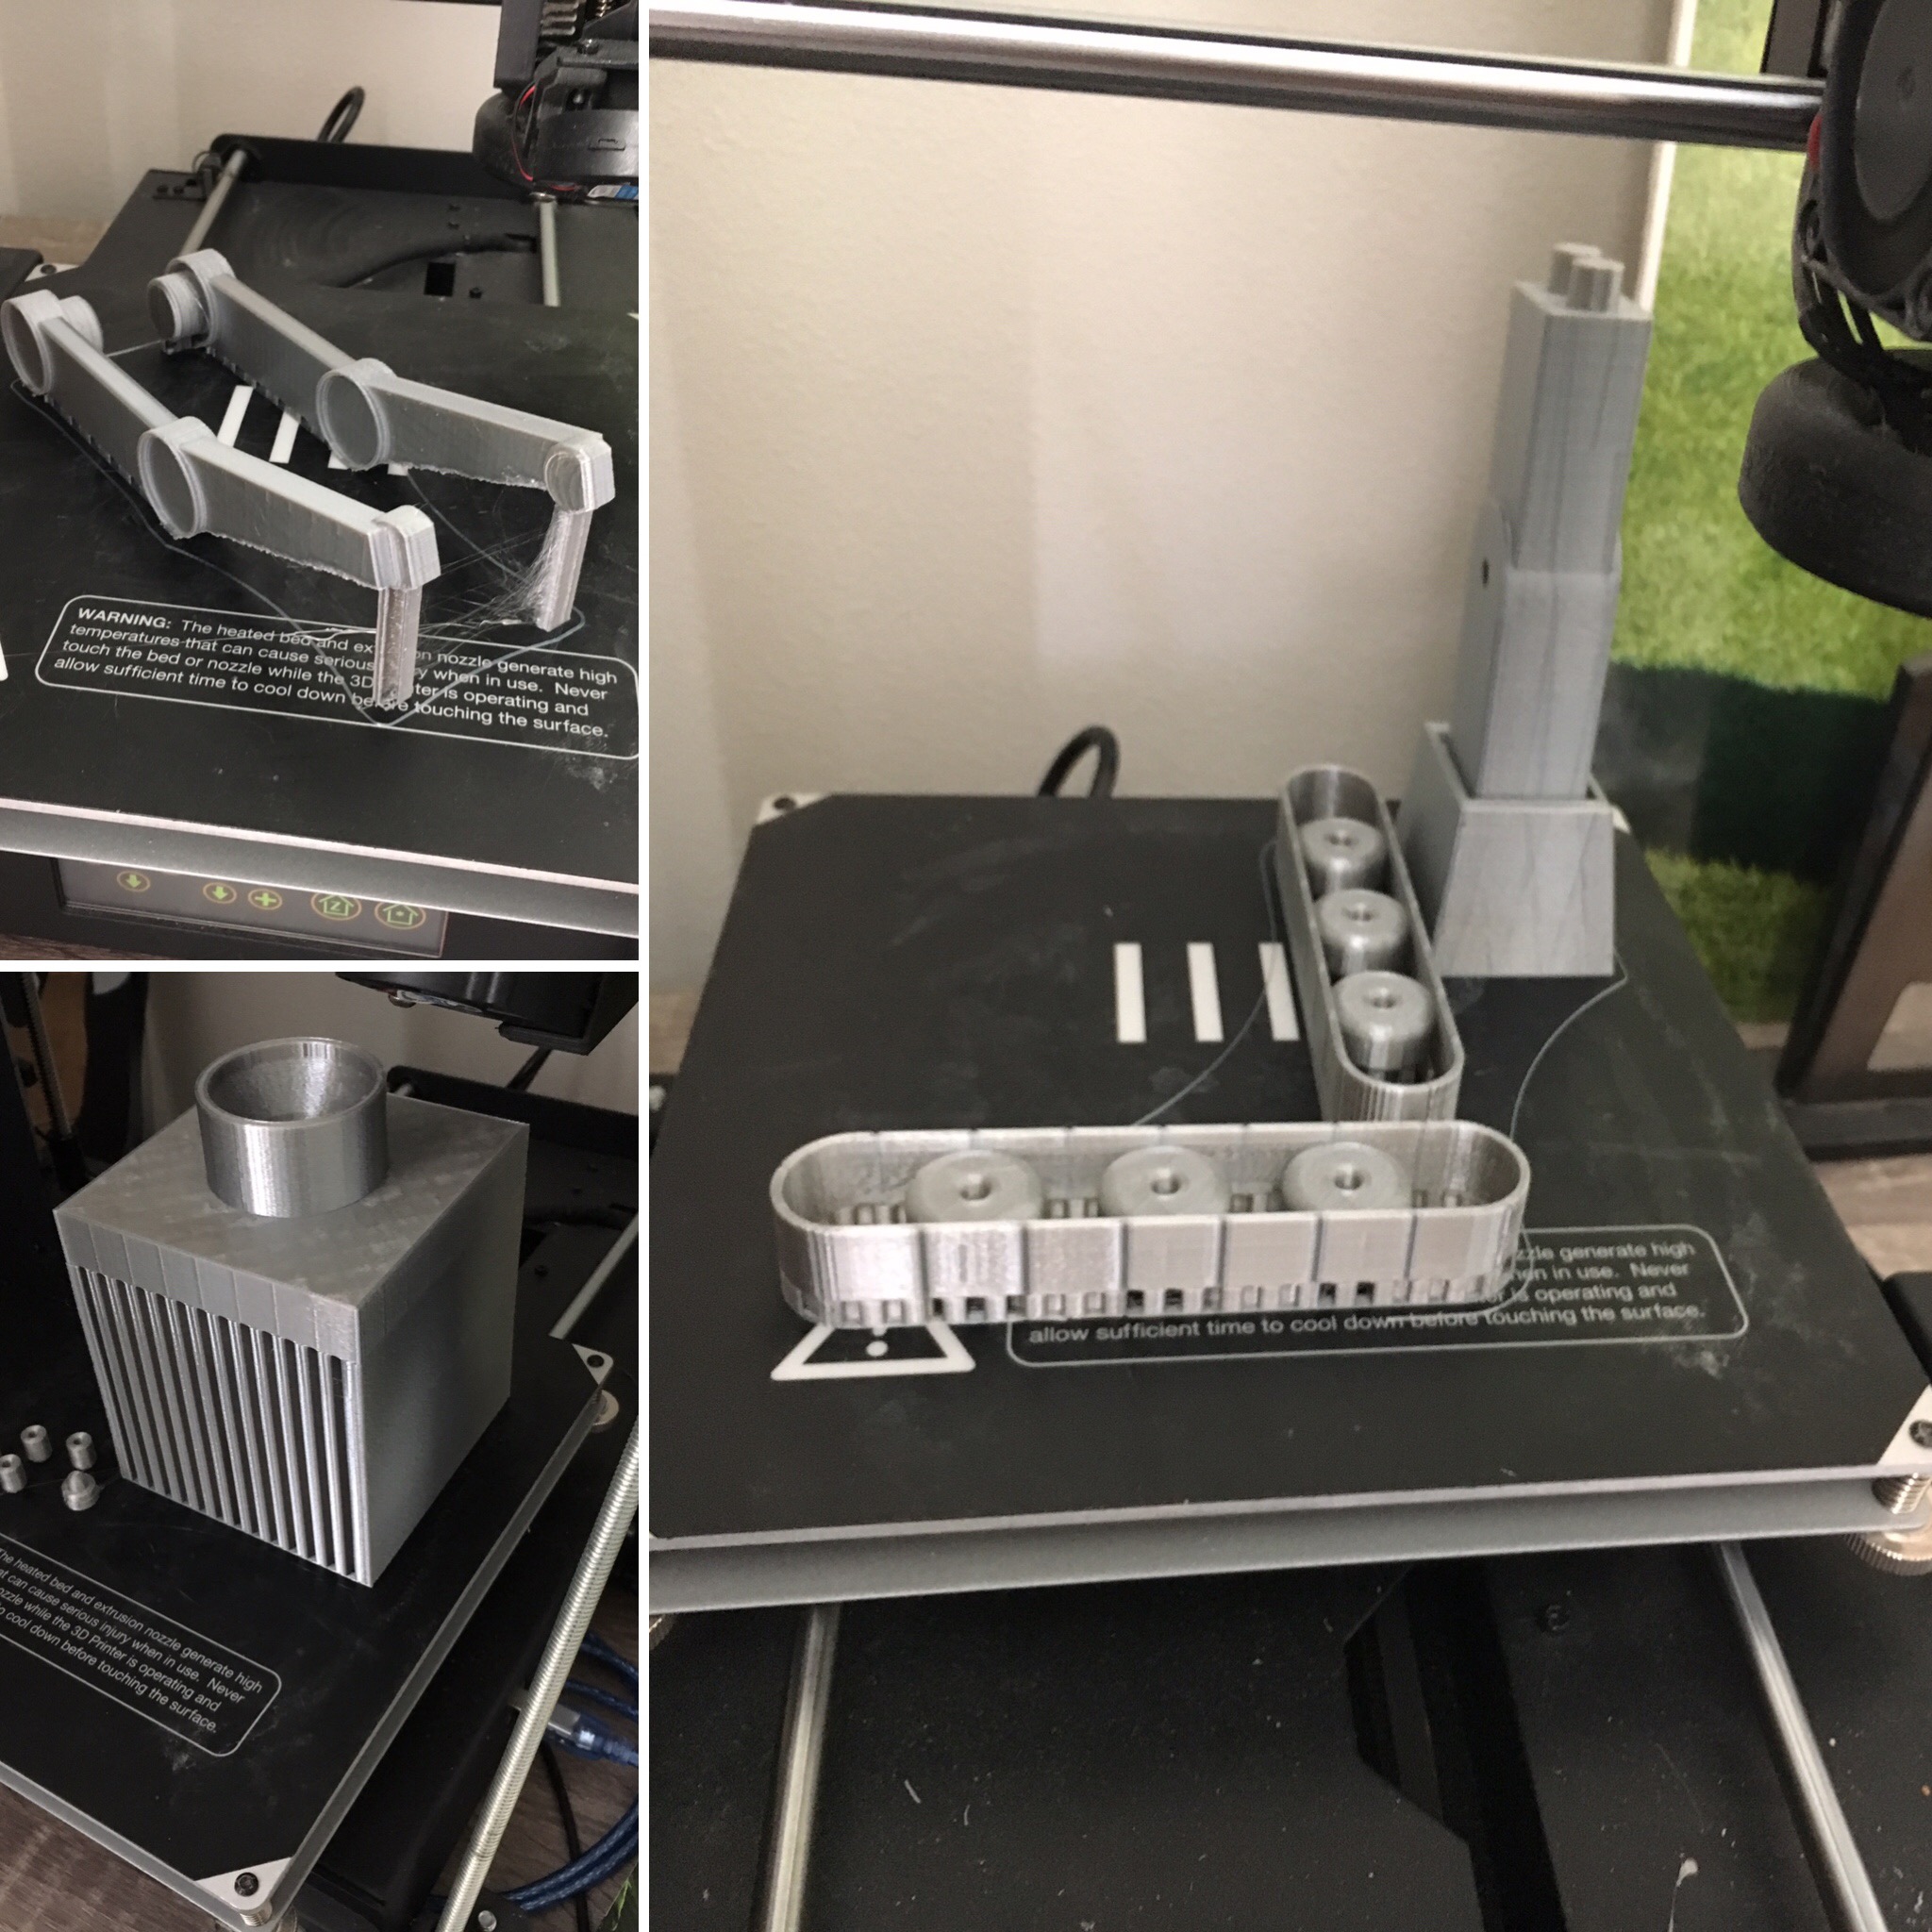
Designing and implementing my idea was relatively straightforward after
deciding what to build. The trickiest part was designing the parts in such a
way so they could be broken up and printed in different jobs—the overall size
is roughly 7” x 8” x 18” (although the 7” width can change depending on how the
spotlight leaves are oriented, and the height can change depending on the tilt
angle). I am particularly proud of my insight of creating a domed peg to enable
the printing of the main body without the need for supports.
The only thing missing from the completely finished design are a red wire, a yellow wire, and a red led bulb. Anyway, here’s a gallery of my design and build process:
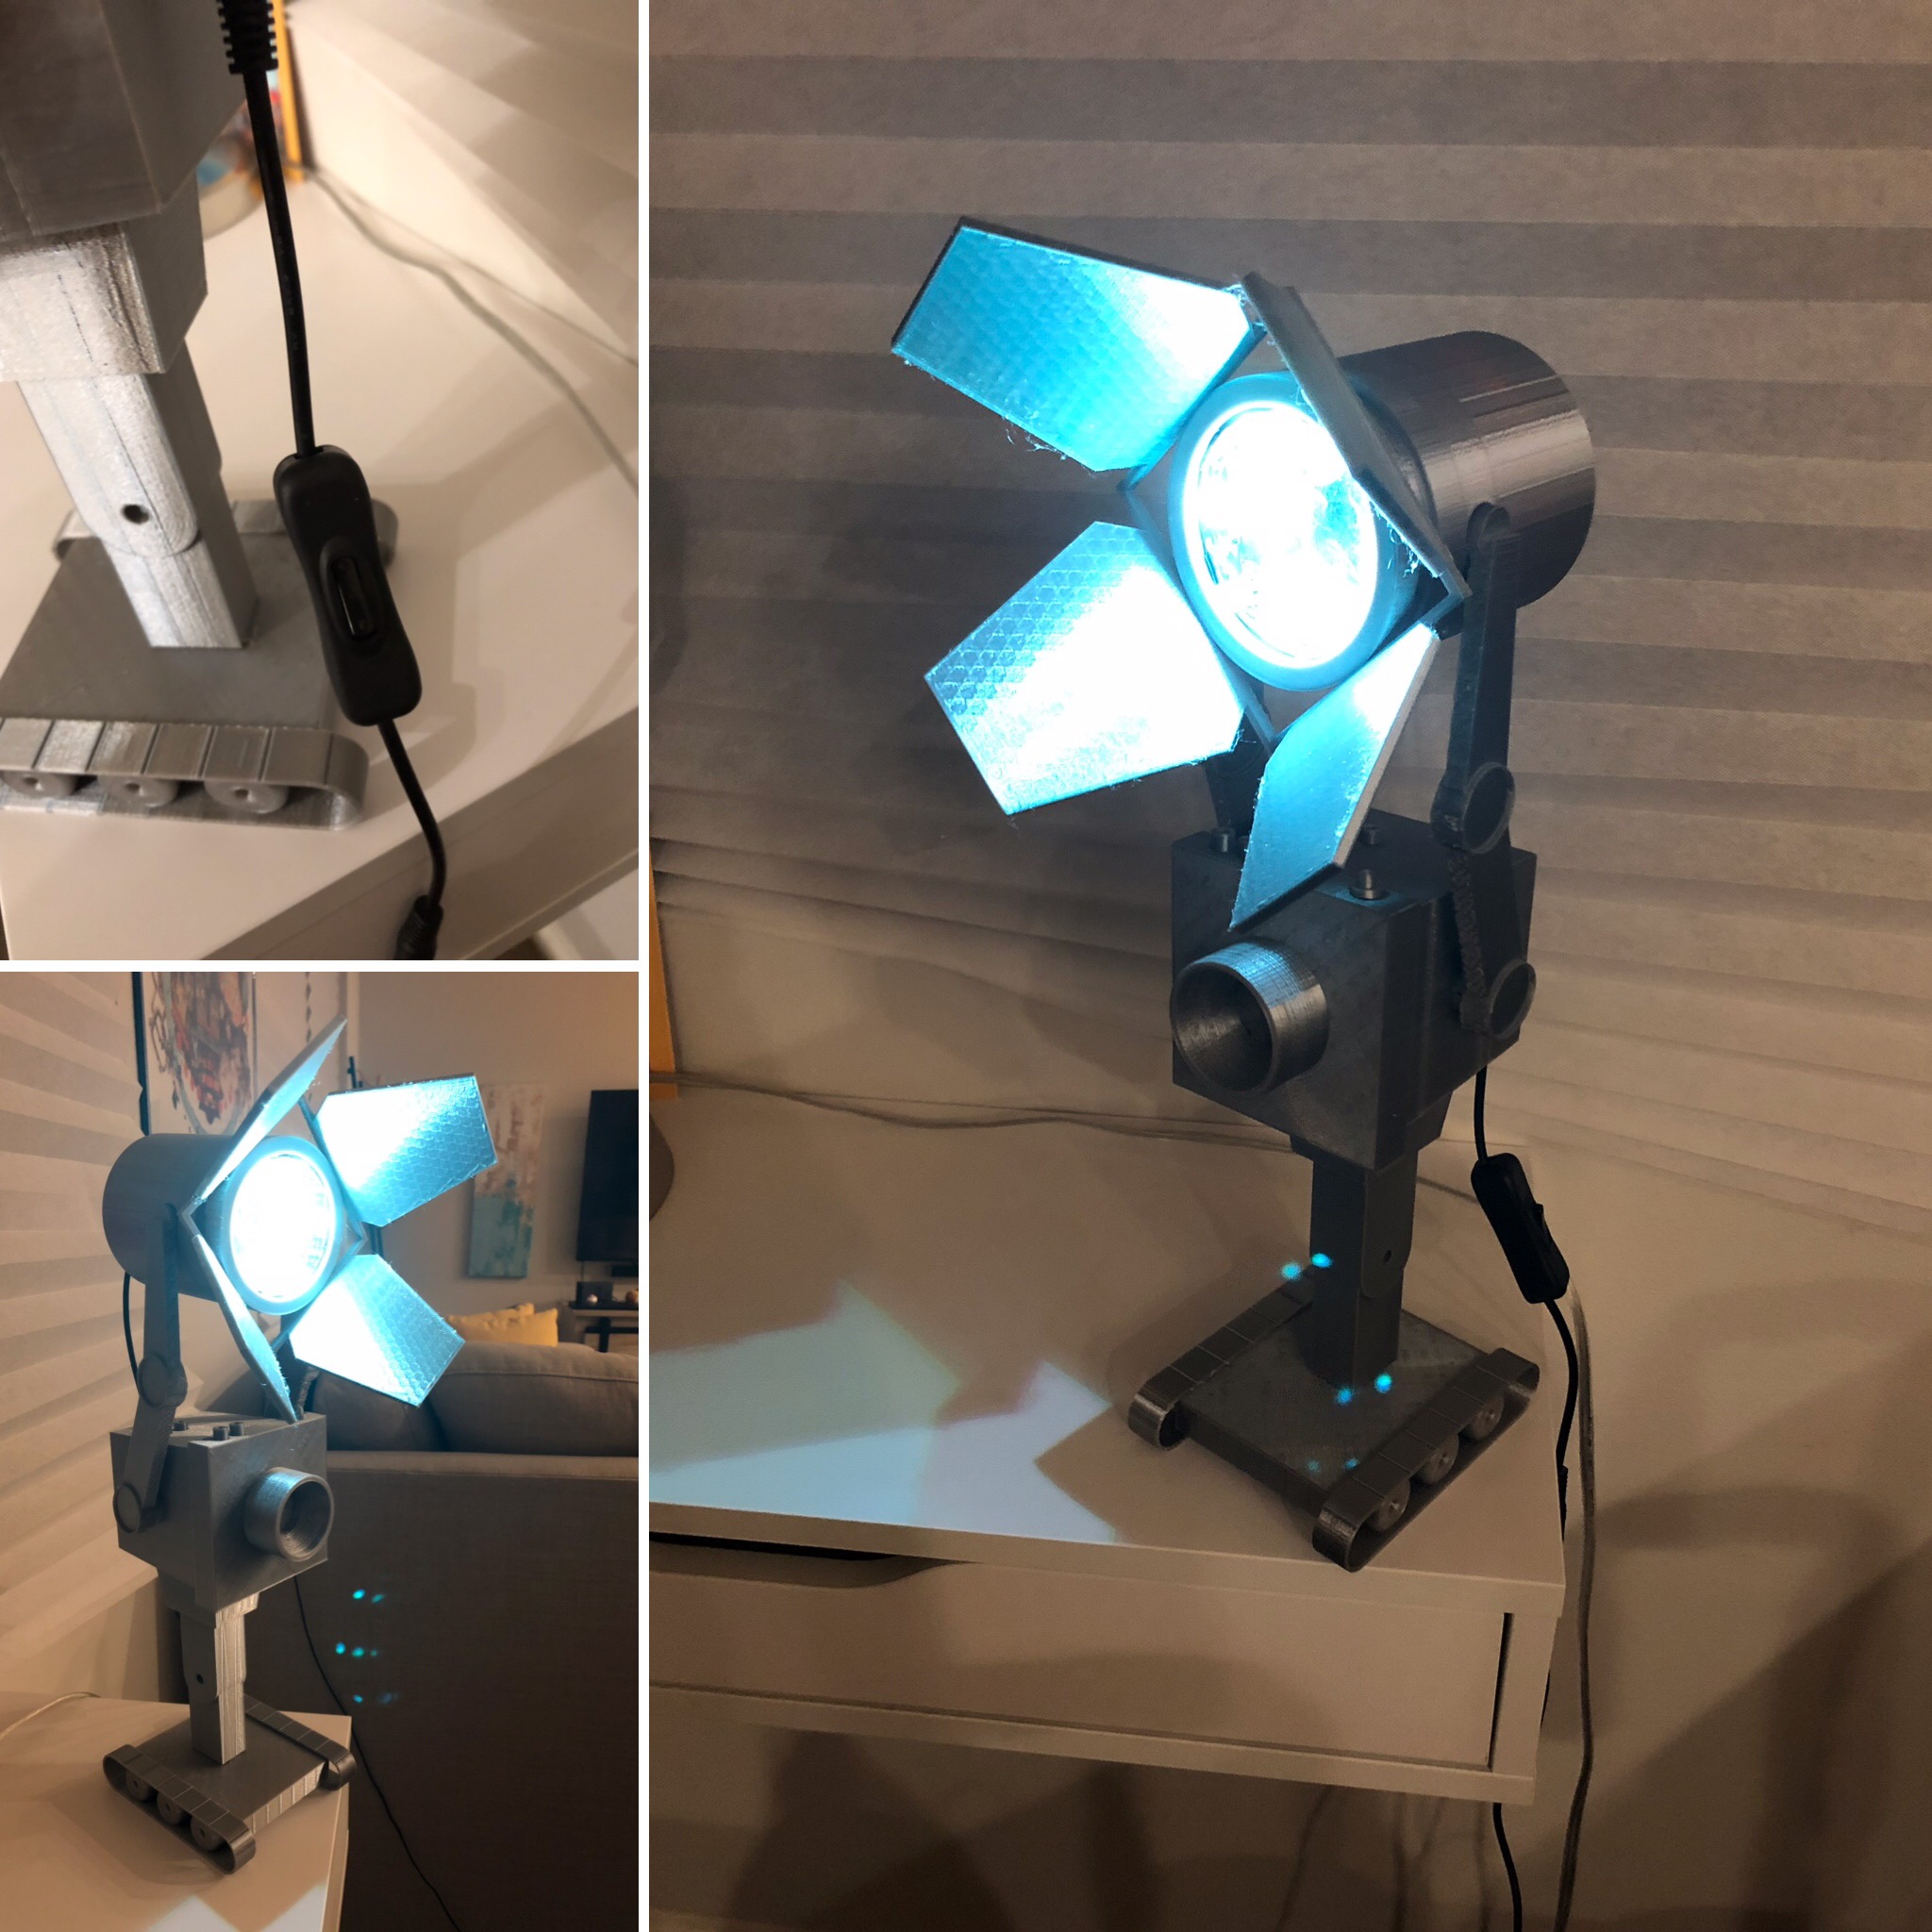
I started off by building a simple spotlight. I took care to add mounting features and access holes for the electronics. I probably could have added more shell layers to prevent the supports from being visible in the leaves, but it's not too bad. I added a piece of aluminum foil at the bottom of the spotlight for a bit more reflectivity.
I love sketching. I still find it the fastest way to get ideas out of my head, and somewhat into the real world.
Since this project is relatively large, I needed to break the printing up into several print jobs. The spotlight itself was printed in two parts--main body and leaves (8.5 hrs, 14 hrs). The ButterBot was broken up into prints consisting of the base (not pictured, 4 hrs), arms (6 hrs), main body + treads (10.5 hrs), and head (18 hrs), for a grand total of 61 hours of print time and roughly 400 grams (almost half a roll) of filament.
Assembly was pretty straightforward since I took care to design everything to fit together well. The arm positions are slightly adjustable and the tilt and rotation of the spotlight leaves can be adjusted as well. I am particularly happy about making domed pegs and holes (upper right) to prevent the need for supports.
The inline DC power jack and DC to micro-USB cable are a lifesaver and are huge in adding easy functionality. They're probably the coolest component finds for this project.
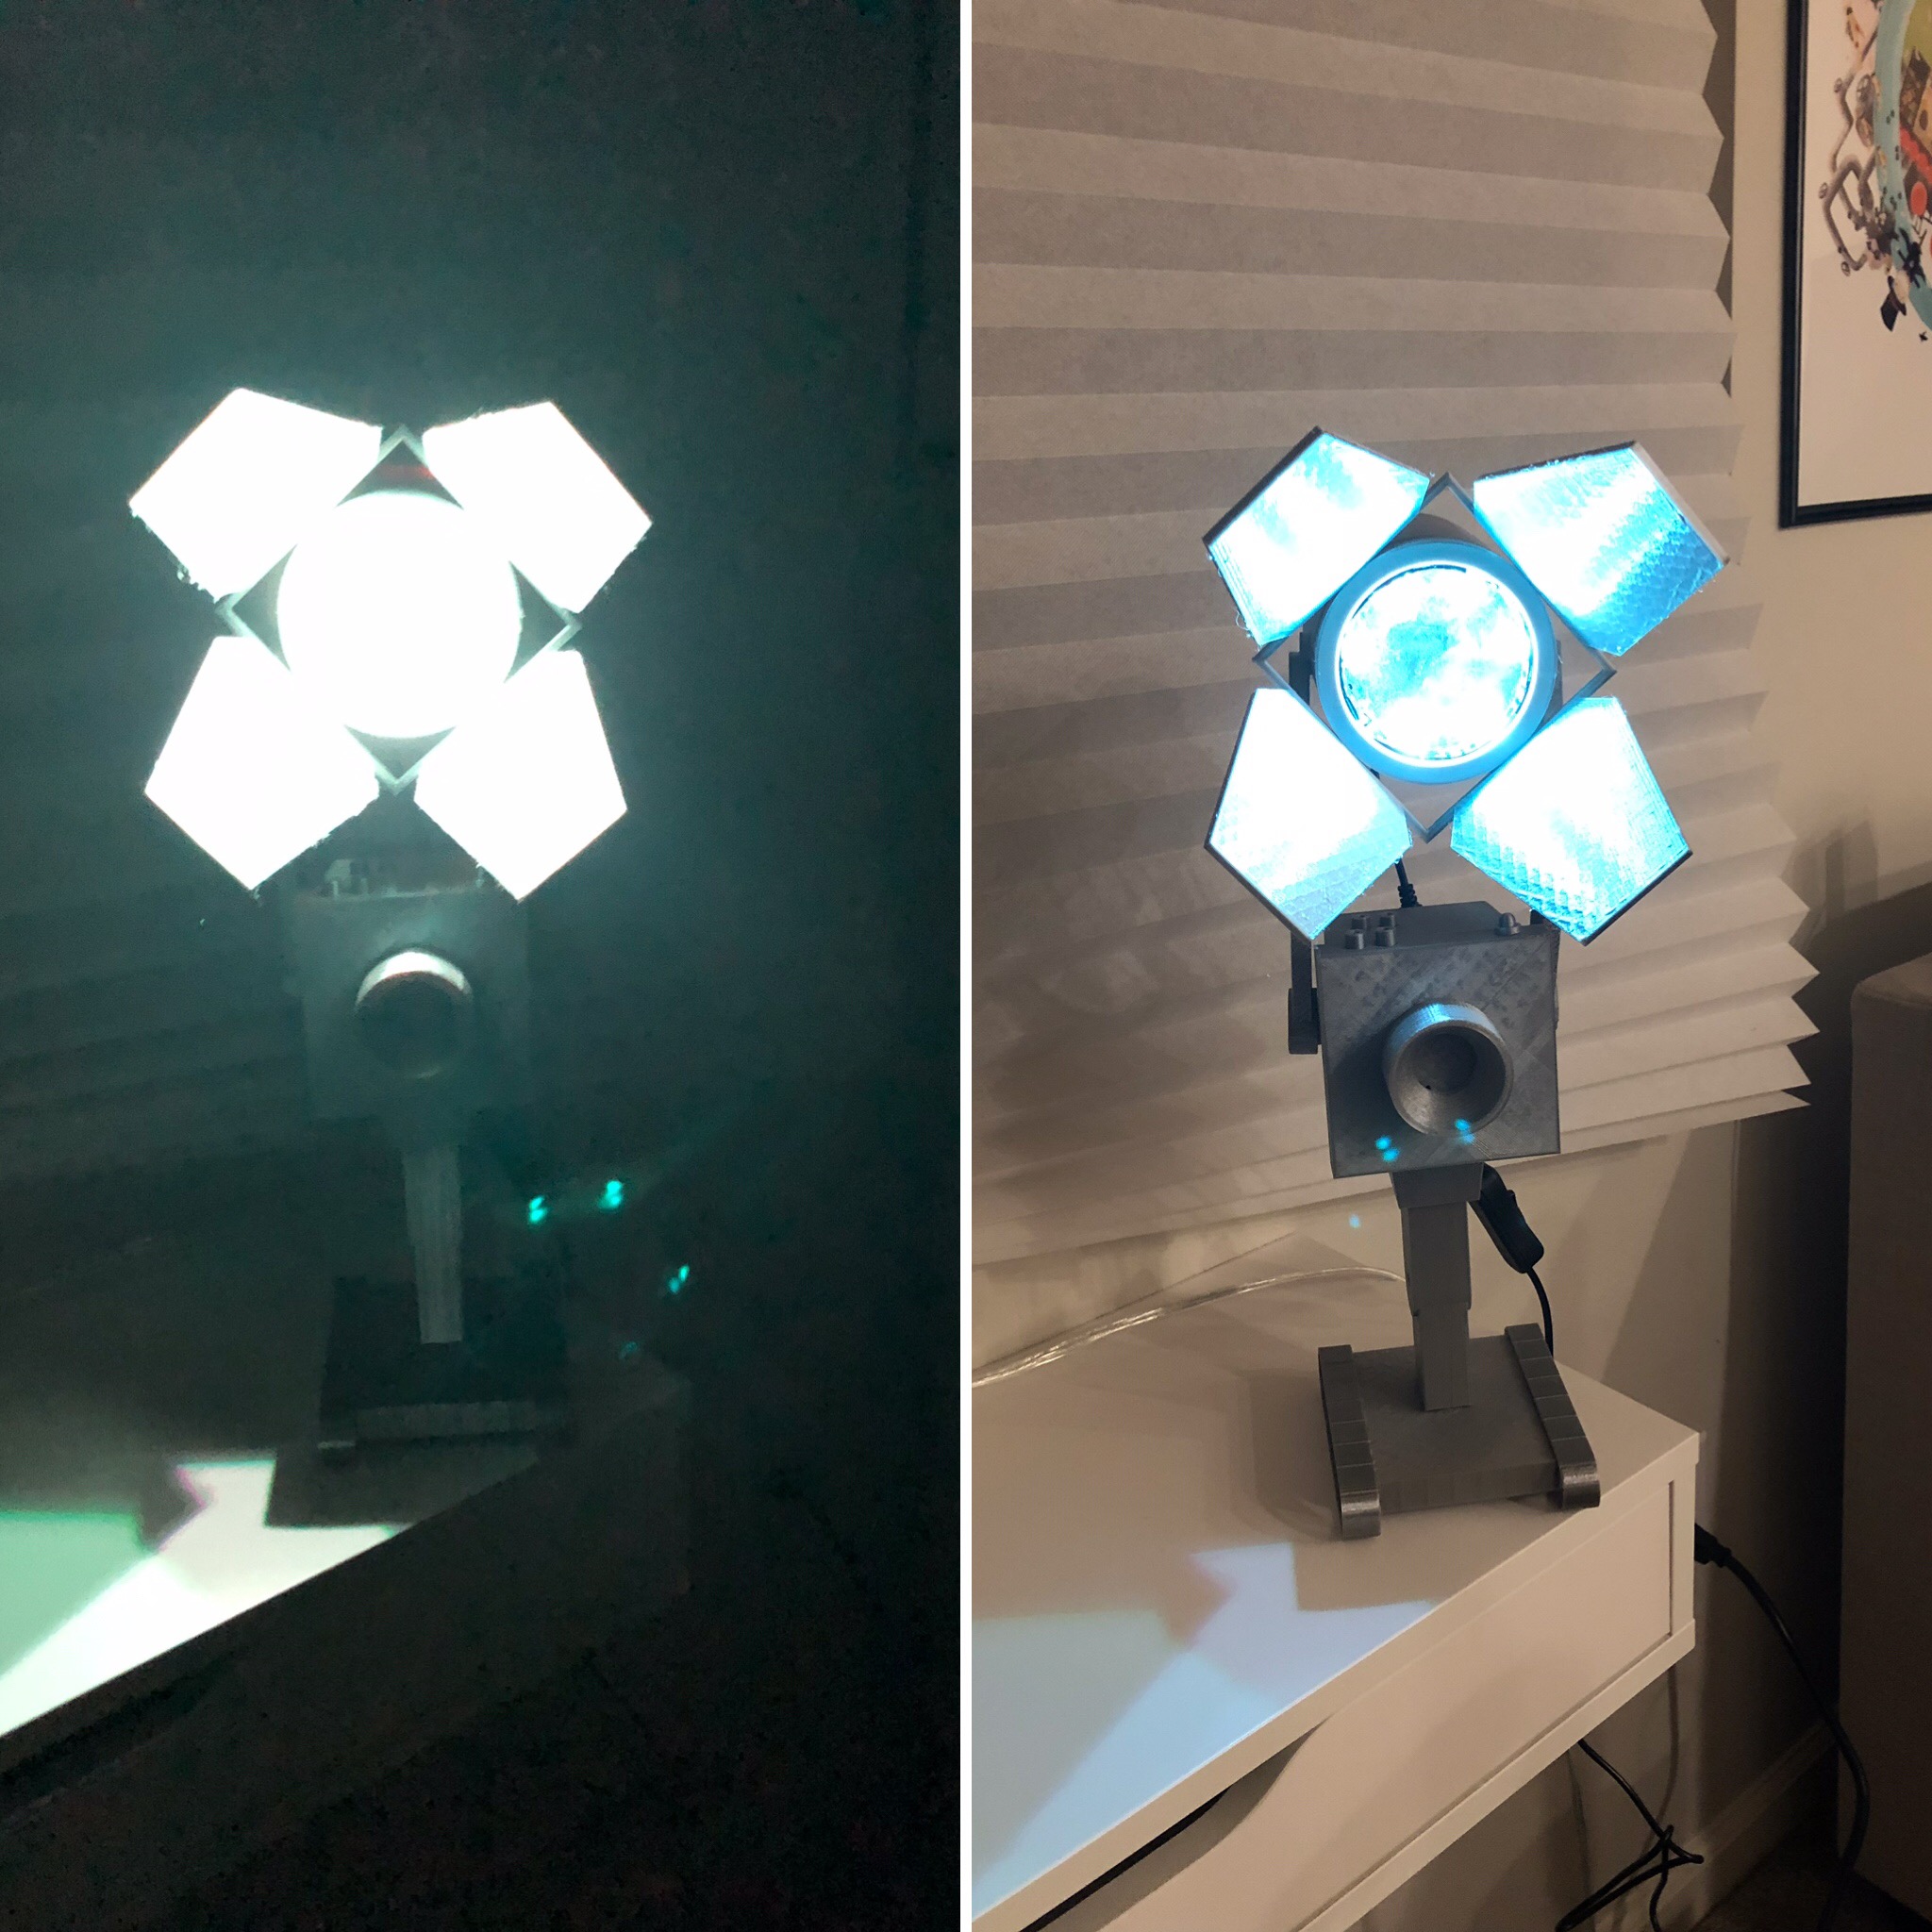
A lights on/off comparison. Sorry I don't have an iPhone 11 pro yet, so my low light shot is whack. I'm actually pretty pleased with how reflective the spotlight leaves are.
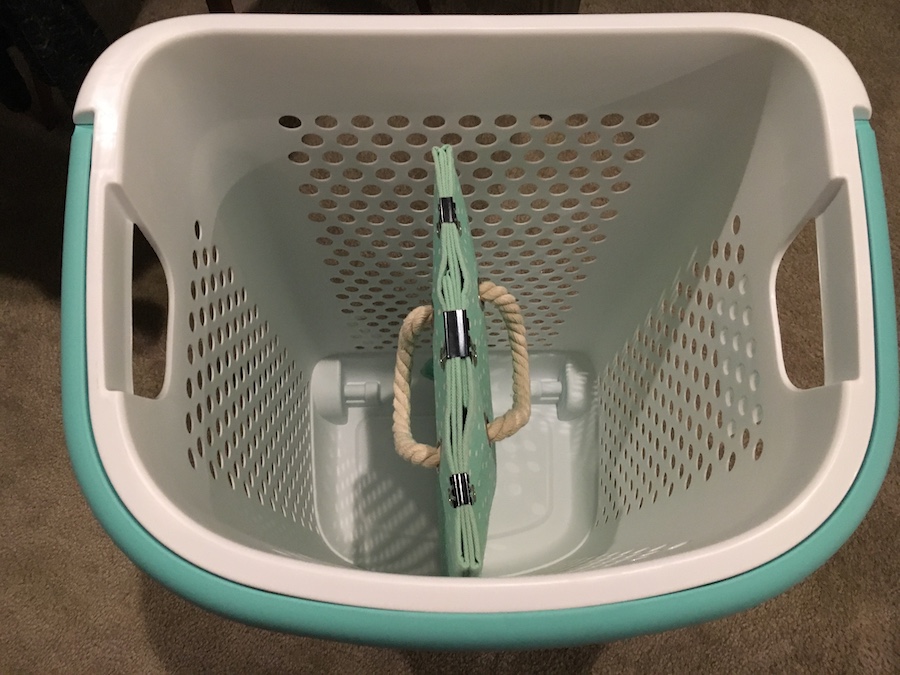
TL;DR: I made a divider for our new laundry bin using material from our old
bin and printing some threaded pins to hold it in place.
We used to have a stiff cloth laundry basket, but there were two main
problems with it. Whenever I tossed my clothes on it inaccurately (this
happened all the time, let’s be real), the walls would buckle a bit under the
weight. Secondly, there’s just a single compartment, and I’m allergic to the
laundry detergent Tiff likes to use.
To fix the first problem, we actually used the ubiquitous 20% off Bed Bath
and Beyond and bought a new hard plastic hamper. To address the second, I got a
bit more creative. Since our old laundry basket was cloth-based, I was able to
fold it up using binder clips. The divider fit very tightly near the bottom, so
I only needed a way to hold it in place closer to the top. I created a pocket
on each side by adding two binder clips around where I wanted to place the
holder.
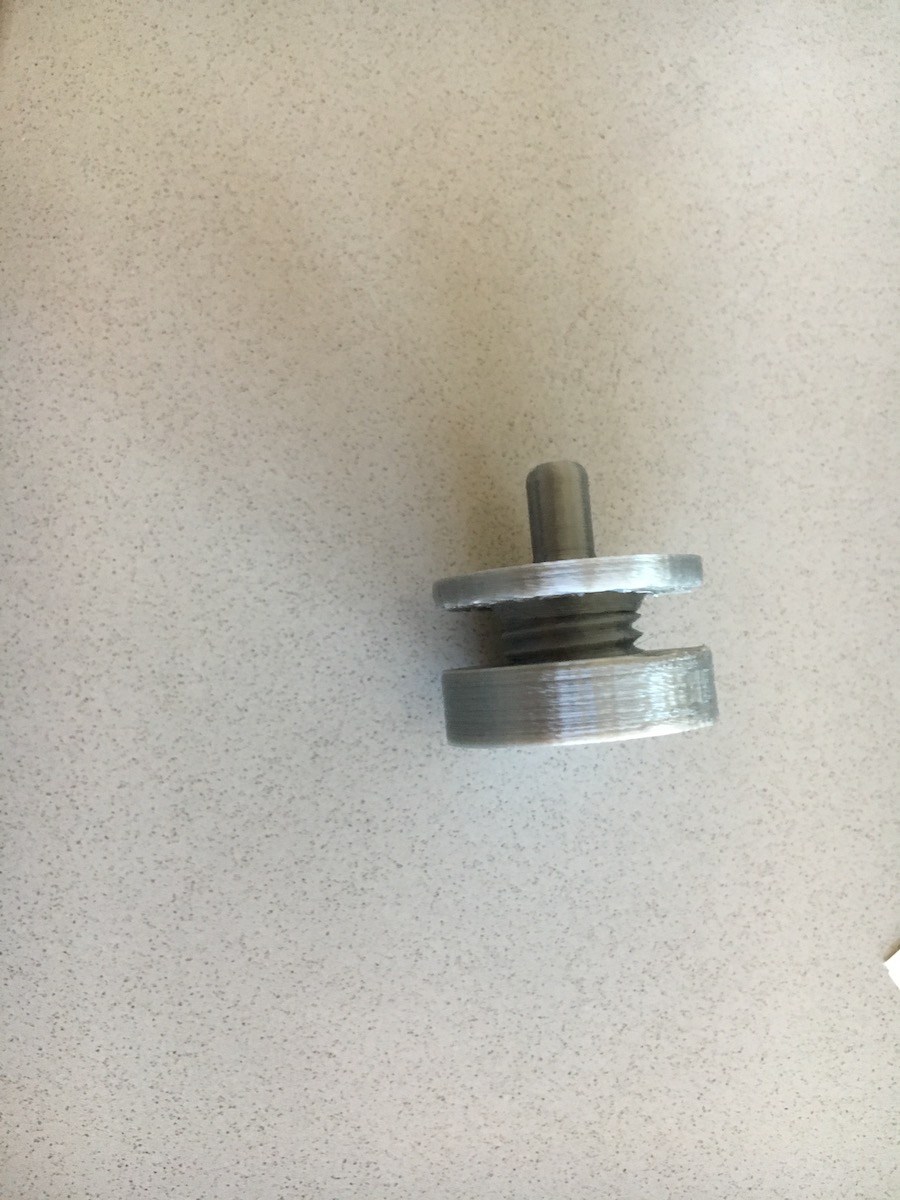
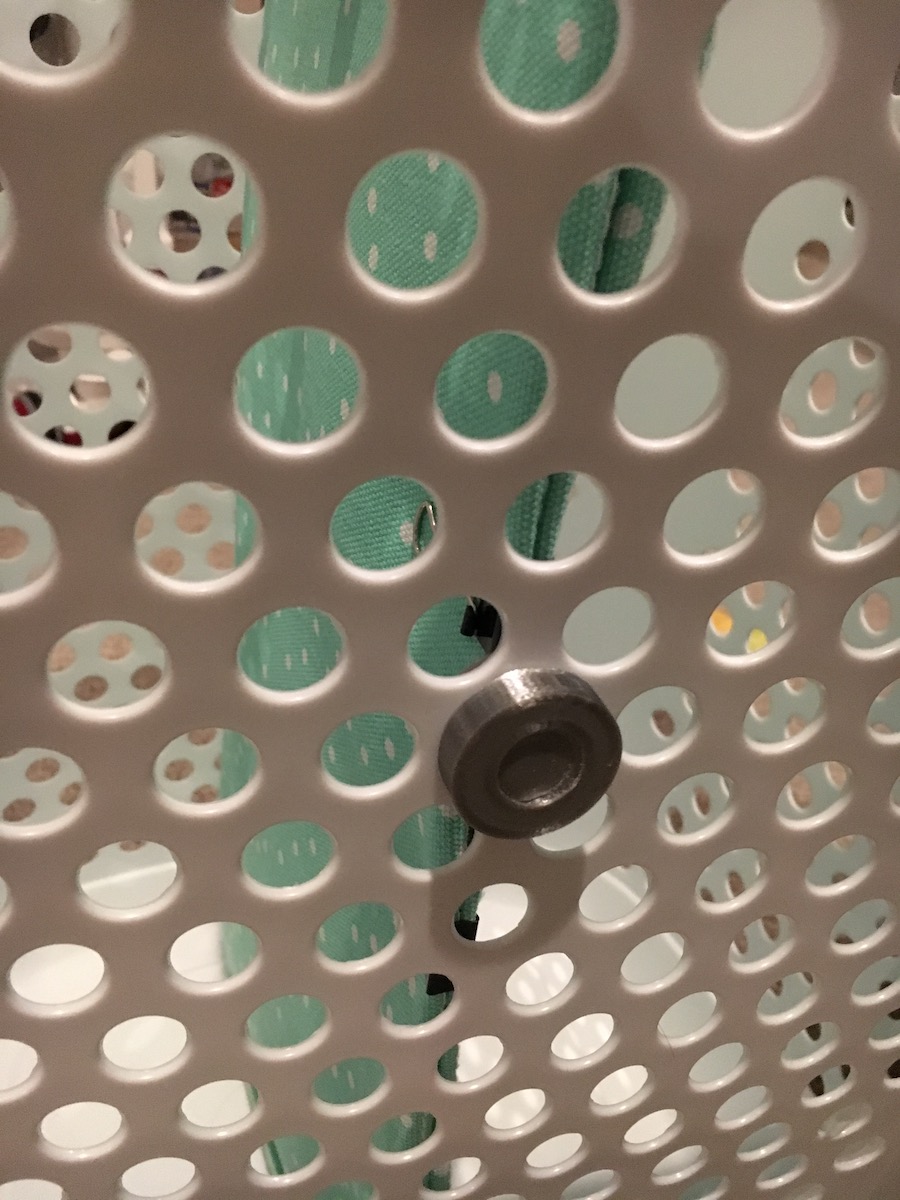
The custom design I went with was very simple—it’s a simple threaded pin and
retaining nut. I measured the hole I needed to fill, extruded a few cylinders,
and added threads, ezpz. About two hours on the printer later, I installed two
pins with nuts on the basket and put the divider into place.
I’ll be the first to admit that this isn’t my sexiest design ever, but it’s
quite utilitarian.
Here’s a few build photos:
The first step was to measure the size of the holes I needed to fill.
I was very happy that the threads were large enough such that they worked well on my printer without any issues.
Part 1 of the installation--adding the thread through the hole
Part 2 of the installation--fitting the divider onto the pin head and tightening the nut.
Here's a top view of the basket with divider installed. As a bonus, the color schemes matched pretty well 🙂