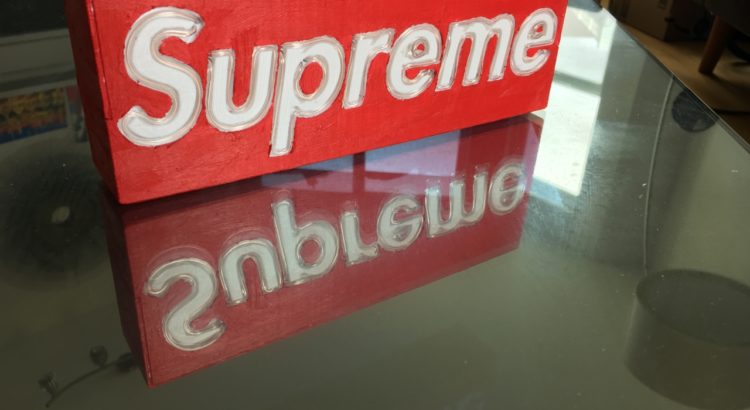
TL;DR: For my friend Teddy’s birthday, I made him a hypebeast worthy (if I
do say so myself) Supreme EL box.
My good friend Teddy is one of the biggest hypebeasts I know, so I wanted to
make something he would like. I went back to the EL wire well again for this
project (see: headbands https://www.andrewpip.com/2019/03/28/el-wire-lighted-headbands/
and sign <https://www.andrewpip.com/2019/04/07/faux-neon-signage>).
However, I needed to dig into my paint supplies dating all the way back to my
Iron Man Mask (https://www.andrewpip.com/2018/05/06/infinity-war-masks).
Conceptually, this project was relatively simple:
I made a box.
I cut some channel shaped holes in the box.
I painted the box.
I put my wire through the box.
I gave Teddy the box.
For this project, honestly I think the gallery will explain things better than I can in words, so here it is (it looks nicer if you click to open the full-sized images):
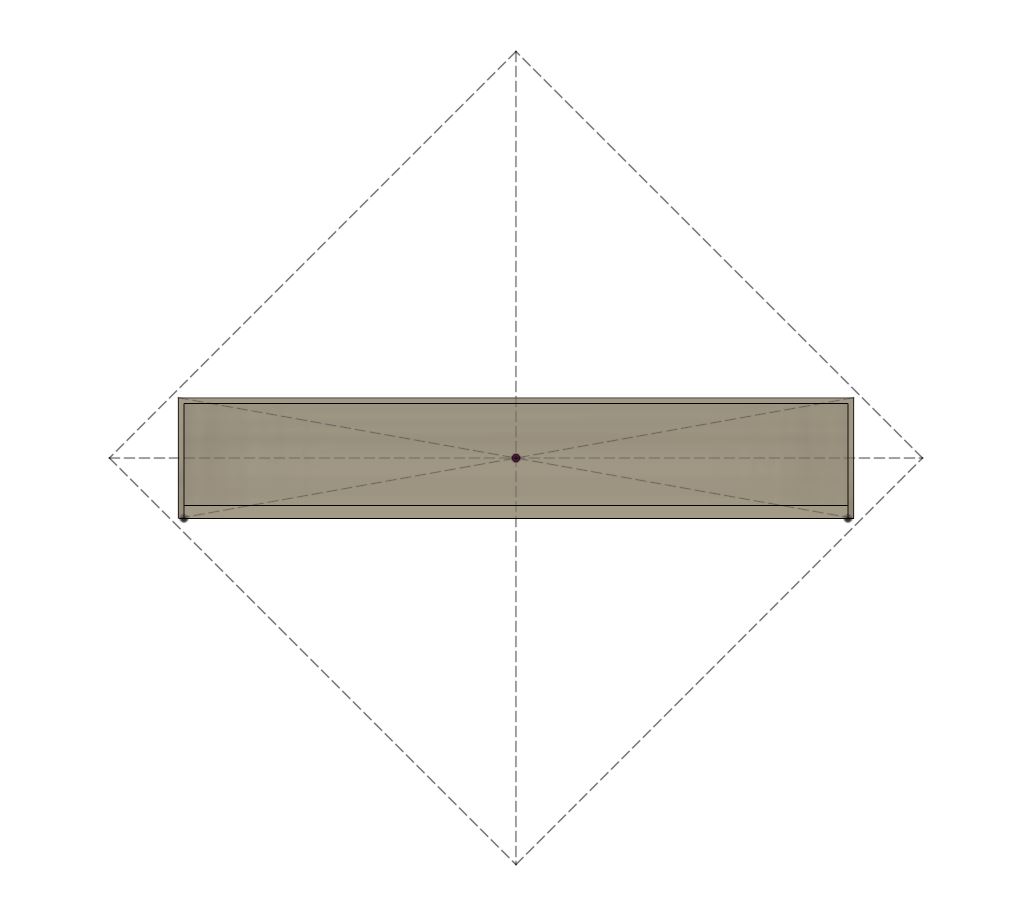
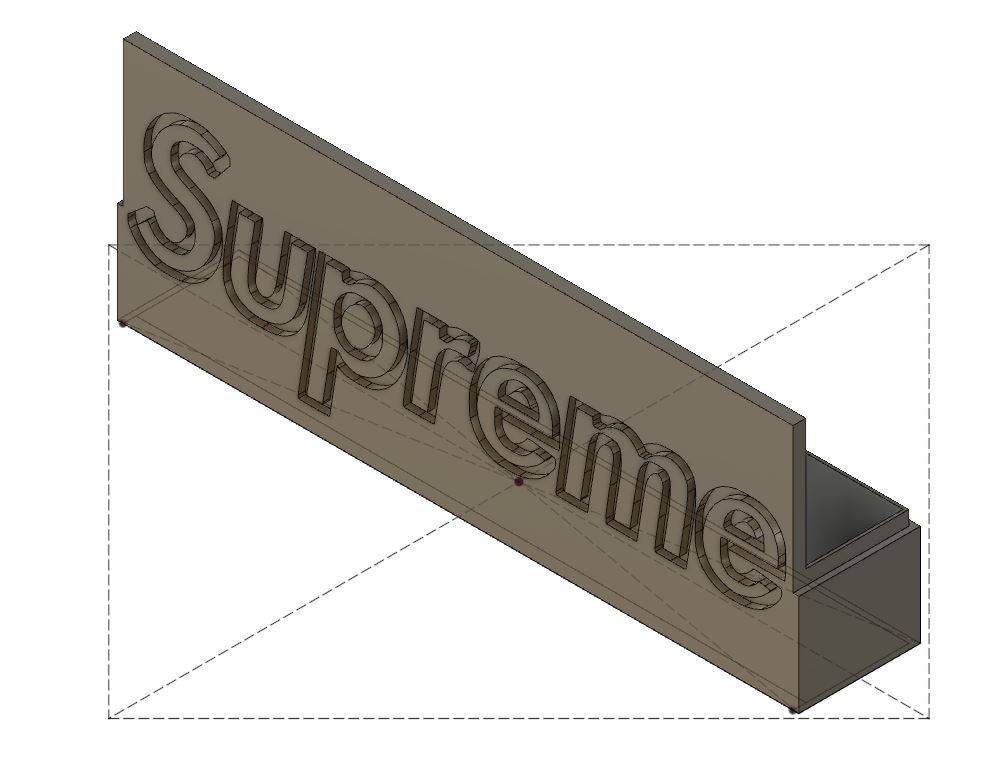
The outlined box shows the extents of my 3D printer's bed (200mm x 200mm). I wanted to make this single part as large as possible, so used a single master sketch to lay out all the features.
I used my layout sketch to extrude all of the basic box features very quickly. Completing a lot of the planning up front was a great time-saving investment.
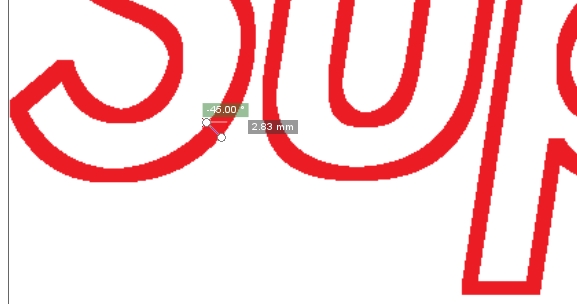
I created a stroked version of the logo in Gimp in a similar way to what I've done for previous projects. In Inkscape, I did some minor spacing and resizing tweaks to make sure the EL wire would fit well.
I inserted the SVG version of the logo and made a simple extruded cut.
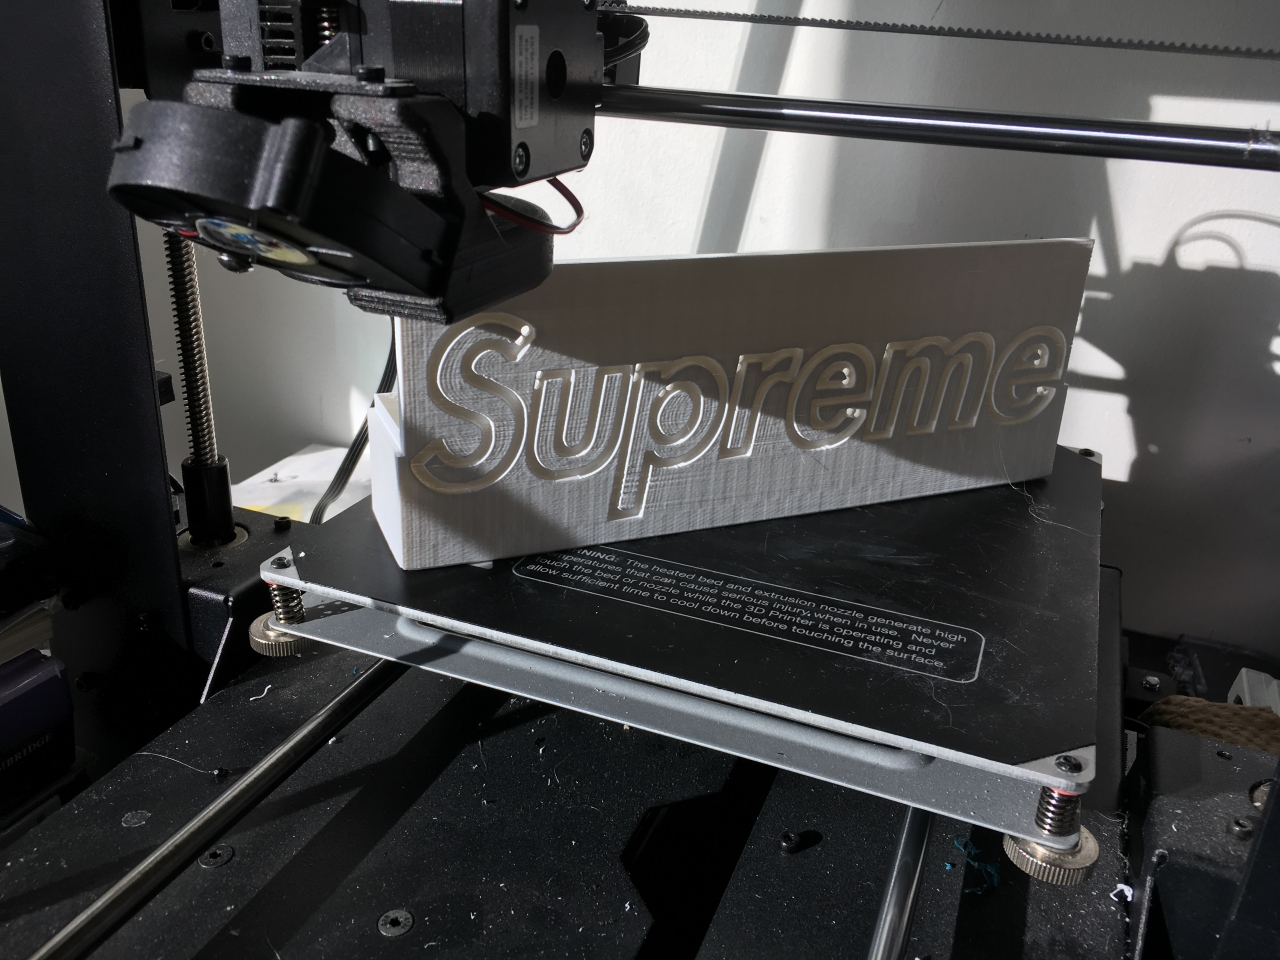
This print maximized my available print area, as planned. If you look closely, you can see where I placed the wire pass-thru holes.
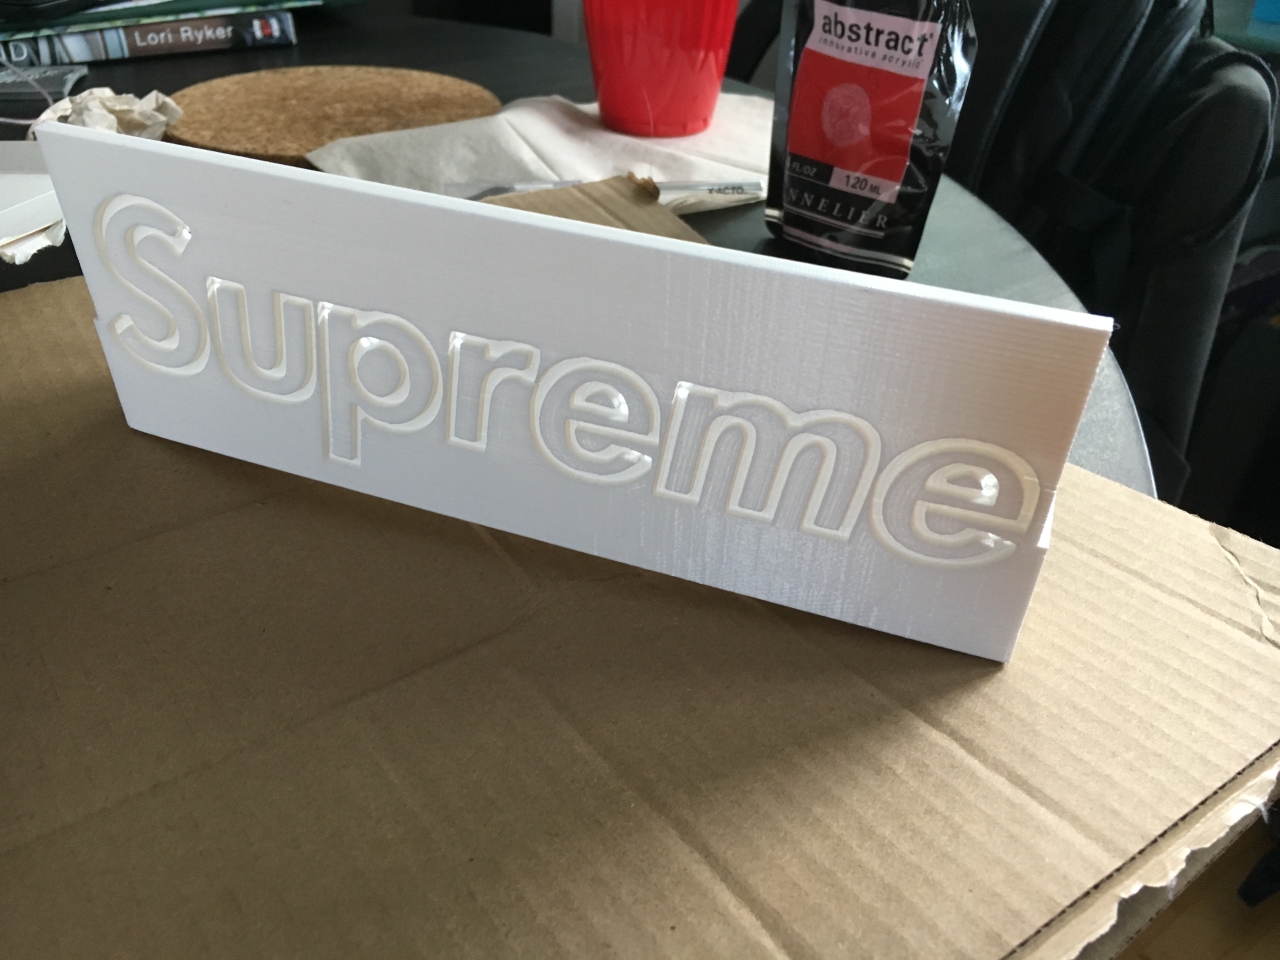
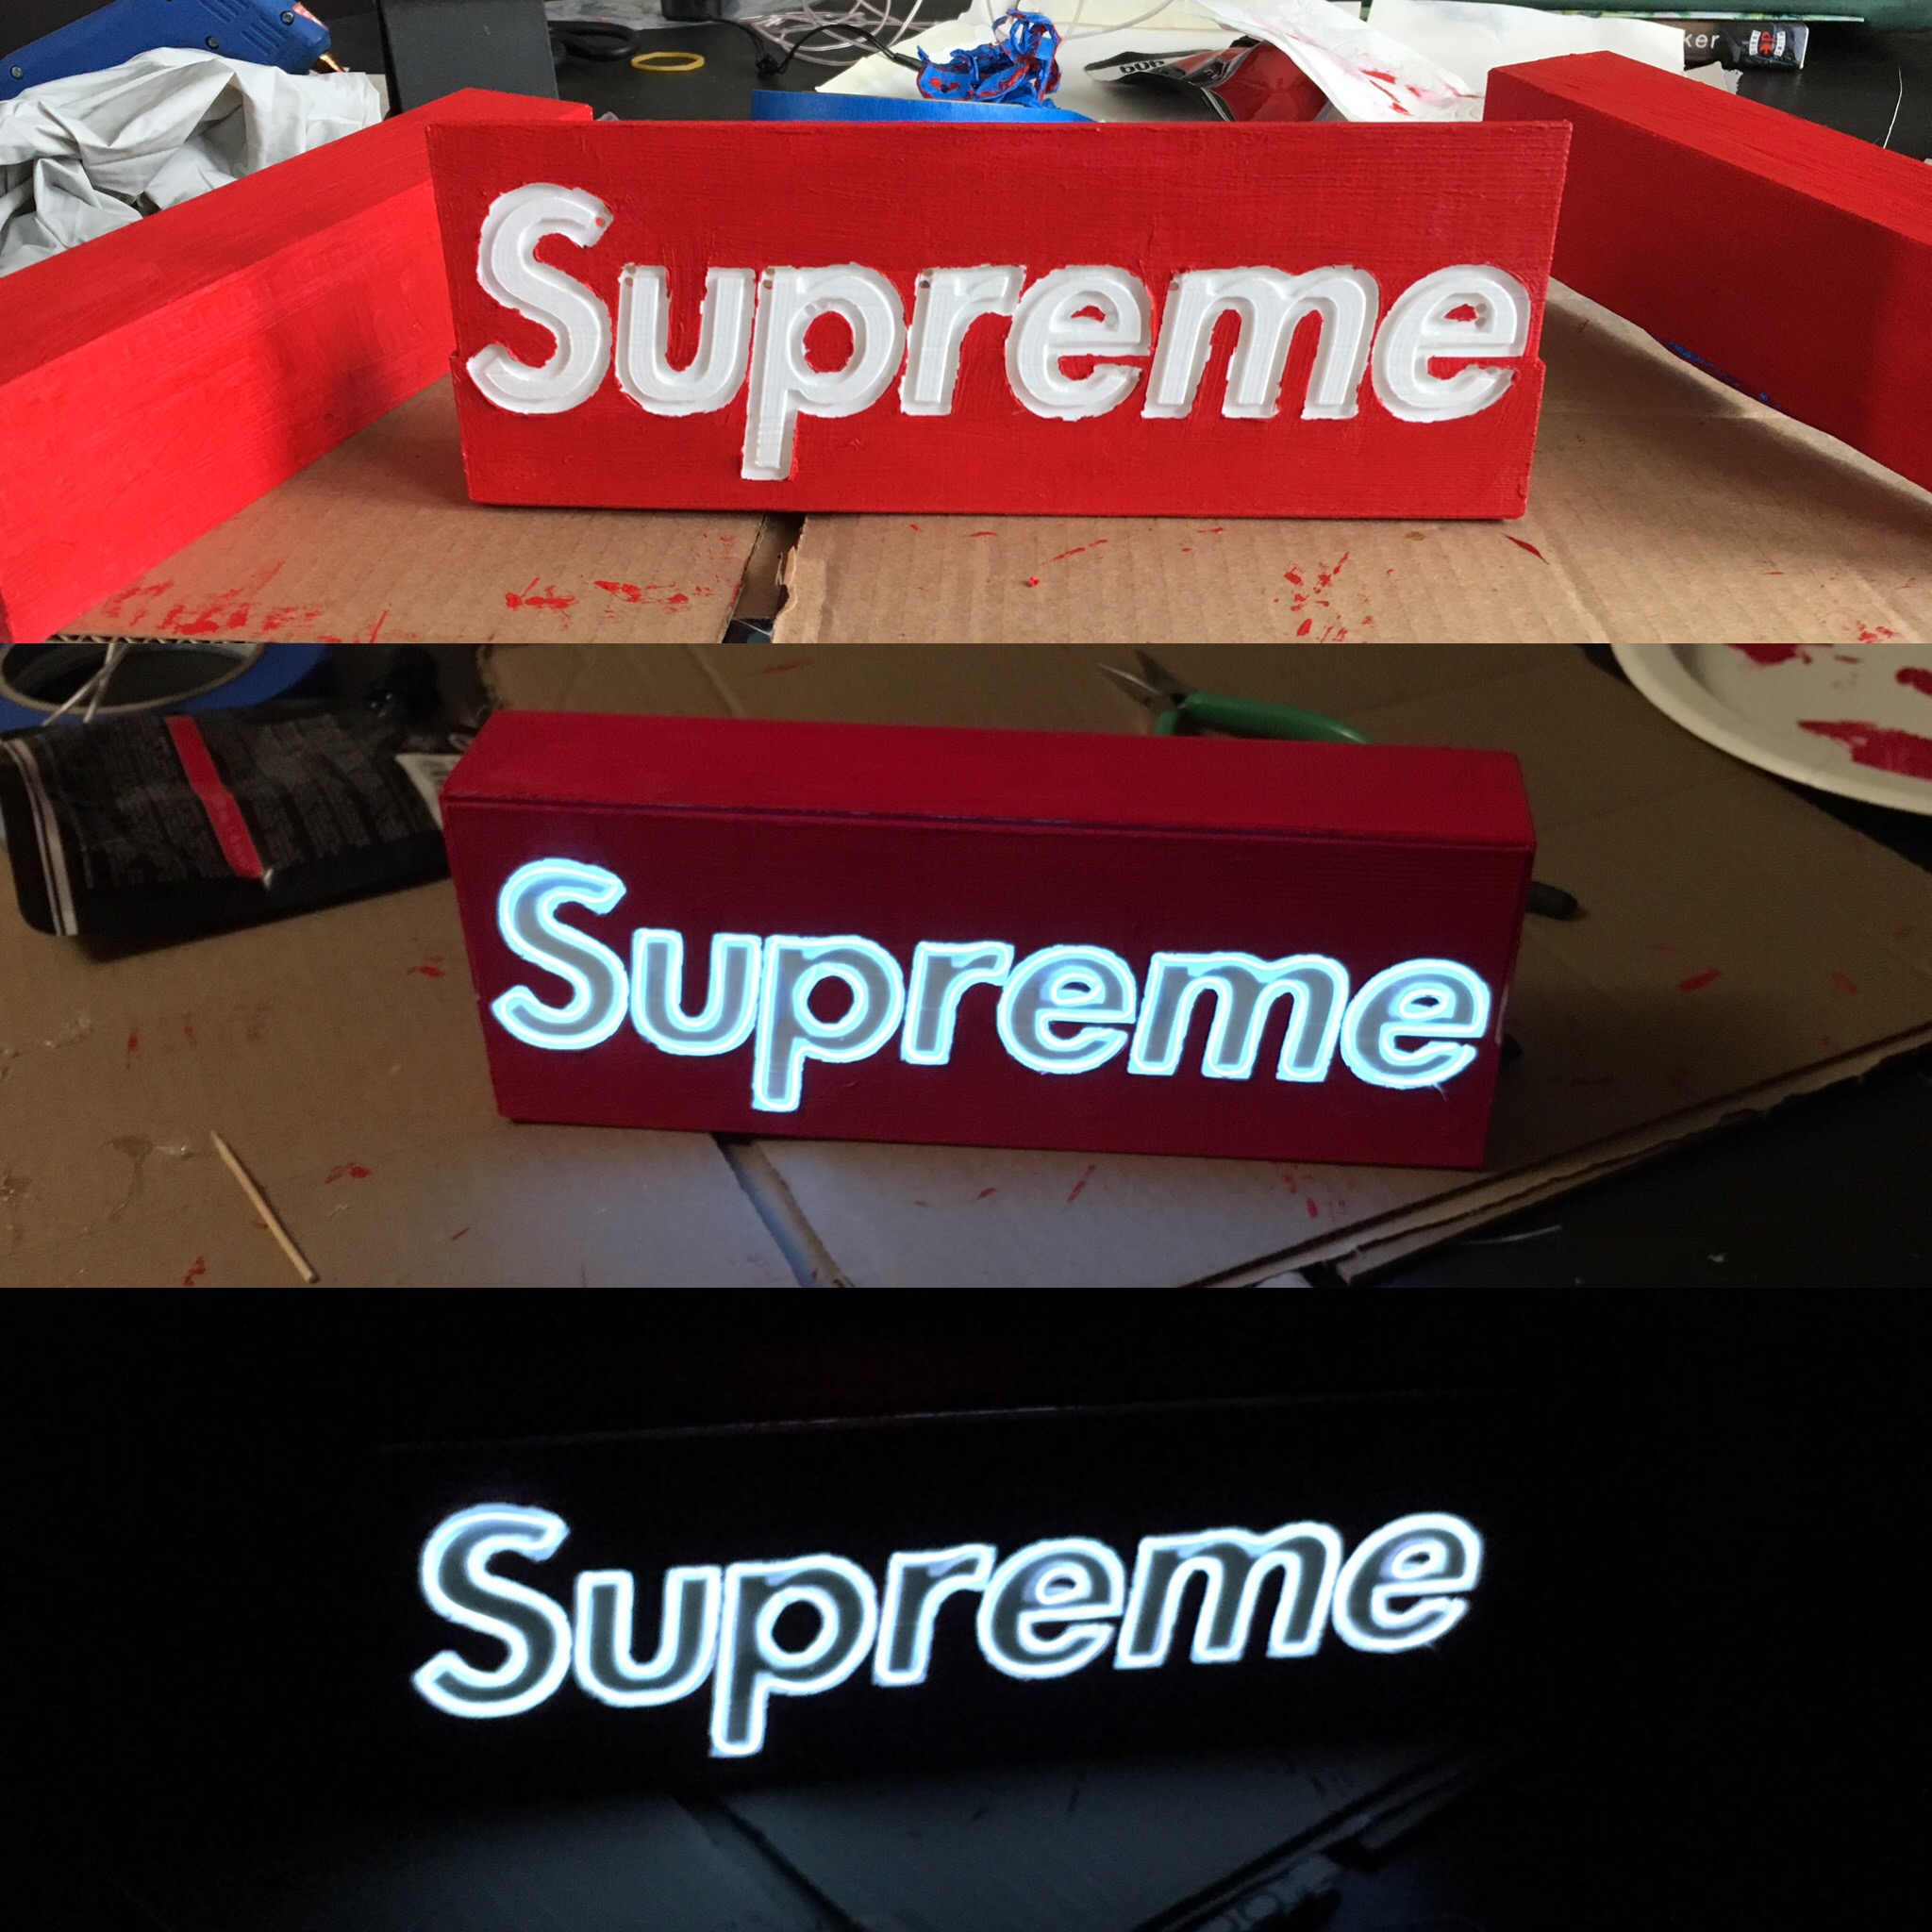
Off the printer, ready for painting...
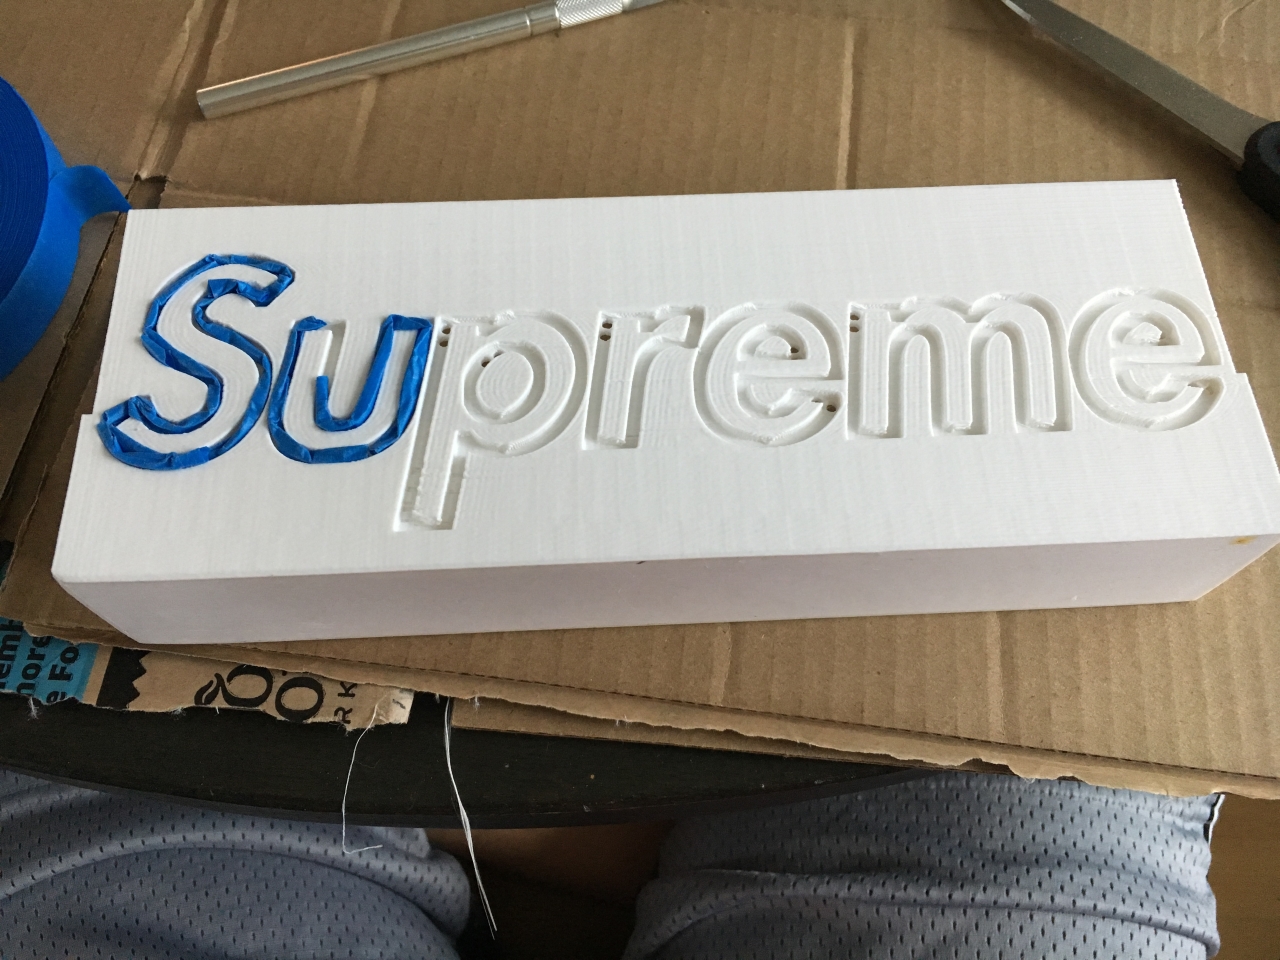
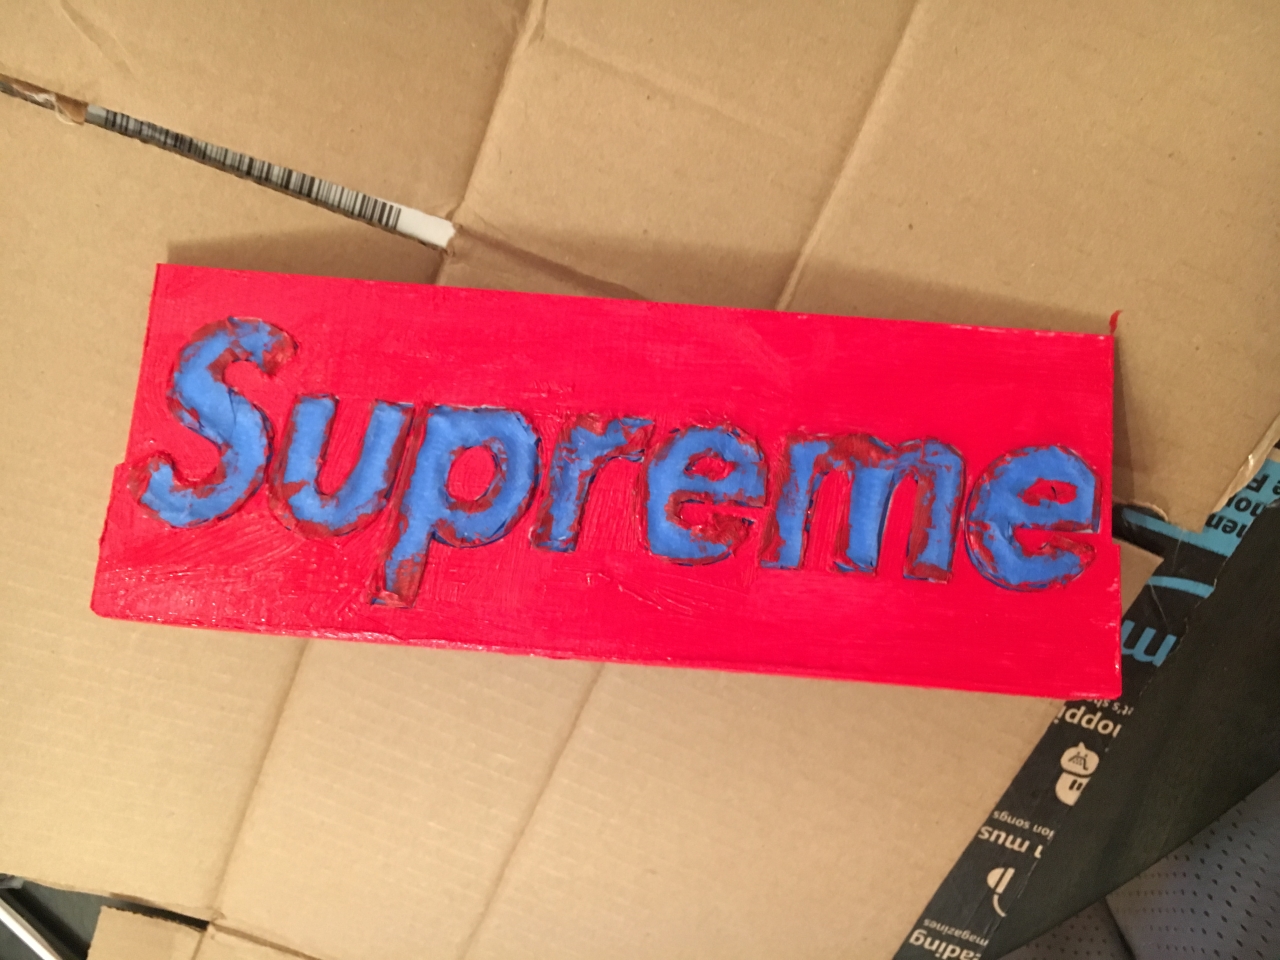
Just kidding. I had to add a lot of masking to stop the paint from entering the channels and cross over into the lettering.
The masking took longer than I anticipated... If I were to redo this project, I would make this assembly into 3 pieces and just print the box in red PLA instead of trying to paint >.<
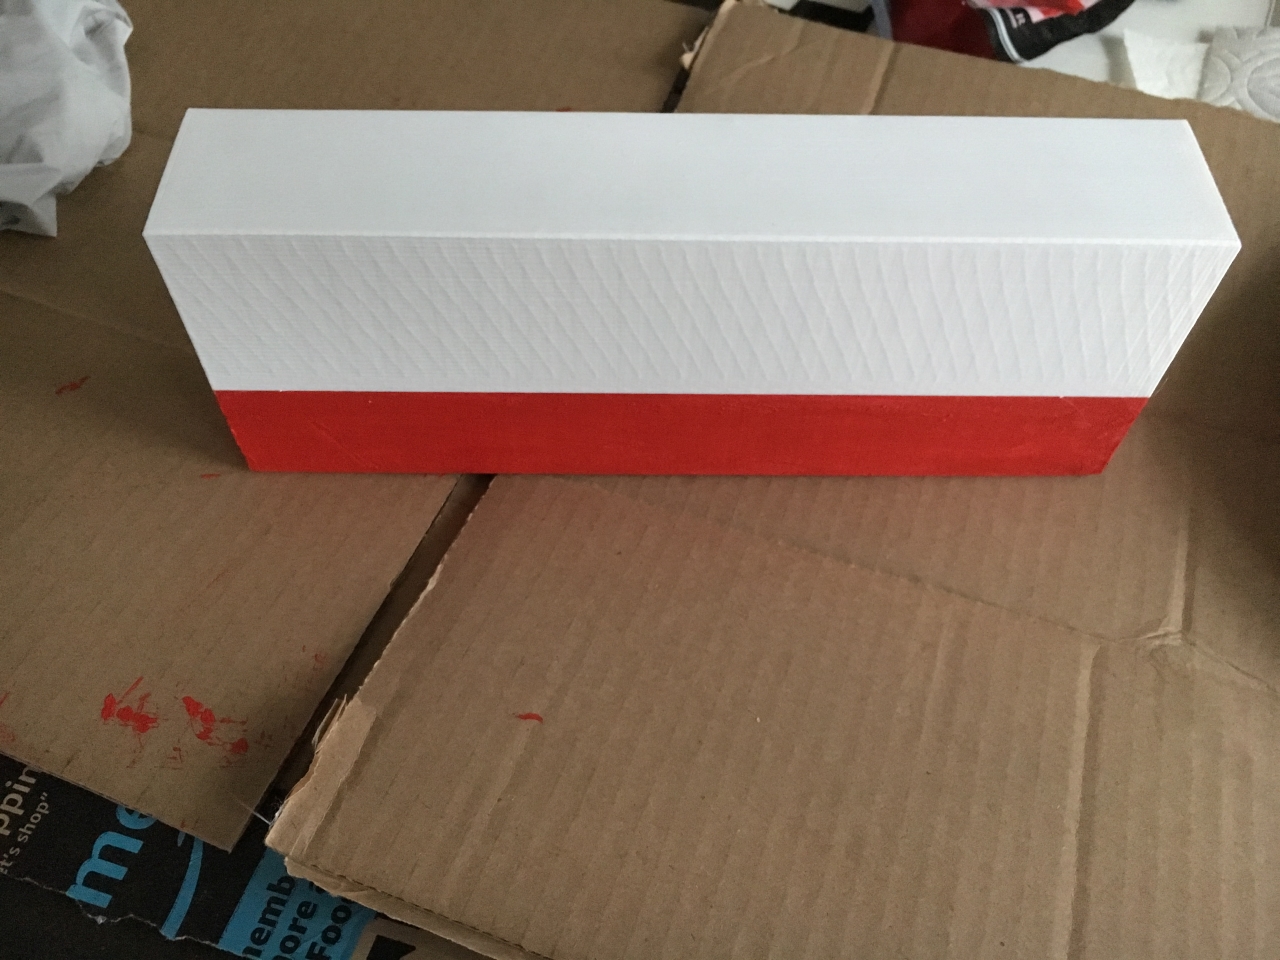
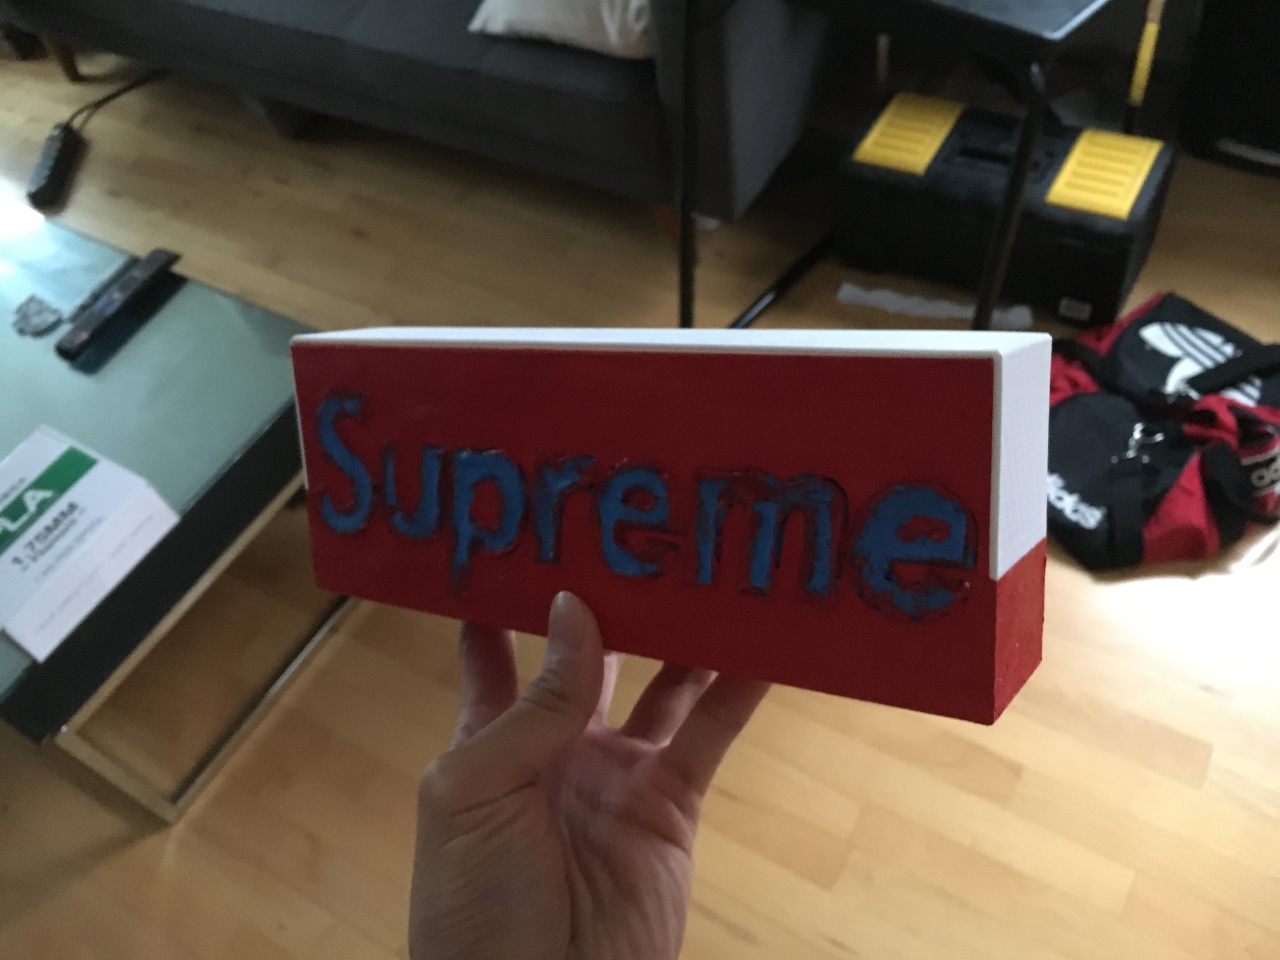
While I waited for the paint to dry, I printed the lid. Unfortunately it looks like I've got some printing artifacts that I need to address. Luckily, the paint ended up covering up most of this ugliness.
Here's the fit check of the lid from the front
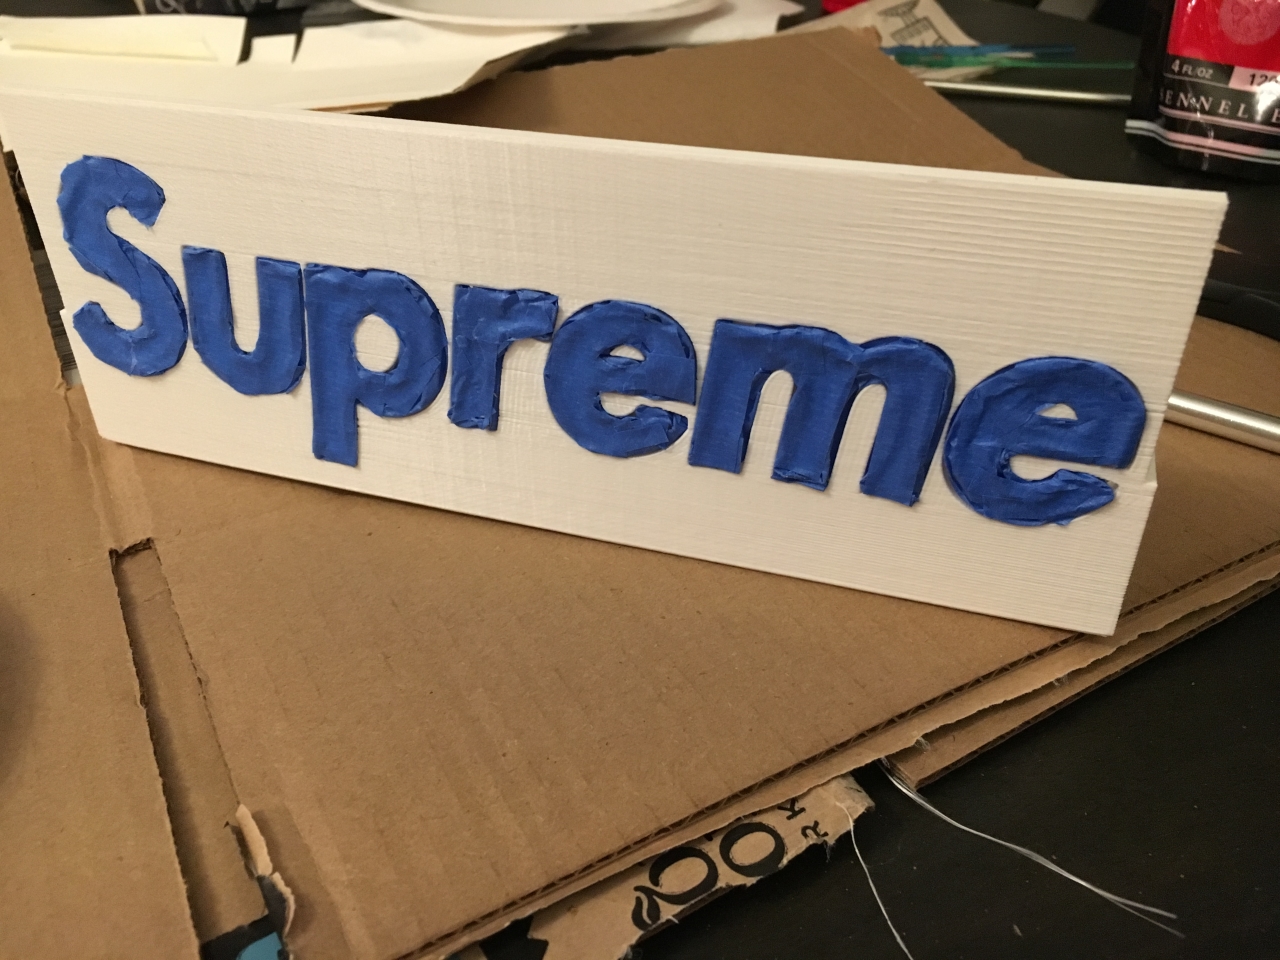
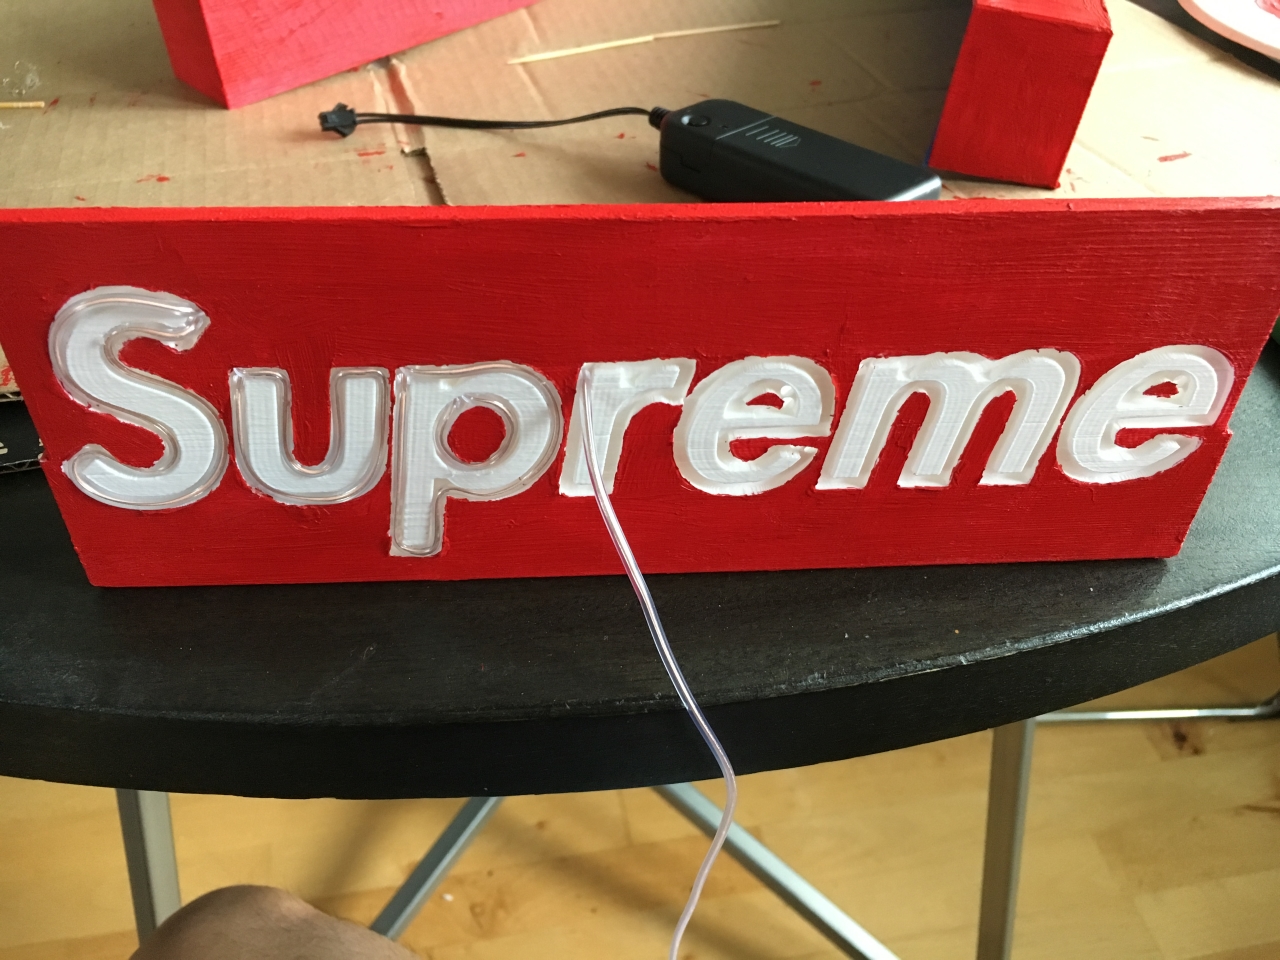
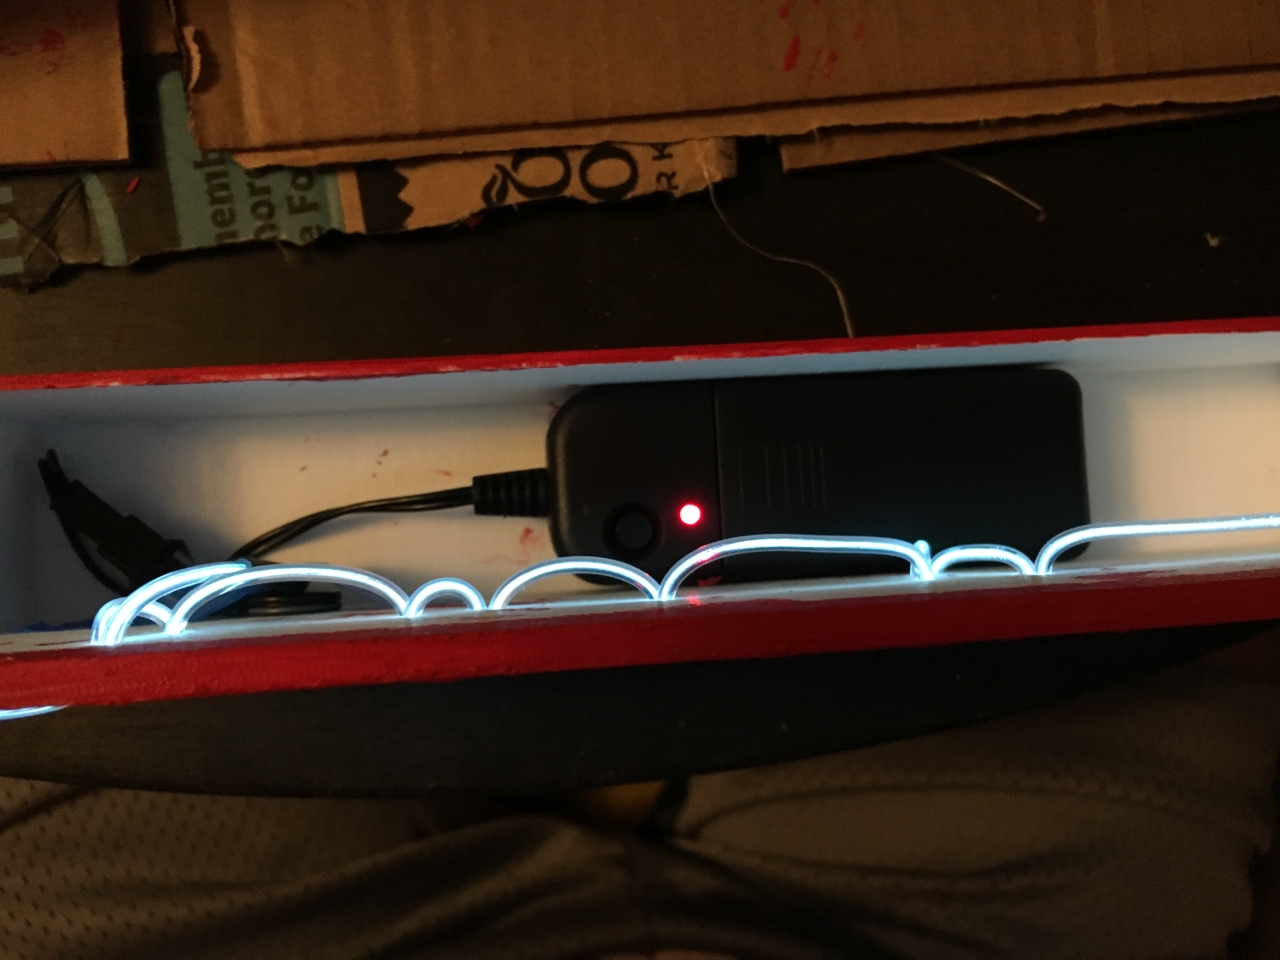
I peeled the blue tape mask off and started adding the EL wire. Not pictured is the steps where I went back in with a toothpick before this step to add/remove tiny specs of red paint where the masking was imperfect.
Here's a look inside the box after stringing--the control box fit inside perfectly... almost as if it was designed that way 😉
Here's a glamour shot... I ended up adding a bit of hot glue to help hold the central portions of the e's down.
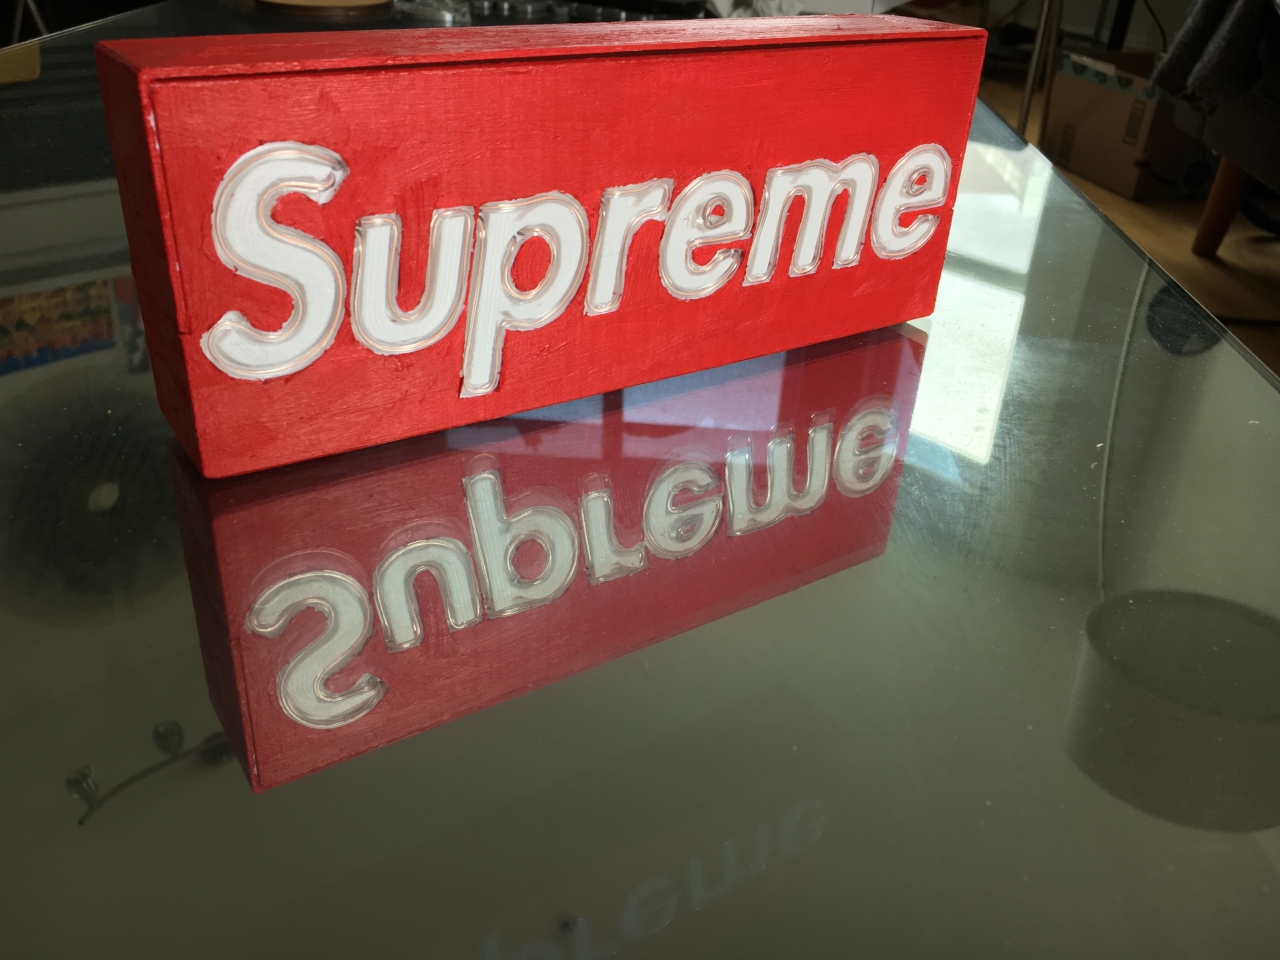
The payoff was really worth it for this project. I really love how this box turned out... I think it looks even better in the dark!
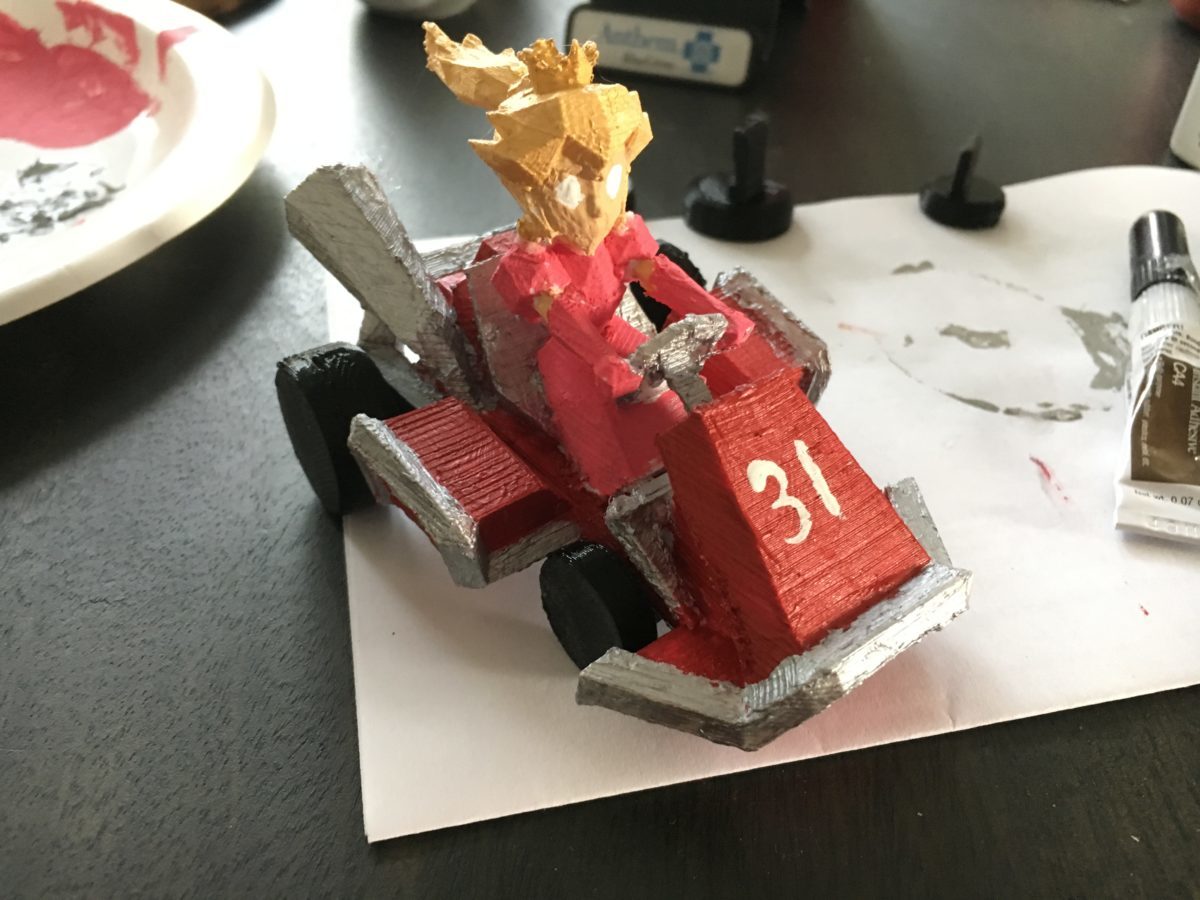
TL;DR: I printed and painted Peach from Mario Kart for a friend’s birthday. The
model came from the video game and I think it turned out pretty well.
Back in the ancient days of Sophomore year of undergrad, my drawmates and I
spent hours playing MarioKart 64. My roommate would always grab Peach before
anybody else, so I decided to make him one for his birthday. I got surface
models from a Mario Kart video game then did a bit of patching work to make
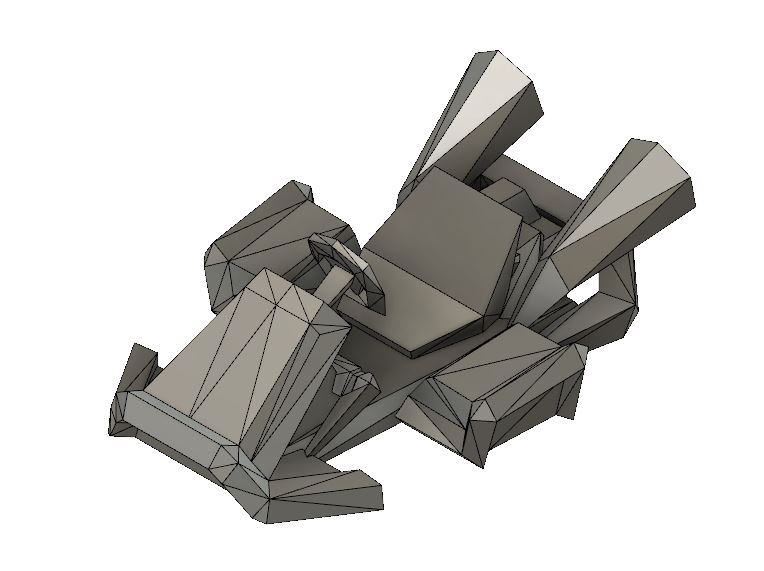
everything into a nice solid model. The Kart and Peach came as two separate
files which I combined into a single model for printing.
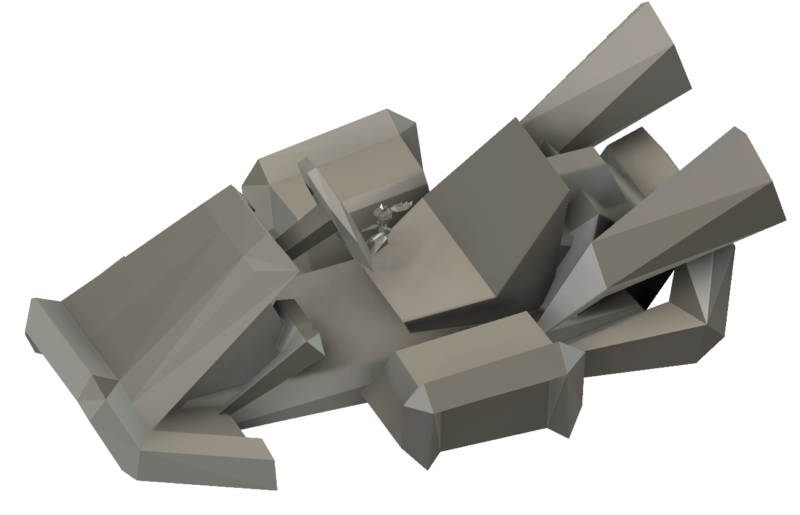
This is the solid model of the kart itself after conversion from game surface models. I had quite a bit of patching work to do--the surfaces were very fragmented. This model also did not come with wheels, but that wasn't a big deal.
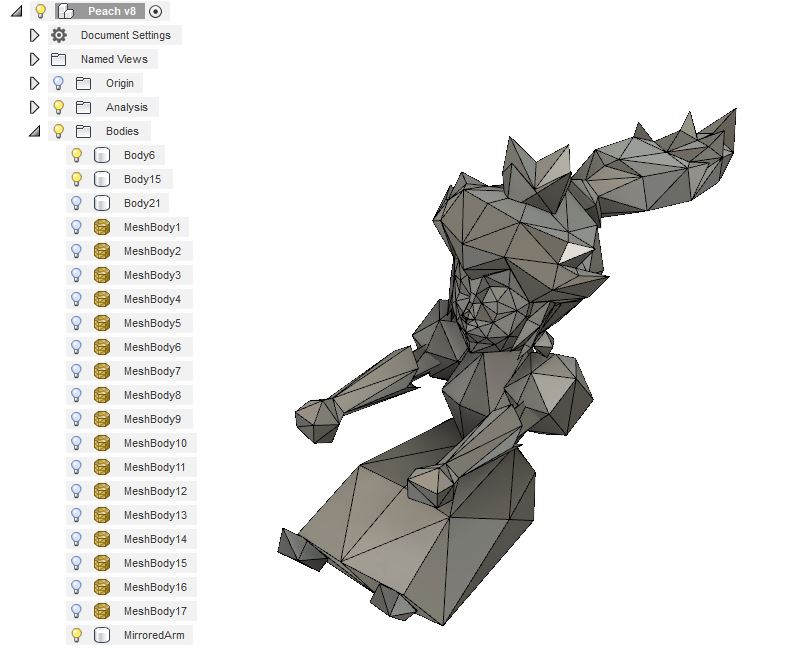
Peach herself came in 17 as separate mesh bodies which I needed to patch into solid bodies before combining them all together. This was also the first model I really played around with in the Fusion 360 patch workspace, so it took me a long time to learn and figure everything out. I made the arms as separate bodies so I could arbitrarily move them around as needed to touch the wheel.
My laughable first attempt at combining the models. The I'd say the model scales were just a wee bit off.
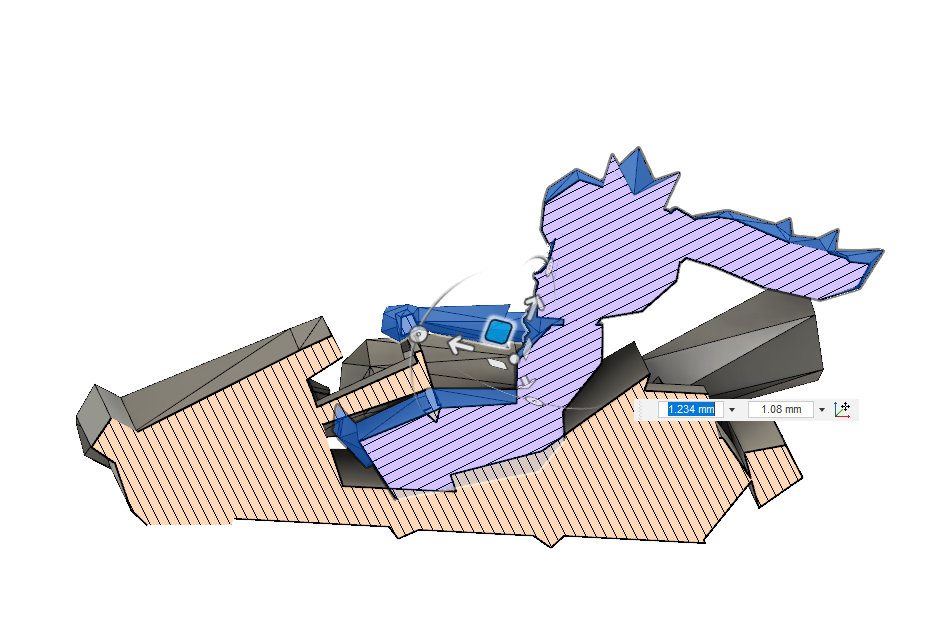
I scaled Peach up and the Kart down to meet somewhere in the middle. I also translated and rotated Peach around to make sure she sat down into the Kart nicely. I considered intersections between the models as a really good thing, especially around the thin steering column.
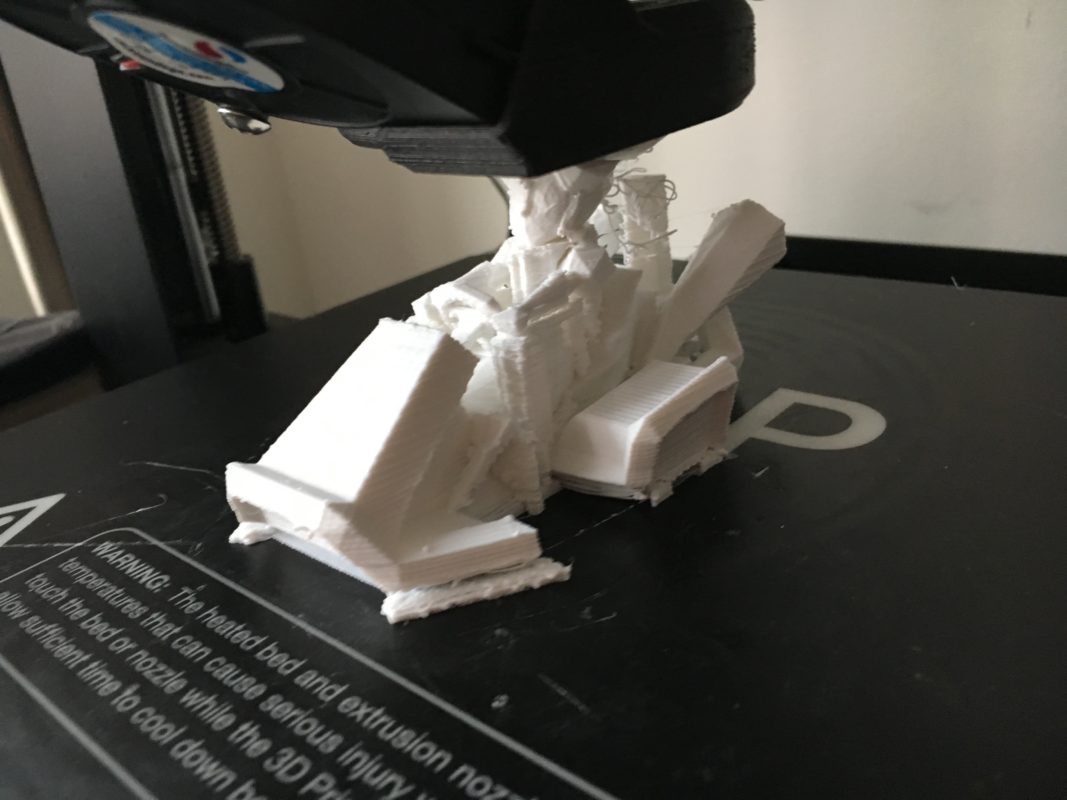
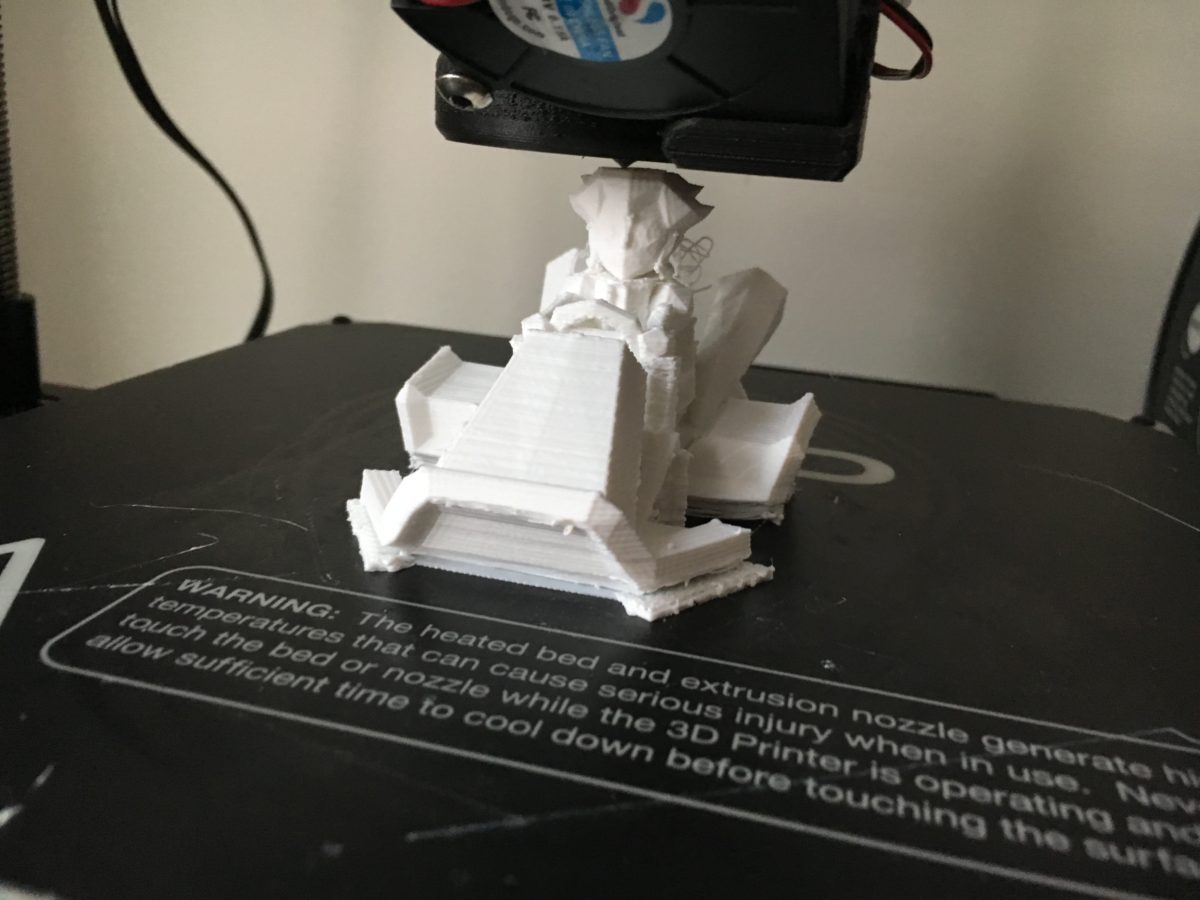
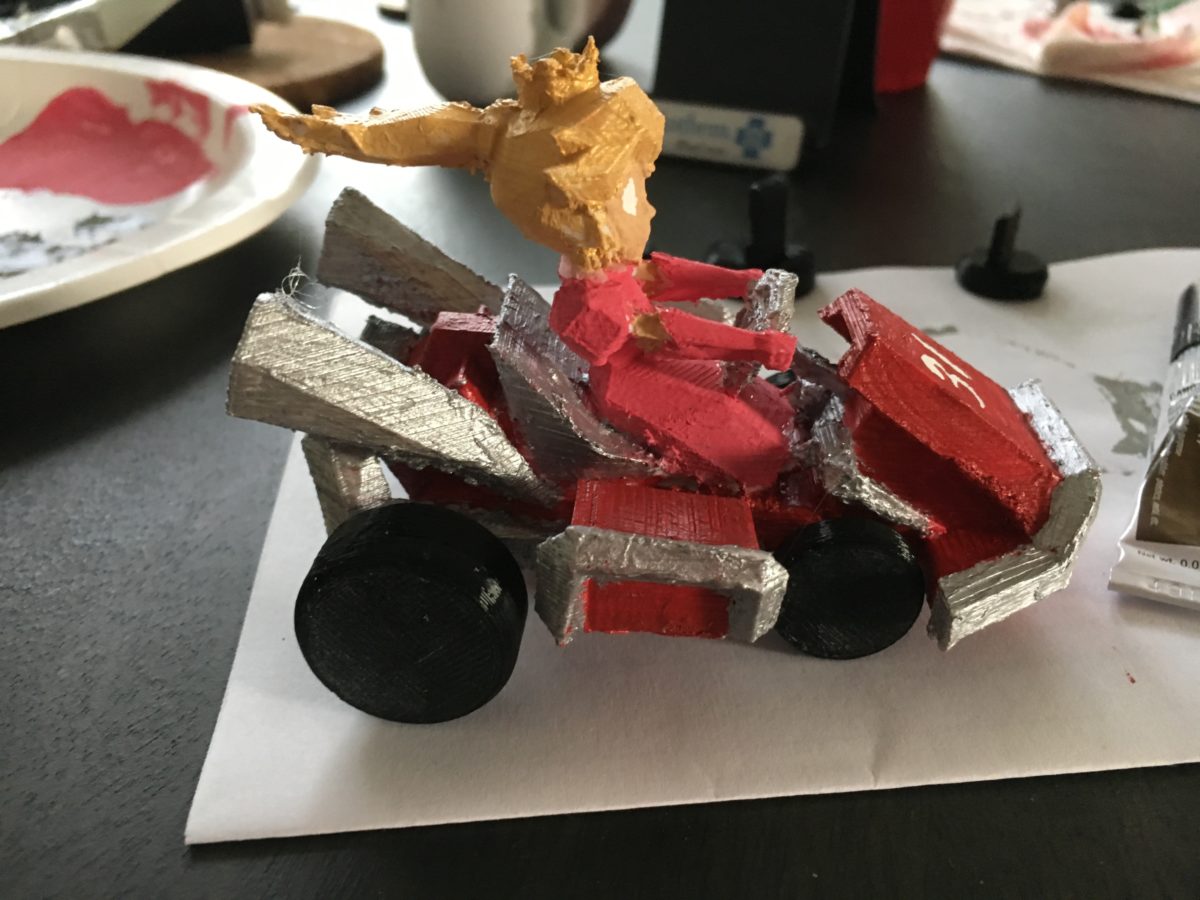
Here's the print in progress--it looks like some of the hair had trouble printing despite the support column for it.
Another view of the model mid-print.
Top view of the completed print still on the bed. The hair didn't turn out perfectly, and I probably had a lot of excessive supports in the main Kart area, but I was pretty happy with the results.
Oops. Accidentally went off with her head during the support removal process. Having it off made it easier to access more of the print though.
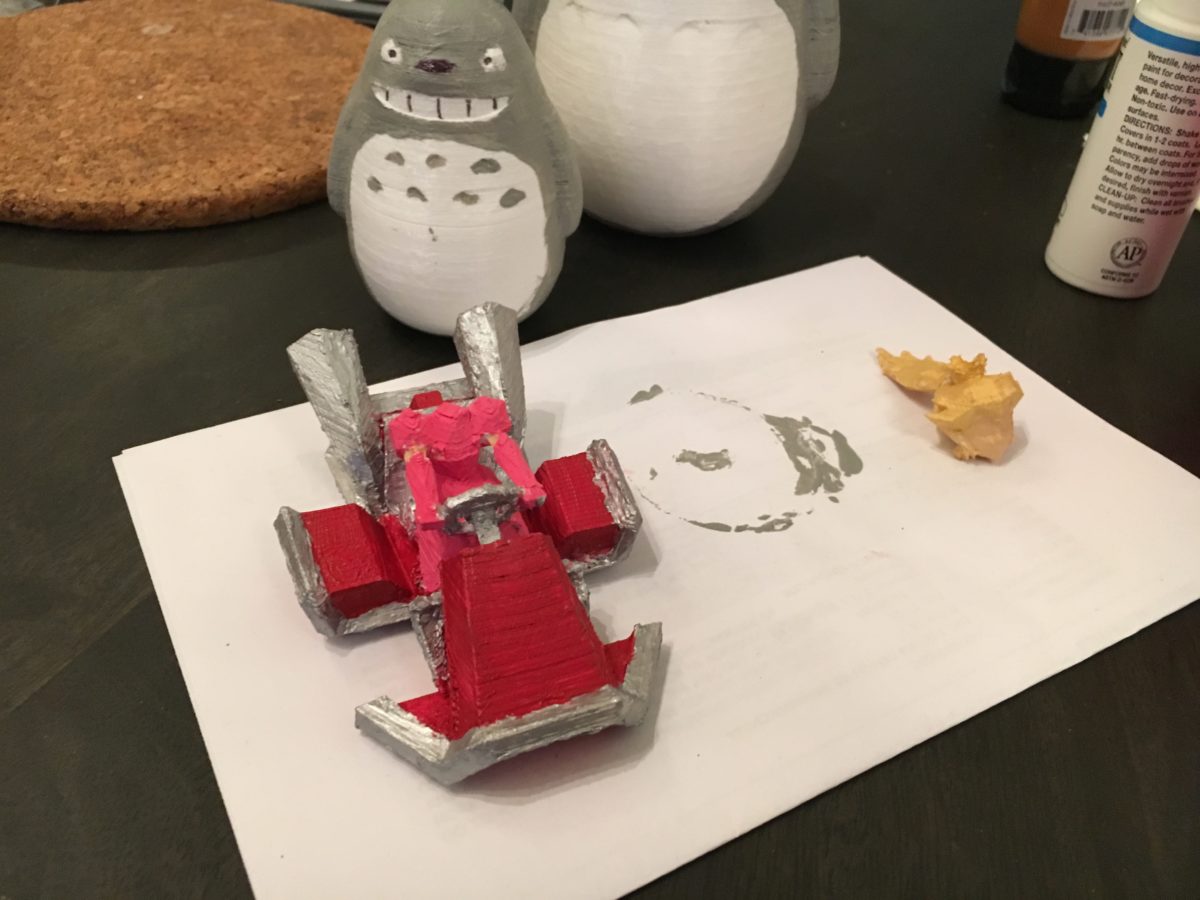
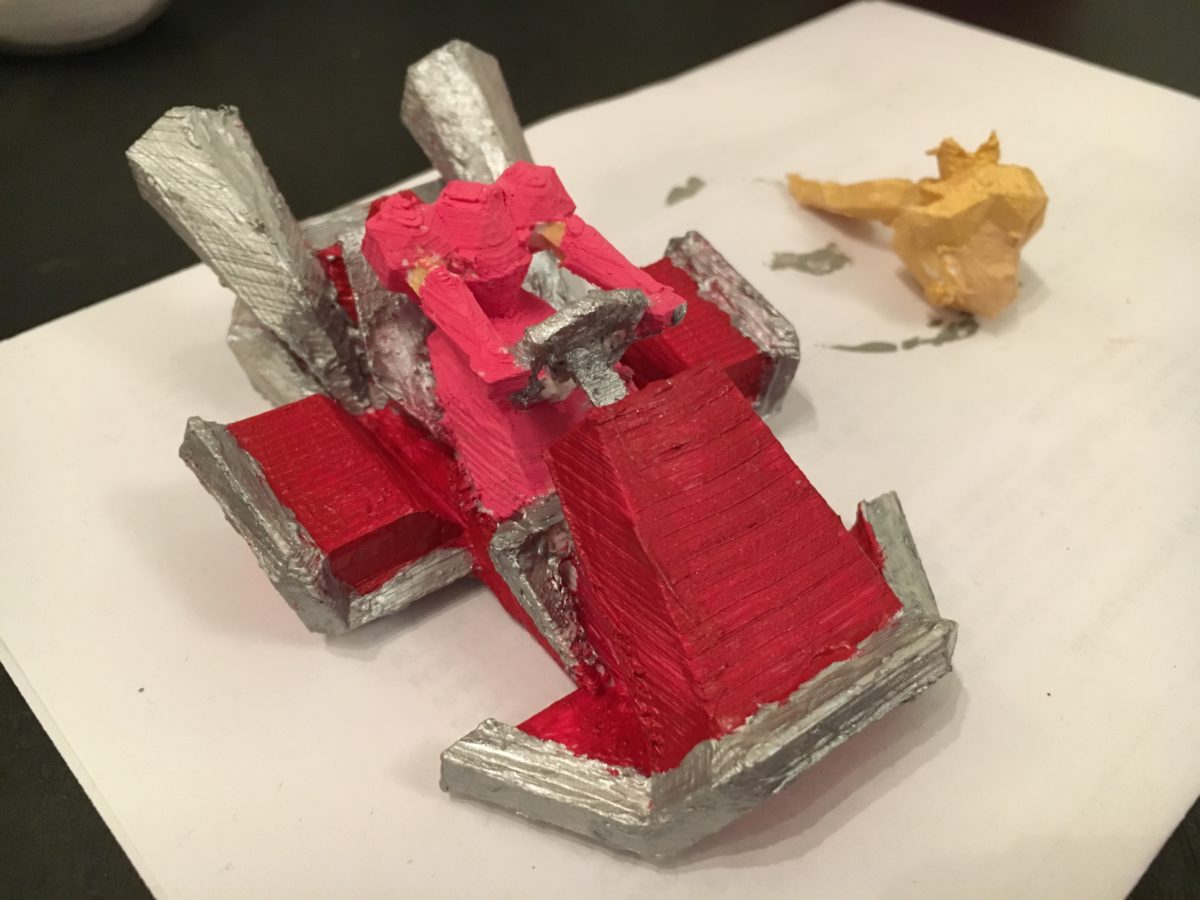
Closer view of painting... I used thick acrylic stuff I had left over from other prints... I'm actually starting to build up a decent inventory of paint.
Her head was reattached using a combination of super glue and hot glue. I used both earrings and her neck as connection points.
The wheels were the only parts of this project I needed to design from scratch. They were printed out of black ABS so I could avoid painting, and they were attached via hot glue. I also added eyes (the irises were added after this was taken) and a Kart number.
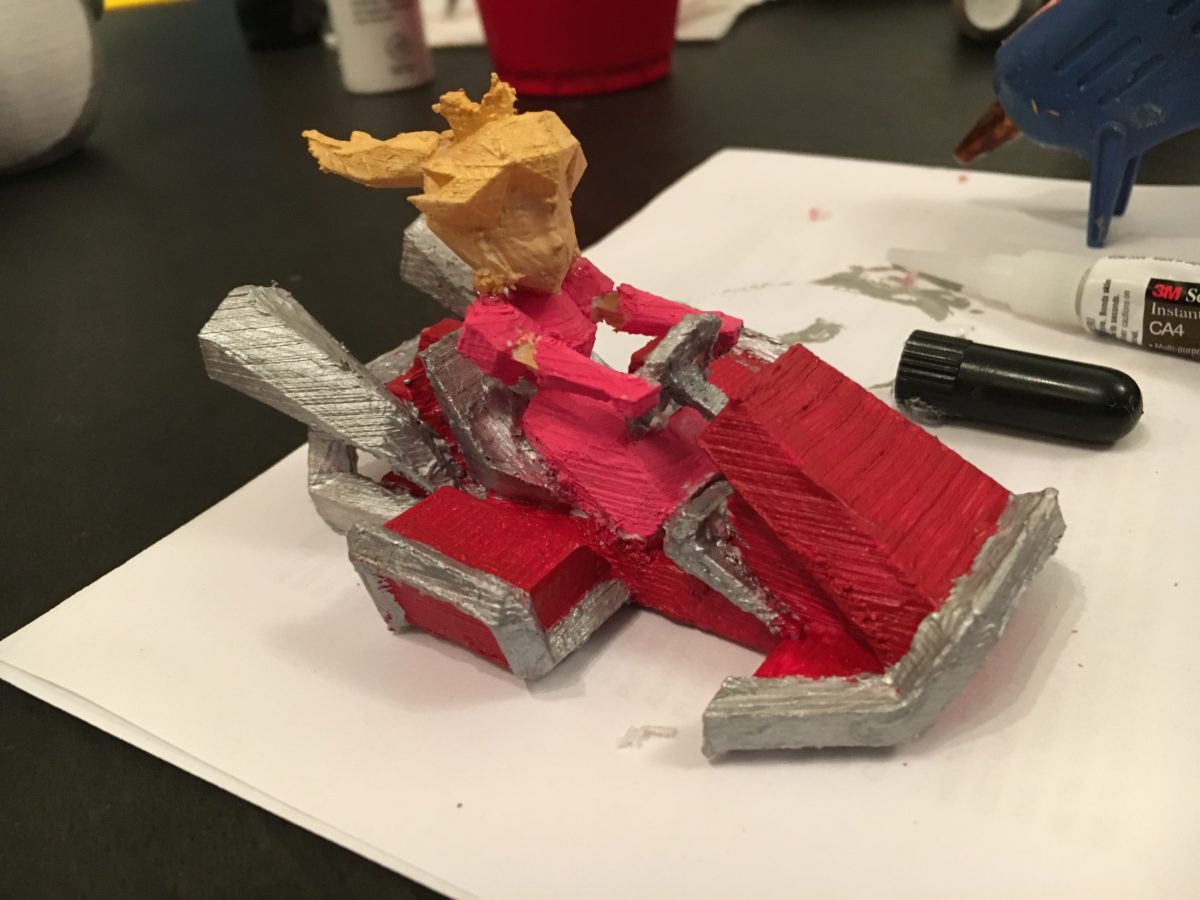
Side view of the painted figure
Prev
Next
During support clean-up, I had an unfortunate accident with our dear
Princess, and she pulled a Marie Antoinette on us. This actually turned out to
be advantageous since I’m not sure how I would have accessed a lot of the body
for painting without the decapitation. The only truly custom parts I made for this
project were the wheels, which were printed in black and simply hot-glued on.
I already missed the birthday of the other drawmates, and I feel bad… but I
have prepared the racer models for both him and the last of the drawmates… We’ll
all be getting together in June 😀